Videografía Inmobiliaria: Guía Esencial
Aprende videografía inmobiliaria con nuestra guía experta. Descubre técnicas profesionales para grabar videos que ayudan a vender propiedades más rápido.
En el sector inmobiliario, una gran fotografía es el precio de entrada. Pero, ¿video profesional? Así es como ganas el juego. Ya no es solo un complemento elegante para listados de lujo; es una herramienta poderosa que te ayuda a conectar con compradores serios y vender propiedades más rápido.
Un gran video hace algo que las fotos simplemente no pueden: crea una conexión emocional. Permite a un comprador potencial recorrer una casa, tener una idea del diseño y experimentar su carácter único antes de siquiera programar una visita.
Por qué el Video Profesional es un Cambio de Juego
Seamos realistas. Un recorrido tembloroso con un smartphone o una presentación de fotos glorificada ya no es suficiente. Los compradores de hoy están acostumbrados a contenido de alta calidad en todos los aspectos de sus vidas, y no esperan menos cuando están buscando una casa. La videografía profesional para bienes raíces se trata de cumplir—y superar—esa expectativa.
El video cierra la brecha entre un plano de planta plano y bidimensional y la experiencia real de estar en un espacio. Un video bien producido lleva al espectador en un viaje. Muestra cómo el vestíbulo fluye hacia la sala de estar, cómo el sol de la mañana inunda la cocina y qué se siente al estar en el patio trasero. No solo estás enumerando características; estás vendiendo un estilo de vida.
De Imágenes Estáticas a Deseo Genuino
Las fotos de alta calidad son imprescindibles, pero solo te ofrecen momentos aislados en el tiempo. El video, por otro lado, cuenta una historia completa.
Construye un sentido de descubrimiento a medida que la cámara se desliza desde la puerta principal, a través del corazón del hogar, y hacia el oasis del patio trasero. Esta narrativa cuidadosamente elaborada es lo que provoca una respuesta emocional genuina.
El verdadero trabajo de un video inmobiliario no es solo presumir una propiedad. Es hacer que un comprador sienta que ya ha encontrado su hogar. Convierte un simple anuncio en un lugar donde pueden comenzar a imaginar su futuro.
Esto no es solo una corazonada; los números lo respaldan. Los anuncios que incluyen video pueden atraer hasta un 157% más de tráfico orgánico de los motores de búsqueda. Además, un asombroso 73% de los propietarios dicen que preferirían listar con un agente que use video. ¿La parte sorprendente? Solo alrededor del 10% de los agentes realmente lo están haciendo, lo que deja una gran oportunidad para que te destaques. Puedes profundizar en estos conocimientos sobre videos inmobiliarios para ver el impacto completo.
Antes de continuar, resumamos las ventajas clave. Esta tabla desglosa exactamente cómo el video puede elevar tu negocio.
Beneficios Principales de la Videografía Inmobiliaria
| Área de Beneficio | Impacto Específico | Estadística de Apoyo |
|---|---|---|
| Mayor Compromiso | Los videos capturan la atención y mantienen a los compradores potenciales más tiempo en tu anuncio. | Los anuncios con video pueden obtener hasta un 157% más de tráfico de búsqueda. |
| Adquisición de Clientes | Demuestra un compromiso con el marketing moderno, atrayendo a más vendedores. | El 73% de los propietarios prefieren listar con agentes que usan video. |
| Calidad de los Leads | Los espectadores obtienen una verdadera sensación del hogar, lo que lleva a consultas más calificadas. | El video pre-califica a los compradores, reduciendo el tiempo perdido en navegadores casuales. |
| Percepción de Marca | Te posiciona como un agente premium y experto en tecnología en un mercado saturado. | Solo ~10% de los agentes están usando video, creando una clara oportunidad. |
En última instancia, invertir en video no se trata solo de un anuncio; se trata de construir una marca más fuerte y un negocio más eficiente.
El Caso de Negocio Claro para el Video
Incorporar videos profesionales en tu mezcla de marketing no es un gasto, es una inversión estratégica que se traduce en beneficios reales y medibles.
Piénsalo:
- Atraerás más vendedores. Los propietarios quieren saber que estás utilizando las mejores herramientas disponibles para comercializar su activo más valioso. Un portafolio de videos pulido dice mucho.
- Obtendrás mejores clientes potenciales. Un recorrido en video inmersivo ayuda a filtrar a los curiosos. Las personas que te llaman después de ver el video ya están interesadas y son serias.
- Dominarás en línea. A los motores de búsqueda y plataformas de redes sociales les encanta el video. Sus algoritmos impulsarán tus anuncios frente a muchas más personas.
Al final del día, la videografía profesional envía una señal clara de que operas a un nivel superior. Construye confianza instantánea tanto con compradores como con vendedores, y esa confianza es lo que cierra los tratos.
Construyendo tu Kit de Videografía Inmobiliaria
Iniciar en la videografía para bienes raíces puede parecer abrumador. Ves todo este equipo caro y escuchas un montón de jerga técnica, y es fácil pensar que necesitas un presupuesto de Hollywood para comenzar. Pero estoy aquí para decirte que ese no es el caso. El verdadero secreto es invertir inteligentemente en las herramientas adecuadas que te den el mayor rendimiento por tu dinero.
Piensa en tu equipo como la base. Tu habilidad y ojo son lo que realmente importa, pero el equipo adecuado hace que obtener ese aspecto pulido y profesional sea mucho más fácil. Vamos a recorrer lo que realmente necesitas para construir un sólido kit de videografía inmobiliaria, desde comenzar con un presupuesto ajustado hasta mejorar tu nivel.
Eligiendo Tu Cámara
La cámara es el corazón de tu configuración, pero "la mejor" es simplemente la que se ajusta a tus necesidades y a tu presupuesto. Tienes excelentes opciones en cada rango de precios.
- Teléfonos inteligentes: En serio, no subestimes el teléfono en tu bolsillo. Los últimos iPhones o Google Pixels graban videos increíbles en 4K. Con algunos accesorios clave, un teléfono inteligente es más que capaz de producir hermosos videos de listados, especialmente si solo estás comenzando a explorar este campo.
- Cámaras sin espejo: Cuando estés listo para dar un salto en calidad, una cámara sin espejo es el siguiente paso lógico. Obtendrás un gran impulso en control creativo y calidad de imagen. He visto trabajos fantásticos de modelos populares como la serie Sony A7, la línea EOS R de Canon, o incluso las cámaras Fuji. Su capacidad para rendir en condiciones de poca luz y usar diferentes lentes te da ese aspecto cinematográfico.
El objetivo siempre es lucir profesional. La autenticidad es genial, pero cuando estás comercializando una propiedad, la calidad de producción es un reflejo directo de tu marca. Un video tembloroso y mal iluminado puede, honestamente, hacer más daño que bien.
Mientras desarrollas tus habilidades de video, no dejes que tu fotografía se oxide. Para profundizar en ese aspecto, consulta nuestra guía completa sobre fotografía inmobiliaria.
Lentes Esenciales para Bienes Raíces
Si optas por la ruta sin espejo, la elección de tu lente podría ser incluso más importante que el propio cuerpo de la cámara. El lente es lo que da forma a la perspectiva y sensación de cada toma.
Un lente gran angular, típicamente en el rango de 16-35mm, es absolutamente imprescindible para interiores. Es lo que te permite capturar una habitación entera sin que se sienta distorsionada o apretada. Esta es la varita mágica para hacer que dormitorios o baños pequeños se sientan espaciosos y acogedores.
También recomiendo añadir un "nifty fifty" estándar ( 50mm) a tu bolsa para tomas de detalle. Es perfecto para enfocarse en esos acabados de alta gama, detalles arquitectónicos únicos, o pequeños toques de estilo de vida que ayudan a contar la historia del hogar.
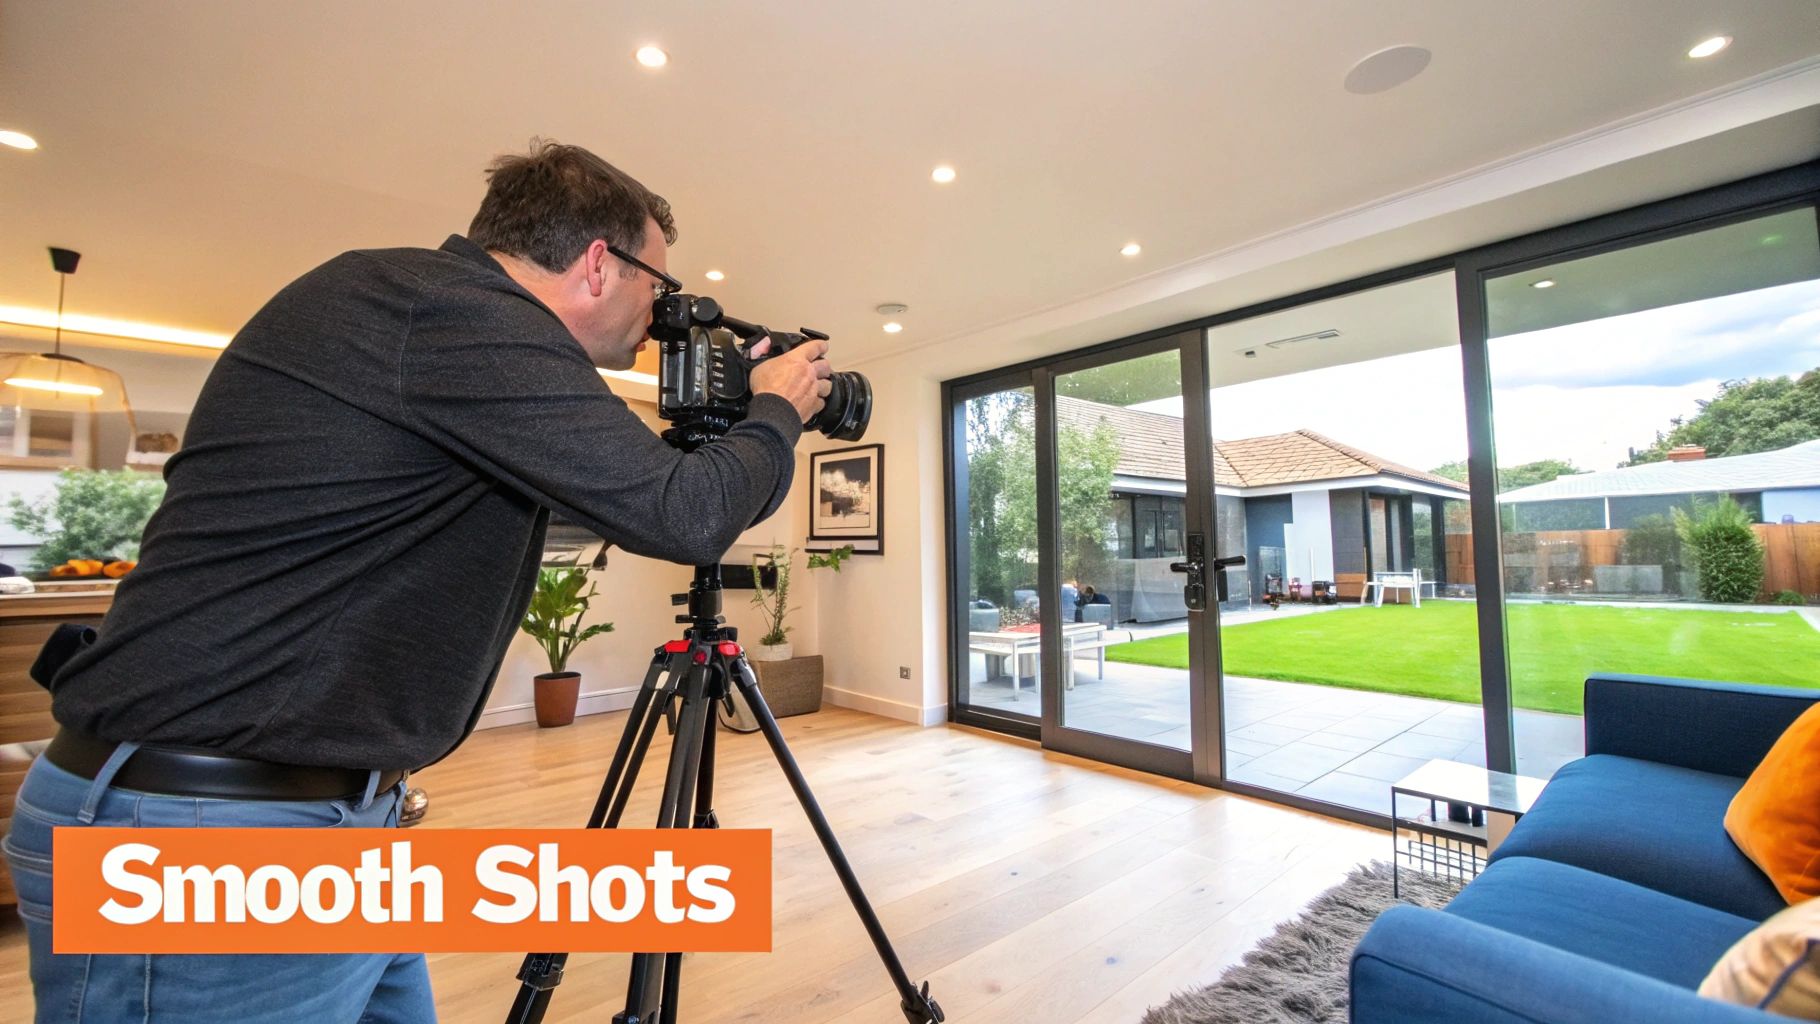
Lograr Tomas Suaves y Estables
Nada grita "aficionado" más fuerte que un metraje tembloroso. Los movimientos de cámara suaves y deliberados son los que crean esa experiencia cinematográfica de alta calidad que los compradores adoran.
Así es como logras ese aspecto suave como la seda:
- Gimbal: Este es el accesorio más importante que puedes comprar para video. Un gimbal es un estabilizador de mano que utiliza motores para suavizar tus movimientos mientras caminas. Ya sea en un smartphone o en una cámara más grande, un gimbal de una empresa como DJI o Zhiyun hará que tu metraje se vea instantáneamente diez veces más profesional.
- Trípode: Mientras que un gimbal es para tus tomas en movimiento, un buen trípode a la antigua es esencial para las tomas estáticas. Úsalo para fijar una toma de una habitación, obtener un paneo lento y perfectamente controlado, o filmarte a ti mismo haciendo una introducción.
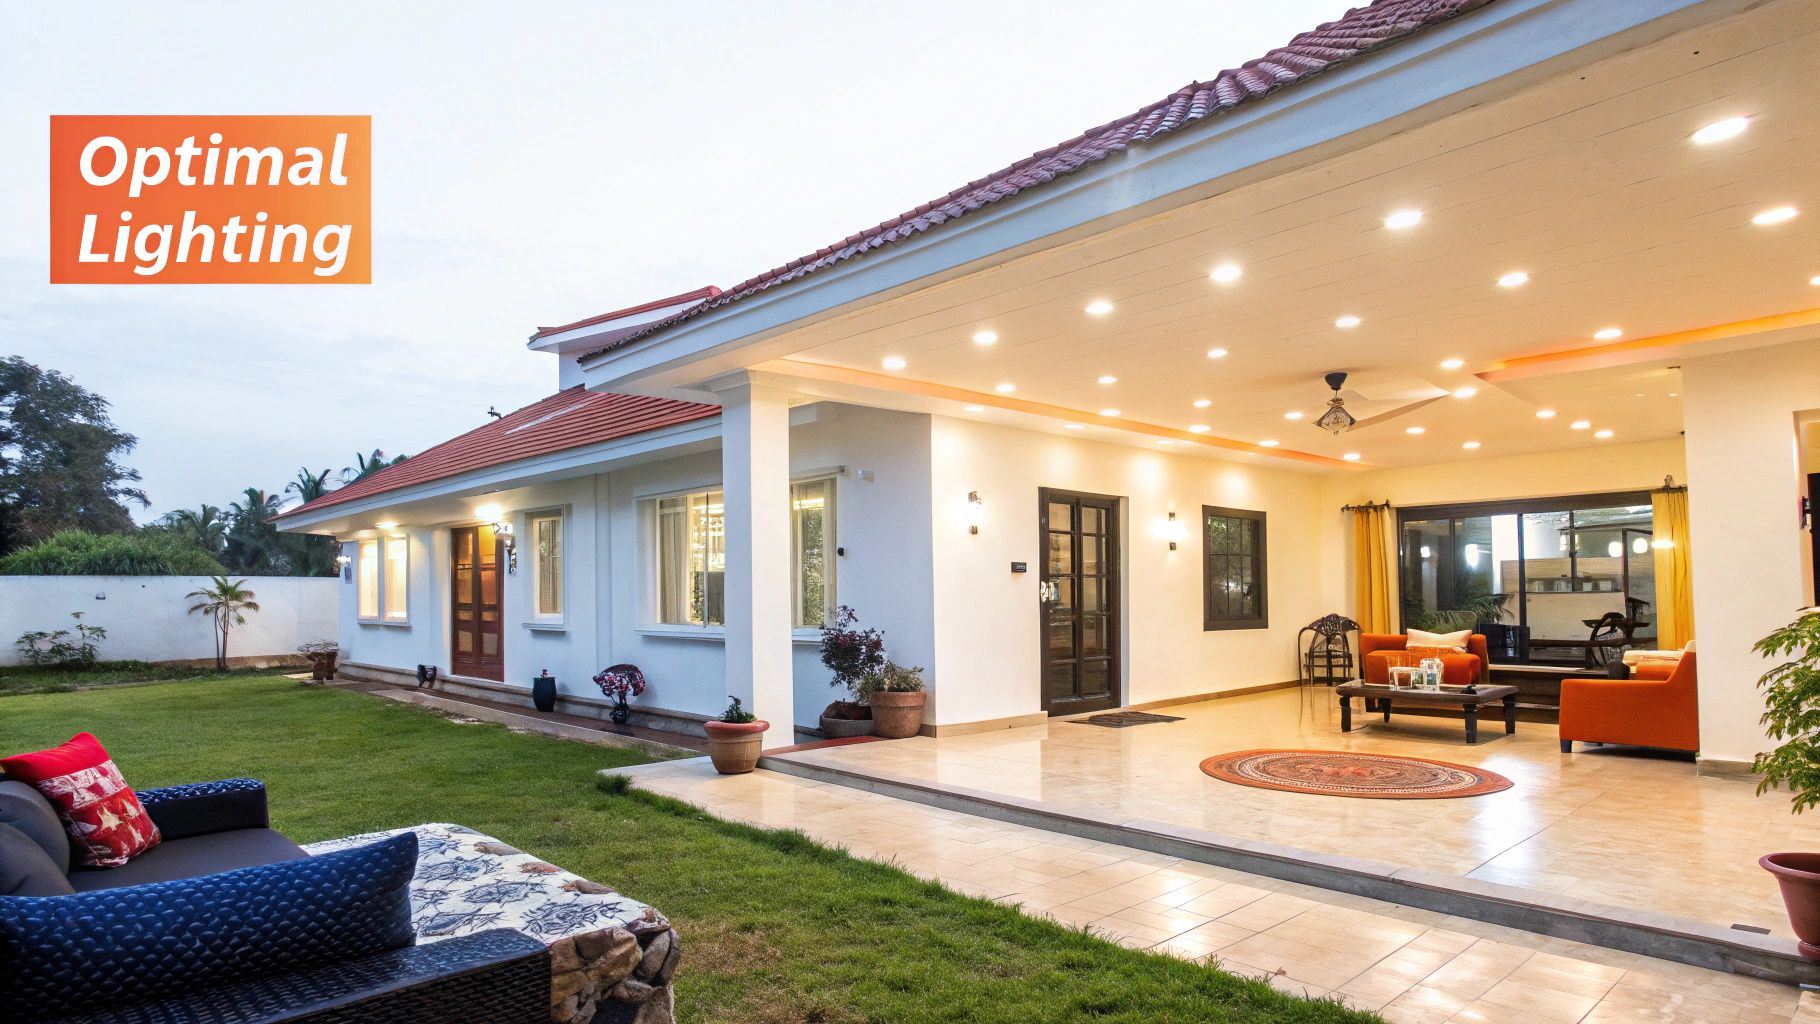
Equipos de Iluminación y Audio
Una buena iluminación hace que una propiedad se sienta luminosa, aireada y limpia. Siempre debes intentar usar luz natural, pero seamos realistas: te vas a encontrar con rincones oscuros y habitaciones sombrías. Un par de pequeños paneles de luz LED portátiles pueden ser un salvavidas para rellenar sombras y asegurarte de que cada espacio se muestre en su mejor luz.
Y por favor, ¡no te olvides del audio! Si vas a tener un agente en cámara o grabar una locución, un sonido limpio es innegociable. Un simple micrófono de escopeta en cámara o un micrófono de solapa inalámbrico capturará un audio nítido y claro, haciendo que tu mensaje sea profesional y fácil de entender.
Cómo Planificar y Grabar un Video Impresionante de Propiedad
Un gran video de propiedad se realiza mucho antes de que presiones el botón de grabar. Aunque el equipo es importante, tu éxito en el sitio realmente se reduce a una planificación cuidadosa y tener una visión clara de la historia que deseas contar. Así es como pasas de simplemente documentar habitaciones a crear una experiencia que ayuda al comprador a sentir una conexión inmediata.
La videografía verdaderamente exitosa para bienes raíces no se trata solo de aparecer y apuntar con una cámara. Estás tratando de crear una narrativa que guíe al espectador a través de las mejores características del hogar y, lo que es más importante, resalte el estilo de vida que ofrece. Eso requiere un plan de ataque sólido, y todo comienza con la propiedad en sí.
Preparando la Casa para su Primer Plano
Antes de que cualquier equipo de cámara salga de la bolsa, la casa necesita ser preparada como un set de película, porque por el día, eso es exactamente lo que es. Tu objetivo principal aquí es crear un lienzo limpio, brillante y acogedor que permita que los mejores atributos de la propiedad brillen.
Primero lo primero, querrás trabajar con los propietarios para despersonalizar estratégicamente cada habitación. Esto no significa hacer que el espacio sea estéril. Significa guardar fotos personales, imanes de refrigerador y cualquier exceso de muebles que haga que una habitación se sienta más pequeña y distraiga al espectador. Quieres que los posibles compradores imaginen sus vidas allí, no las del propietario actual.
Lo siguiente es la iluminación. Abre todas las persianas y corre todas las cortinas para inundar el espacio con luz natural. Luego, enciende todas las luces de la casa, sí, incluso las lámparas y la iluminación bajo los gabinetes. Un espacio iluminado siempre se ve más grande y atractivo en cámara.
Un error común que veo es pasar por alto los pequeños detalles. Una cama perfectamente hecha, un cuenco de fruta fresca en la encimera de la cocina, o toallas dobladas ordenadamente en el baño pueden añadir un toque sutil de pulido que eleva todo el video.
Para un análisis más profundo de cómo estos elementos contribuyen a un producto final pulido, explorar la estrategia más amplia detrás del video para bienes raíces puede proporcionar un contexto valioso.
Elaboración de una Lista de Toma Atractiva
Simplemente caminar por una propiedad y filmar a medida que avanzas es una receta para obtener imágenes desarticuladas y confusas. Lo que necesitas es una lista de tomas que trace el flujo del video de principio a fin. Piénsalo como tu plano para una filmación exitosa.
Tu lista de tomas debe ser mucho más que simplemente "filmar la sala de estar". Piensa en la historia. Siempre me gusta comenzar con una toma de establecimiento fuerte del exterior, luego moverme lógicamente a través de la casa de una manera que refleje cómo una persona la exploraría naturalmente.
- Exterior: Debes capturar el atractivo exterior. Obtén la puerta principal y cualquier detalle arquitectónico único.
- Entrada: Filma una entrada suave que se sienta como si estuviera dando la bienvenida al espectador.
- Áreas Principales de Estar: Enfócate realmente en el flujo entre la sala de estar, el comedor y la cocina.
- Características Clave: Obtén tomas dedicadas de los elementos destacados, como una acogedora chimenea, una isla de cocina bellamente renovada o una vista impresionante.
- Dormitorios y Baños: Enfatiza la sensación de espacio y luz en estas habitaciones cruciales.
- Vida al Aire Libre: ¡No olvides el jardín, el patio o el balcón! Aquí es donde vendes el estilo de vida.
Además, planifica tus transiciones. ¿Cómo te moverás de la cocina al patio trasero? Una toma continua y suave que siga ese camino es mucho más poderosa que un corte abrupto.
Dominando los Movimientos Cinematográficos de Cámara
La forma en que mueves la cámara es lo que separa un video profesional de una grabación amateur. Tus movimientos siempre deben sentirse lentos, suaves y deliberados. Un estabilizador es tu mejor amigo para esto, pero incluso con el mejor equipo, tu técnica es lo que realmente importa.
Sea lo que sea que hagas, evita movimientos bruscos o paneos rápidos que puedan desorientar al espectador. En su lugar, intenta dominar estos movimientos clave:
- El Acercamiento: Mueve la cámara lenta y suavemente hacia adelante, ya sea hacia un espacio o hacia una característica específica. Esta es una forma clásica de captar la atención del espectador y crear una sensación de inmersión.
- El Alejamiento: Comienza enfocado en un detalle, como un grifo de alta gama, y lentamente aleja la cámara para revelar toda la habitación. Este movimiento es fantástico para establecer el contexto.
- El Paneo Suave: Gira lentamente la cámara de izquierda a derecha (o viceversa) para mostrar la amplitud de un espacio. La palabra clave aquí es lento. Mantenlo estable para evitar ese aspecto nauseabundo de video casero.
- La Revelación: Me encanta este. Usa una pared o una puerta para ocultar lo que viene a continuación, luego mueve la cámara de lado para revelar la nueva habitación. Agrega un pequeño elemento de descubrimiento y hace que el recorrido se sienta más dinámico.
Para obtener algo de inspiración práctica, echa un vistazo a este ejemplo de recorrido en video interactivo de un espacio de coworking. Aunque es un espacio comercial, los principios de movimiento y revelación de características son directamente aplicables al sector inmobiliario residencial. Recuerda, el objetivo es hacer que el espectador sienta que está deslizándose con gracia a través de su futuro hogar.
Convertir Metraje en Bruto en un Video Pulido
Obtener ese metraje hermoso y fluido en el sitio es una gran sensación, pero el trabajo solo está a medio hacer. La verdadera magia en la videografía para bienes raíces ocurre en la línea de tiempo de edición. Aquí es donde tu colección de clips en bruto se transforma en una historia convincente que realmente vende la propiedad.
Piensa en el proceso de edición como la puesta en escena final de una casa. Ya has hecho el arduo trabajo de capturar el espacio; ahora es el momento de desordenar tu metraje, organizar las mejores tomas y guiar la mirada del espectador hacia lo que realmente importa. Una edición cuidadosa es lo que hace que un video se sienta profesional y persuasivo.
El Flujo de Trabajo de Postproducción
Salir de una grabación con una tarjeta de memoria llena puede sentirse abrumador. La mejor manera de abordarlo es con un flujo de trabajo sólido y repetible, y todo comienza con la organización. Antes de siquiera abrir tu software de edición, crea un sistema de carpetas simple para tu proyecto: una para video en bruto, otra para audio, otra para gráficos y una final para tus exportaciones terminadas. Este pequeño trabajo de preparación te ahorrará grandes dolores de cabeza más adelante.
Con tus archivos ordenados, es hora de revisar todo lo que grabaste. Míralo todo y comienza a seleccionar tu "A-roll": las tomas absolutamente mejores, más suaves y perfectamente iluminadas. Estos son los clips que formarán la base de tu video. Coloca estas tomas principales en tu línea de tiempo primero.
Los mejores videos inmobiliarios parecen sin esfuerzo, pero nacen de una curaduría implacable. Tu trabajo como editor es cortar todo lo que no sirva a la historia. Si una toma no está destacando activamente un punto de venta clave o avanzando la narrativa, tiene que irse.
Este enfoque disciplinado es más importante que nunca. El mercado está impulsado visualmente, y el video profesional ya no es un lujo, es una expectativa. De hecho, el 22% de los listados ahora incluyen recorridos virtuales para destacar, y por una buena razón: el 92% de los compradores en EE.UU. utilizan video en su búsqueda de hogar. Puedes profundizar en estas estadísticas de fotografía inmobiliaria para ver cuánto mueve la aguja el contenido visual.
Corrección y Gradación de Color
El color dicta el estado de ánimo completo de un video. Directamente desde la cámara, tu metraje probablemente se vea un poco plano o deslavado. El primer paso es la corrección de color, que es puramente técnica. Solo estás tratando de hacer que el video se vea fiel a la realidad ajustando cosas como la exposición, el balance de blancos y el contraste. El objetivo es lograr que tus blancos se vean blancos puros y tus colores se vean precisos.
Una vez que el metraje está corregido, puedes pasar a la parte más artística: la gradación de color. Aquí es donde creas una sensación específica. Para la mayoría de las casas, querrás un aspecto brillante, aireado y acogedor.
- Aumenta ligeramente las sombras para que los espectadores puedan ver detalles en rincones más oscuros, pero mantén un aspecto natural.
- Incrementa la saturación solo un poco para que el verde del césped y el azul del cielo resalten.
- Añade un toque de calidez a las tomas interiores para dar a la casa una sensación acogedora y bienvenida.
La clave aquí es la sutileza. Quieres que la propiedad se vea como su mejor versión en un día perfecto, no como algo sacado de una publicación de Instagram con filtros excesivos.
Encontrando la Banda Sonora Adecuada
La música es el latido emocional de tu video. La pista correcta puede hacer que una casa se sienta grandiosa y lujosa, tranquila y serena, o divertida y moderna. La incorrecta, por otro lado, puede ser una gran distracción.
Al elegir tu música, piensa en la personalidad de la casa y en el comprador probable. Un loft elegante en el centro necesita una banda sonora completamente diferente a la de una extensa casa familiar suburbana. Siempre recurro a sitios de música libre de regalías como Epidemic Sound o Artlist para encontrar pistas de alta calidad y con licencia. Quédate con música instrumental—no quieres letras compitiendo con una locución o distrayendo al espectador.
Deja que el ritmo de la música guíe tus ediciones. Cortar tus tomas al compás de la canción es un truco simple que instantáneamente hace que el video final se sienta más pulido y profesional. Un cambio en la música también puede ser una manera perfecta de hacer la transición entre diferentes partes de la propiedad, como pasar del interior al patio trasero.
Añadiendo Texto Simple y un Llamado a la Acción
Finalmente, utiliza superposiciones de texto limpias y simples para compartir detalles clave que las imágenes no pueden mostrar. Esta es tu oportunidad de resaltar características importantes sin interferir con el recorrido.
Qué Incluir en tus Superposiciones de Texto:
-
La dirección: Muéstrala claramente al principio o al final.
-
Características clave: Piensa en los metros cuadrados, el número de habitaciones/baños, o algo destacado como "Cocina Recién Renovada."
-
Tu información de contacto: Siempre termina el video con tu nombre, agencia inmobiliaria y sitio web.
Sobre todo, tu video necesita un claro llamado a la acción (CTA). No dejes a la gente en el aire. Un simple gráfico de cierre que diga "Programa Tu Tour Privado Hoy" junto con tu información de contacto es todo lo que necesitas para convertir a un espectador interesado en un cliente potencial genuino.
Técnicas Que Hacen Que Tus Videos Sean Inolvidables
Una vez que hayas dominado el recorrido fluido y bien iluminado, estás listo para agregar las capas que realmente hacen que una propiedad destaque. Aquí es donde pasas de crear un simple recorrido a diseñar una experiencia.
Estas son las técnicas que separan los listados estándar de los premium que demandan precios más altos. Es así como justificas un presupuesto de marketing más grande y demuestras a los clientes de alto nivel que ofreces resultados excepcionales. Estamos yendo más allá de simplemente mostrar un espacio; estamos construyendo una historia visual persuasiva.
Vuela Alto con la Videografía de Drones
Nada cuenta la historia completa de una propiedad como un dron. Un recorrido a nivel del suelo muestra las habitaciones, pero una vista aérea muestra la vida. Revela el tamaño del jardín, las vistas impresionantes, el camino al parque y la sensación del vecindario. Para cualquier propiedad donde el terreno sea un punto de venta importante, esta perspectiva es innegociable.
Pero un gran metraje de dron en tu videografía para bienes raíces es más que solo volar alto y apuntar hacia abajo. Piensa de manera cinematográfica.
- La Revelación: Comienza bajo, tal vez detrás de una línea de árboles, y sube lentamente para revelar toda la casa. Es una apertura clásica y dramática que nunca deja de impresionar.
- La Órbita: Vuela en un círculo lento y constante alrededor de la propiedad. Esto muestra todos sus ángulos, el paisajismo y las mejores características arquitectónicas en una sola toma fluida.
- El Vuelo a Través: Para casas de lujo con entradas imponentes o terrazas abiertas, una toma cuidadosamente coreografiada de vuelo a través es absolutamente impresionante.
Un consejo: no lo exageres. Unos pocos clips aéreos perfectamente colocados al principio y al final de tu video son mucho más poderosos que un video hecho enteramente de tomas de dron.
Para Desarrolladores y Constructores
En el desarrollo inmobiliario, las representaciones conectan el plano con el banco. Los desarrolladores a menudo necesitan asegurar inversiones importantes o pre-vender unidades mucho antes de comenzar la construcción. Un conjunto convincente de representaciones exteriores e interiores de casas puede hacer que un proyecto parezca irresistible para los inversores y compradores tempranos. No solo muestran un edificio; venden el estilo de vida y la calidad del desarrollo terminado, forjando una conexión emocional que los planos por sí solos no pueden crear.
Esto es especialmente importante en el mercado actual. Como se señala en el informe global del mercado inmobiliario de jll.com, muchas regiones están experimentando escasez de oferta de viviendas. Con menos propiedades nuevas disponibles, los desarrolladores necesitan todas las ventajas para atraer compradores rápidamente. Imágenes impresionantes que comuniquen claramente el producto final son una herramienta poderosa para destacar.
Para Agentes Inmobiliarios y Contratistas
Los agentes inmobiliarios utilizan renderizados para comercializar propiedades que aún no están construidas o que están en medio de una renovación importante. Estos visuales les permiten listar y mostrar casas que no existen físicamente, lo que amplía su inventario y ayuda a cerrar ventas más rápidamente. Para los contratistas, los renderizados detallados son una herramienta clave de coordinación.
Cuando cada profesional—desde fontaneros y electricistas hasta pintores—puede ver una imagen clara del objetivo final, hay menos margen para errores y malentendidos en el sitio de trabajo. Este entendimiento compartido ayuda a mantener proyectos complejos en el cronograma y dentro del presupuesto.
La tabla a continuación detalla cómo diferentes profesionales utilizan renderizados de casas para lograr sus objetivos específicos.
Aplicaciones de Renderizado de Casas por Industria
- Cómo diferentes industrias y profesionales utilizan los renderizados de casas, incluyendo casos de uso típicos y beneficios
| Industria | Uso Principal | Beneficios Clave | Inversión Típica | Indicadores de ROI |
|---|---|---|---|---|
| Bienes Raíces | Marketing y Pre-ventas | Vende propiedades más rápido, atrae más compradores, lista casas en plano. | Baja a Media | Tiempo de venta más rápido, precio de venta más alto, más clientes potenciales. |
| Desarrollo | Asegurar Financiamiento y Ventas | Visualiza el potencial del proyecto, atrae inversores, vende unidades anticipadamente. | Media a Alta | Rondas de financiamiento exitosas, altas tasas de preventa. |
| Arquitectura | Comunicación con Clientes | Aclara la intención del diseño, acelera aprobaciones, explora opciones. | Baja a Media | Menos revisiones, mayor satisfacción del cliente. |
| Construcción | Coordinación de Proyectos | Reduce errores en el sitio, alinea subcontratistas, aclara planes. | Baja | Menos órdenes de cambio, finalización del proyecto a tiempo. |
Como muestra la tabla, la inversión en renderizados es a menudo pequeña en comparación con los posibles retornos. Ventas más rápidas, financiamiento asegurado y menos errores de construcción se traducen en ganancias financieras significativas, demostrando que una buena imagen vale más que mil palabras—y a veces, mucho más.
Tu Primer Proyecto de Renderizado de Casas Paso a Paso
Comenzar tu primer proyecto para crear renderizados de casas puede sentirse como intentar resolver un rompecabezas sin la imagen en la caja. Pero con un plan claro, el proceso es mucho más sencillo de lo que parece. El truco es desglosarlo en pasos manejables, comenzando con la recopilación de tus documentos clave y aclarando tus objetivos.
Paso 1: Reúne Tus Documentos Fundamentales
Antes de que ocurra cualquier magia digital, necesitas los planos arquitectónicos que sirven como el ADN del proyecto. Piensa en esto como reunir tus ingredientes antes de comenzar a cocinar. El documento más importante es el plano o plano de planta, que proporciona las dimensiones esenciales, el diseño y la información estructural que se convertirá en el esqueleto digital de tu hogar.
Es una buena idea entender lo que estás viendo. Para aquellos nuevos en estos dibujos, tomarse un momento para aprender a leer planos puede ayudarte a comunicar tu visión de manera más efectiva.
Además de los planos, intenta recopilar estos elementos:
- Dibujos de Elevación: Estos muestran cómo se ve la casa desde cada lado, delineando la colocación de ventanas y diseños de techos.
- Horarios de Materiales y Acabados: Esta es una lista simple de los materiales que planeas usar, como revestimientos, techos, pisos y colores de pintura.
- Fotos de Inspiración: Reúne imágenes que muestren el estilo, ambiente e iluminación que deseas lograr.
Mantener todos estos materiales en un solo lugar crea un claro resumen del proyecto, ya sea que estés usando una herramienta de bricolaje o contratando a un profesional.
Paso 2: Definir el Alcance y las Vistas Clave
Con tus documentos organizados, es momento de decidir qué necesitas ver realmente. Este paso establece el alcance del proyecto, lo cual tiene un impacto directo en el costo y el cronograma. Probablemente no necesites renderizar cada rincón de la propiedad. En su lugar, enfócate en las vistas que son más importantes para tomar decisiones o para la comercialización de la casa.
Hazte estas preguntas:
- ¿Qué habitaciones son más importantes? La cocina, la sala principal y el dormitorio principal suelen ser las principales prioridades.
- ¿Cuál es el objetivo de la toma exterior? ¿Es para mostrar el atractivo exterior de la casa o para resaltar el patio trasero?
- ¿Cuánto detalle realmente necesito? Un renderizado simple para verificar un diseño necesita mucho menos detalle que una imagen fotorrealista para un folleto de ventas.
Un error común es pedir demasiadas vistas o un nivel extremo de detalle, lo que aumenta el costo sin aportar mucho valor. Un buen punto de partida es 2-3 vistas interiores esenciales y 1-2 ángulos exteriores clave.
Paso 3: El Proceso de Renderización y Revisión
Una vez que hayas compartido tu visión, comienza el trabajo de renderización. Un artista o una herramienta de IA empezará creando un "modelo gris" o "render de arcilla". Este es un modelo 3D básico y sin texturas de tu espacio. Su propósito es confirmar que los ángulos de cámara y la geometría general sean correctos. Este es el mejor momento para solicitar cambios importantes, como mover una pared o cambiar una pieza importante de mobiliario.
Después de que apruebes los ángulos, la siguiente etapa implica agregar materiales, iluminación y texturas. Recibirás un primer borrador para revisar. Revísalo cuidadosamente y proporciona tus comentarios en una lista única y organizada. En lugar de enviar varios correos electrónicos con pequeños ajustes, consolida tus notas. Por ejemplo: "Cambiar la encimera de la cocina de mármol a cuarzo," o "Hacer el color de la pared de la sala un tono más claro."
Este ciclo de retroalimentación organizado previene interminables idas y vueltas, ahorrándote tiempo y asegurando que los renders de casas coincidan con tu visión. El flujo de trabajo es muy similar a cómo los profesionales utilizan software para tareas como puesta en escena virtual de casas para amueblar digitalmente una habitación vacía.
Elegir tus Herramientas y Software para Renderizar Casas
Intentar elegir el software adecuado para crear renderizados de casas puede resultar abrumador. Es como entrar en una enorme ferretería con innumerables herramientas, cada una prometiendo los mejores resultados. El truco es ajustar la herramienta a tu trabajo, ya seas un arquitecto profesional o un propietario con una nueva idea. Tus opciones generalmente se dividen en dos categorías: software tradicional de alta gama y plataformas más nuevas y accesibles impulsadas por IA.
Motores de Renderizado de Calidad Profesional
Para arquitectos y profesionales del diseño que necesitan control total sobre cada píxel, el software de renderizado tradicional es la opción preferida. Estos son programas poderosos, a menudo utilizados en combinación, que producen imágenes increíblemente realistas.
- Software de Modelado (El Plano): Aquí es donde se construye el modelo 3D digital de la casa. Piensa en herramientas como SketchUp, Revit y 3ds Max como el sitio de trabajo digital donde enmarcas cada pared, colocas cada ventana y colocas cada ladrillo con absoluta precisión.
- Motores de Renderizado (El Fotógrafo): Una vez que el modelo está construido, plugins como V-Ray y Corona Renderer intervienen para "fotografiarlo". Añaden luz realista, sombras y materiales—como la veta de la madera o el reflejo en una ventana—para convertir un modelo 3D básico en una imagen impresionante y fotorrealista.
Este camino ofrece libertad creativa ilimitada, pero tiene sus exigencias. Requiere una curva de aprendizaje pronunciada, licencias de software costosas y una computadora potente para manejar la carga de trabajo. También es intensivo en tiempo, ya que un solo render de alta calidad puede tardar horas en configurarse y procesarse. Cuando estés listo para mostrar tu trabajo, piensa en cómo presentarlo; investigar sobre los mejores constructores de sitios web de portafolios puede ayudar a que tus proyectos brillen.
Alternativas Amigables y Potenciadas por IA
Para aquellos que necesitan resultados hermosos sin profundizar en lo técnico, una nueva ola de herramientas está marcando una gran diferencia. Estas plataformas están diseñadas para la rapidez y la simplicidad, poniendo renderizados de alta calidad de casas al alcance de todos.
- Opciones Gratuitas y de Código Abierto: Un programa como Blender es una excelente opción gratuita que combina un potente modelado 3D con un motor de renderizado capaz. Está respaldado por una enorme y activa comunidad y una gran cantidad de tutoriales en línea.
Esta captura de pantalla de la interfaz de Blender muestra sus amplias capacidades, pero también da una idea del tiempo necesario para aprenderlo bien.
- Plataformas Potenciadas por IA: Software como nuestro propio Pedra funciona de manera diferente. En lugar de construir un modelo 3D complejo desde cero, simplemente puedes subir un plano de planta en 2D o una foto de una habitación. La IA se encarga, generando automáticamente un renderizado completamente amueblado y fotorrealista en solo unos minutos. Esto es un cambio radical para agentes inmobiliarios, decoradores de interiores y remodeladores que necesitan mostrar el potencial de una propiedad de manera rápida y asequible. Además, dado que todo el trabajo pesado se realiza en la nube, no necesitas una computadora de alta gama.
La decisión se reduce a una simple compensación: control versus conveniencia. Las herramientas profesionales te dan el control artístico definitivo pero requieren una inversión significativa de tiempo, habilidad y dinero. Las plataformas de IA proporcionan una increíble rapidez y facilidad de uso, entregando el 90% de la calidad por el 1% del esfuerzo. Para la mayoría de las necesidades empresariales en bienes raíces y renovación, esto las convierte en una opción muy práctica y efectiva.
Obtener el Máximo Valor de tus Renderizados de Casa
Tus renderizados de casa son mucho más que solo las imágenes finales y pulidas; son activos versátiles que pueden aportar valor a lo largo de todo el ciclo de vida de tu proyecto. Para obtener el máximo de tu inversión, deberías considerarlos no como un artículo de un solo uso, sino como una herramienta multiuso. Un uso estratégico puede agilizar las decisiones, mejorar la comunicación e incluso impulsar tu marketing mucho después de que el diseño inicial sea aprobado. La clave es reutilizar y presentar estos visuales de maneras que hablen a diferentes audiencias en diferentes etapas.
Reutilización de Renderizados para Diferentes Audiencias
Un solo renderizado de alta definición contiene una gran cantidad de información visual que puede adaptarse a diversas necesidades. Piénsalo como un chef que utiliza un ingrediente principal para crear múltiples platos distintos. Un renderizado exterior fotorrealista creado para un folleto de ventas puede reutilizarse de manera efectiva.
- Para Contratistas: Recorta secciones específicas del renderizado para crear detalles destacados. Un primer plano del porche puede aclarar los diseños de las barandillas, mientras que una toma enfocada del marco de la ventana puede guiar a los pintores con precisión.
- Para Marketing: Convierte una imagen estática en contenido atractivo para redes sociales añadiendo animaciones sutiles, como luces parpadeantes en las ventanas o nubes deslizándose.
- Para Aprobaciones: Utiliza el renderizado en presentaciones para asociaciones de propietarios o entidades de permisos. Una visualización clara que muestre cómo el nuevo diseño se integra en el vecindario suele ser más persuasiva que los planos por sí solos.
Este enfoque asegura que extraigas el máximo provecho de la inversión inicial de tiempo y costo, haciendo que los renderizados de casas trabajen más para ti.
De Imágenes Estáticas a Experiencias Interactivas
La forma en que presentas tus renderizados es tan importante como la calidad de las imágenes en sí. En lugar de simplemente enviar un JPEG por correo electrónico, considera crear una presentación más inmersiva. Una sencilla presentación de diapositivas que guíe a un cliente a través de la casa—desde una vista exterior hasta la cocina y luego el dormitorio principal—cuenta una historia y les ayuda a formar una conexión emocional con el espacio.
Los profesionales en proyectos a gran escala utilizan esta estrategia con gran efectividad. Al presentar renderizados de casas en una secuencia lógica, guían a las partes interesadas a través del proyecto, facilitando la obtención de financiamiento de los bancos que pueden ver claramente el potencial del producto terminado. Esta claridad visual también ayuda a coordinar los oficios. Por ejemplo, un recorrido en tiempo real puede mostrar a un electricista y a un fontanero exactamente cómo su trabajo se intersectará en un espacio reducido, previniendo conflictos en el sitio antes de que ocurran.
La Próxima Frontera: Realidad Aumentada y Virtual
Las nuevas tecnologías están facilitando la tarea de sacar las representaciones de la pantalla y colocarlas en el mundo real. Con la Realidad Aumentada (AR), un cliente puede usar su teléfono inteligente para proyectar un modelo 3D de una renovación propuesta en su habitación existente, dándoles una verdadera sensación de escala y ajuste. Esta tecnología se está volviendo más accesible y es una herramienta poderosa para finalizar decisiones de diseño con confianza. Al adoptar estos usos visionarios, transformas una simple visualización en un activo poderoso que define el proyecto.
Agente en Cámara vs. Sensación Cinematográfica
Una de tus mayores decisiones estratégicas es quién—o qué—guía el recorrido. No hay una única respuesta correcta aquí; todo se reduce a la propiedad y tus objetivos de marketing.
Un recorrido guiado por un agente, donde estás en pantalla, es fantástico para construir una conexión personal. Te posiciona como un experto amigable y conocedor, y te permite señalar detalles específicos que de otro modo podrían pasarse por alto. Este enfoque genera confianza y añade un toque humano.
Por otro lado, un recorrido cinematográfico elimina la narración y deja que las impresionantes imágenes y la música hablen por sí solas. Este estilo crea una calidad más aspiracional, casi de ensueño. Permite a los compradores perderse en la fantasía de vivir allí, haciéndolo perfecto para listados de lujo de alta gama donde la propiedad es la estrella indiscutible.
Piénsalo de esta manera: un recorrido guiado por un agente es una conversación guiada, mientras que un recorrido cinematográfico es un cortometraje. Elige el que cuente la historia que tu comprador objetivo quiere ver.
Integración de Datos para Propiedades Comerciales
El video está evolucionando rápidamente, especialmente en el mundo de los bienes raíces comerciales. Los inversores y propietarios de negocios quieren más que solo imágenes bonitas. Esperan que los videos combinen visuales cinematográficos con datos concretos como conteos de tráfico, detalles de zonificación o inquilinos ancla cercanos. Esto les ayuda a tomar decisiones más rápidas y mejor informadas.
Para destacar realmente, necesitas dominar las técnicas de narración visual. Se trata de tejer una narrativa que conecte a nivel emocional, ya sea utilizando un toque personal para una casa familiar o datos poderosos para una inversión comercial.
Comparación de Características de Video Básicas y Avanzadas
Desglosamos cómo estos enfoques avanzados elevan el video estándar de propiedades. Vea cómo las técnicas de video estándar se comparan con enfoques avanzados que captan la atención y aseguran listados premium.
| Característica | Enfoque Básico (Bueno) | Enfoque Avanzado (Mejor) |
|---|---|---|
| Perspectiva | Un recorrido fluido a nivel del suelo por el interior. | Tomas aéreas integradas que muestran el contexto y la escala de la propiedad. |
| Narración | Música libre de derechos que establece el ambiente del tour. | Una elección estratégica entre un recorrido personal guiado por un agente o un estilo cinematográfico de alta gama. |
| Información | Superposiciones de texto simples para metraje cuadrado y dirección. | Gráficos ricos en datos para listados comerciales (por ejemplo, conteos de tráfico, demografía). |
| Narrativa | Un recorrido lógico que muestra la disposición de las habitaciones. | Una narrativa que destaca un estilo de vida específico o una oportunidad de inversión. |
Al aplicar estos métodos de manera reflexiva, no solo está creando un recorrido. Está produciendo un activo de marketing sofisticado que genera un compromiso serio y ofrece resultados reales para sus clientes.
Haciendo que tus Videos de Propiedades Sean Vistos por Compradores
Acabas de finalizar un hermoso recorrido en video de una impresionante propiedad. Las tomas son fluidas, la iluminación es perfecta y la edición es impecable. Pero aquí está la dura verdad: un gran video no vale nada si nadie lo ve. Lograr que ese video llegue a compradores reales es tan importante como producirlo en primer lugar.
Esto significa que necesitas un plan. No puedes simplemente subirlo y cruzar los dedos. El objetivo es colocar estratégicamente tu video en todos los lugares donde tus compradores potenciales ya están buscando, desde el motor de búsqueda de videos más grande del mundo hasta sus feeds de redes sociales. Un plan de distribución inteligente es lo que convierte tu trabajo creativo en más clientes potenciales y ventas más rápidas.
Optimizando para Plataformas Clave de Video
Comencemos con el gigante en la sala: YouTube. No es solo para videos de gatos; es el segundo motor de búsqueda más grande del planeta y un lugar donde la gente definitivamente va a investigar sobre casas. Simplemente subir tu video no es suficiente. Tienes que tratarlo como un mini-sitio web que necesita ser encontrado.
Una vez que tengas tu archivo de video final, el siguiente paso es asegurarte de que pueda posicionarse. Dominar los conceptos básicos de SEO en YouTube para principiantes te dará una gran ventaja sobre los agentes que solo suben y se olvidan.
- Crea un Título Inteligente: No solo pongas la dirección. Incluye una característica atractiva. Algo como, "123 Calle Maple | Impresionante Casa de 4 Habitaciones con Piscina en Scottsdale, AZ" funciona mucho mejor.
- Escribe una Descripción Real: Este es un bien inmueble de primera. Cuenta una historia sobre la casa, enumera las características y comodidades clave y, lo más importante, agrega tu información de contacto y un enlace directo al listado completo de la propiedad.
- Usa Etiquetas Específicas: Piensa como un comprador. Usa etiquetas para la ciudad, el vecindario e incluso el estilo de la propiedad ("casa de campo moderna", "condominio en el centro"). No olvides las etiquetas basadas en características como "cocina renovada" o "vista al mar".
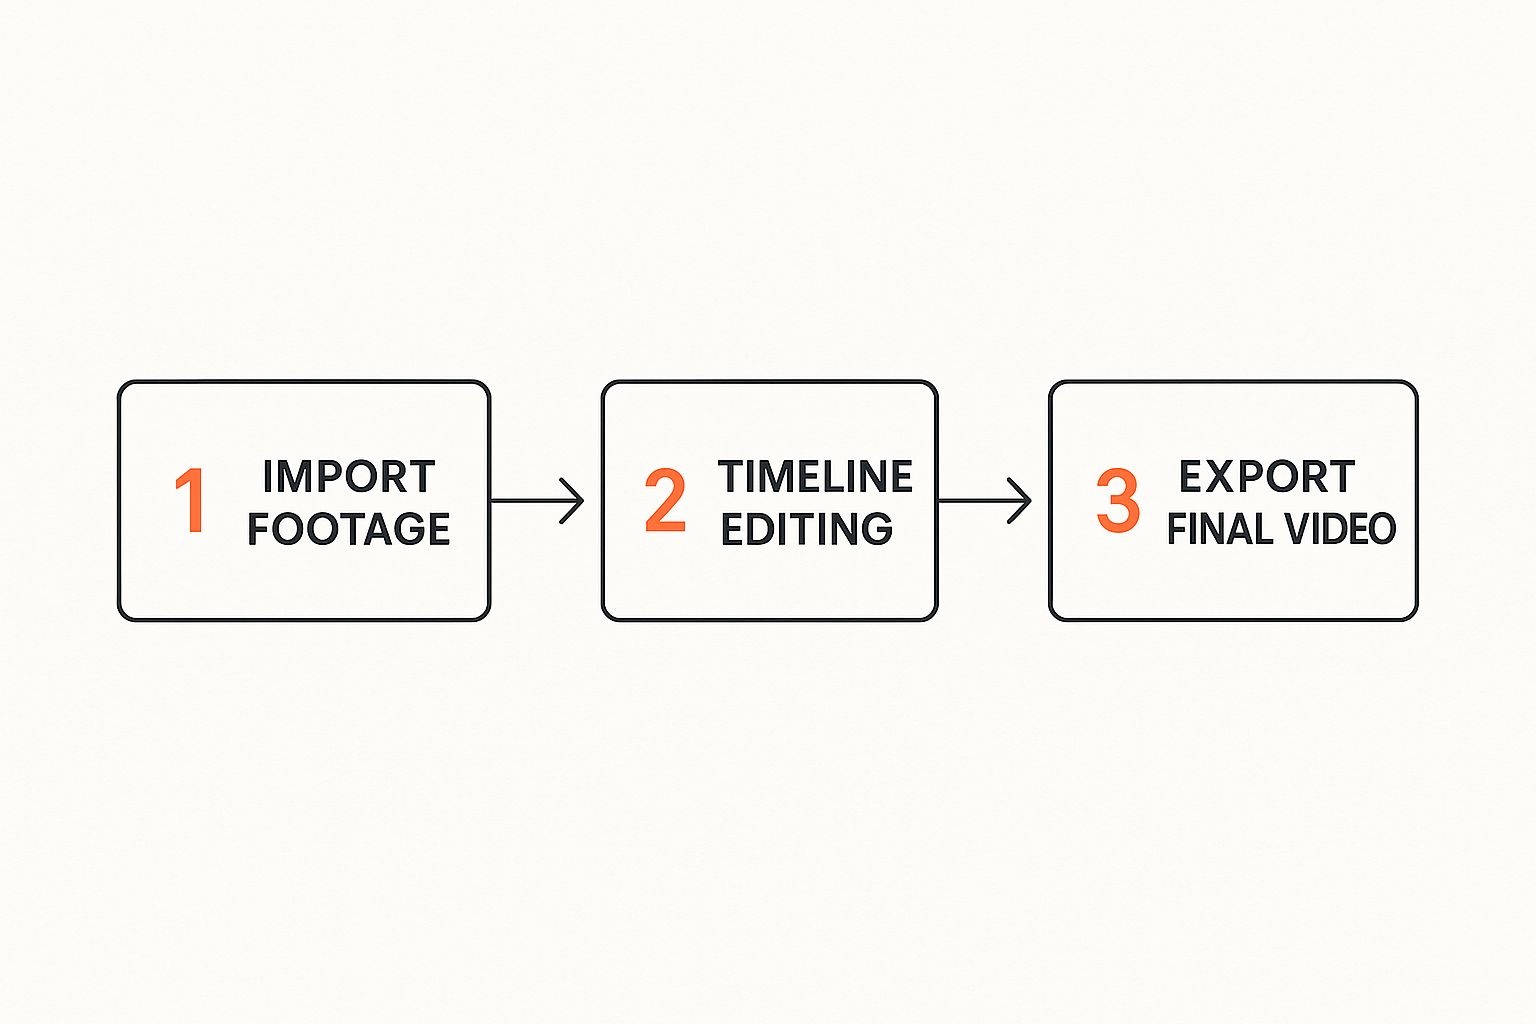
Desde traer las imágenes en bruto hasta exportar ese corte final pulido, cada paso es vital para crear un activo de alta calidad que esté listo para atraer compradores.
Aprovechando las Redes Sociales y Tus Propios Canales
Aunque YouTube es fantástico para la búsqueda, las redes sociales son donde captas la atención de las personas mientras navegan casualmente. La clave es adaptar tu video para cada plataforma.
Para Instagram, recorta un carrete destacado vertical de 30-60 segundos para Reels. Muestra los momentos "wow". En Facebook, puedes publicar el video completo e incluso invertir un pequeño presupuesto en publicidad para dirigirte a demografías específicas en tu área. Esto puede aumentar dramáticamente su alcance con muy poco costo.
¿El canal más poderoso y a menudo pasado por alto? Tu propia red. Enviar un correo electrónico masivo a tu esfera de influencia—clientes anteriores, clientes potenciales actuales y otros agentes—pone tu video frente a una audiencia cálida que ya confía en ti.
Finalmente, no olvides las propiedades digitales que posees: tu sitio web y el listado en el MLS. Incrustar el video directamente en el listado es innegociable, ya que muchos portales dan prioridad a los listados que incluyen video. Una encuesta de NAR de 2024 encontró que, aunque los vendedores esperan que los agentes comercialicen viviendas en sus sitios web, un sorprendente 46% de los agentes no lo hacen. Esa es una gran oportunidad para que te destaques de la competencia.
Colocar el video en tu sitio personal o en el de la agencia no solo mejora la apariencia del listado; también ayuda al SEO de tu sitio web al mantener a los visitantes comprometidos por más tiempo. Para reunir todo esto, puedes profundizar en la construcción de un plan completo de marketing de video inmobiliario. Al cubrir todas tus bases, aseguras que esos fantásticos videos de propiedades hagan el trabajo pesado para atraer compradores y lograr que esa propiedad se venda.
Preguntas Comunes sobre Videografía Inmobiliaria
Cuando recién comienzas con los videos de propiedades, es inevitable que tengas algunas preguntas. Todos las tienen. Resolver estas desde el principio te dará la confianza para comenzar a filmar contenido que realmente obtenga resultados.
Vamos a repasar algunas de las preguntas más comunes que escucho de los agentes sobre videografía para bienes raíces. Recuerda, el objetivo no es crear una producción perfecta de Hollywood en tu primer intento. Se trata de tomar acción. Un video auténtico que grabes hoy es infinitamente mejor que el impecable que sigues posponiendo para mañana.
¿Cuánto Tiempo Debe Durar un Video Inmobiliario?
Encontrar la duración adecuada para un video es un acto de equilibrio. Necesitas mostrar la casa, pero también debes mantener la atención de las personas. Según lo que he visto, el punto ideal para una casa estándar está entre 90 segundos y dos minutos.
Es tiempo suficiente para recorrer las principales áreas de estar, destacar algunas características sobresalientes y dar una idea del exterior sin que nadie se aburra. Esta duración también está hecha a medida para las redes sociales y el MLS, donde solo tienes unos segundos para causar una impresión.
Por supuesto, si estás anunciando una gran propiedad de lujo con una casa de huéspedes y acres de terreno, definitivamente puedes extenderte más—tal vez tres o incluso cuatro minutos. Solo asegúrate de que cada segundo agregue valor y mantenga el ritmo.
El mayor error que puedes cometer con la duración del video es crear un recorrido largo y divagante que pierda el interés del espectador a mitad de camino. La brevedad y el impacto son tus mejores aliados.
¿Narración del Agente o Solo Música?
Esta es una excelente pregunta, y la respuesta realmente depende de lo que intentas lograr con el video para esa propiedad específica. No hay una única forma "correcta" de hacerlo; simplemente logran cosas diferentes.
- Video Cinematográfico Solo con Música: Este estilo se trata de crear un ambiente. Se siente de alta gama y aspiracional. Al combinar tomas hermosas con una excelente banda sonora, permites que los compradores se imaginen viviendo en la casa. Esto funciona de maravilla para listados modernos, arquitectónicos o de lujo.
- Narración del Agente o Introducción en Cámara: Ponerte frente a la cámara es una manera fantástica de construir una conexión personal y posicionarte como el experto del vecindario. Puedes señalar cosas que la cámara podría pasar por alto, como la marca de los nuevos electrodomésticos de cocina o el tipo específico de encimeras de cuarzo.
Honestamente, un enfoque híbrido suele ser el más efectivo. Podrías comenzar con una breve introducción en cámara, dejar que un recorrido impulsado por música maneje el tour principal, y luego regresar para un fuerte llamado a la acción al final.
¿Cuál es el Mayor Error a Evitar?
Sin duda, el error más vergonzoso es un metraje tembloroso e inestable. Inmediatamente parece amateur y, francamente, puede hacer que las personas se sientan un poco mareadas. La mejor inversión que puedes hacer es un simple estabilizador para tu teléfono o cámara. Instantáneamente hará que tus videos se vean 10 veces más profesionales.
El otro gran error es la mala iluminación. Si puedes evitarlo, nunca filmes una propiedad en un día oscuro y sombrío. Lo mejor es grabar durante las horas de luz brillante. Antes de presionar grabar, abre todas las persianas, corre todas las cortinas y enciende todas las luces de la casa. Un hogar brillante y bien iluminado siempre se ve más grande, más limpio y mucho más acogedor en cámara.
¿Listo para crear impresionantes videos de propiedades sin la complejidad de la edición tradicional? Pedra utiliza IA para generar videos de bienes raíces de calidad profesional, puesta en escena virtual y mejoras fotográficas con solo un clic. Eleva tus listados e impresiona a tus clientes visitando el sitio web de Pedra para ver cómo funciona.

Entradas Relacionadas
Home Staging Virtual para Naves Industriales – Estudio de Caso de Venta Multimillonaria
Descubre cómo Alemany Real Estate vendió naves industriales multimillonarias usando home staging vir...
Cómo aumentar el valor de la propiedad: su guía completa
Aprende cómo aumentar el valor de la propiedad con renovaciones inteligentes, puesta en escena virtu...
Cómo hacer videos inmobiliarios que se vendan rápido
Aprende a hacer videos inmobiliarios que atraigan compradores y cierren tratos rápidamente. Descubre...