HDR Photography Real Estate: Complete Guide to Stunning Listings
Learn how to master hdr photography real estate with our comprehensive guide on gear, techniques, and editing to boost your property listings.
In a crowded real estate market, your photos have to do more than just show a space—they have to grab a buyer’s attention and hold it. This is where HDR photography comes in. High Dynamic Range (HDR) is a technique that solves the classic problem of tricky lighting, like a sun-drenched window in an otherwise dark room. It works by blending multiple photos into a single, perfectly lit image that makes a property look its absolute best.
Why HDR Makes Your Real Estate Listings Stand Out
Let’s be honest: first impressions happen online. Before a buyer ever considers visiting a home, they’re scrolling through countless listings. Your photos are what will make them stop and click.
Standard, single-shot photos just can’t handle the dynamic range of most interiors. You’ve probably seen it before—either the room looks good but the windows are completely blown out, or you can see the beautiful view outside, but the room itself looks like a cave. The camera’s sensor simply can’t capture both the brightest brights and the darkest shadows in one go.
This is exactly the problem HDR was designed to fix. It works by taking a series of photos (a bracket) at different exposure levels, from dark to bright. Then, software merges these shots, taking only the best-lit parts from each one:
- The crisp, beautiful view from the windows (from the darkest shot).
- The rich colors and textures of the furniture and floors (from the mid-tone shots).
- The subtle details lurking in the darkest corners (from the brightest shot).
The final result is one seamless image that looks balanced, vibrant, and incredibly detailed. It’s a much closer representation of what you’d actually see with your own eyes, making potential buyers feel like they’re standing right there in the room.
The Tangible Impact on Your Listings
This isn’t just about making pretty pictures; it’s about driving results. When a property looks professional and inviting online, buyers perceive it as more valuable. The data backs this up in a big way.
To really see the difference, let’s look at how listings perform with and without this professional touch.
Listing Performance With and Without HDR Photos
This table breaks down the tangible benefits of using HDR photography in your real estate listings compared to a standard, single-exposure image.
| Key Metric | Standard Single Photo | Professional HDR Photo |
|---|---|---|
| Online Views | Baseline traffic | Up to 118% more views |
| Sale Speed | Sells at market average | Sells up to 50% faster |
| Buyer Perception | Can look amateur, dark, or small | Perceived as high-value, bright, and inviting |
| Emotional Connection | Difficult for buyers to envision themselves | Helps buyers feel “at home” before visiting |
As you can see, the impact is significant. Listings with professional HDR images don’t just get more clicks; they attract more serious buyers and move off the market faster.
The goal isn’t just to show a property; it’s to sell a lifestyle. HDR photography creates an inviting atmosphere that helps potential buyers emotionally connect with the home before they even schedule a visit.
To create a truly compelling listing, you should consider a complete visual package. While HDR is perfect for interiors, combining it with techniques like drone real estate photography for stunning aerial views can set your property apart.
If you’re ready to master the craft, you can dive deeper into our complete guide on https://pedra.so/blog/real-estate-photography. A strategic approach to your visuals will always lead to more interest, more showings, and a quicker, more profitable sale.
Getting the Right Gear for Flawless HDR Photos

Image
When you’re diving into HDR photography for real estate, you don’t need to max out your credit card on the most expensive gear. What you absolutely need, though, is the right gear. The right tools are what will give you consistency, sharpness, and efficiency on every shoot—the difference between an amateur-looking snapshot and a professional photo that actually helps sell a home.
If there’s one piece of equipment you can’t skimp on, it’s a sturdy tripod. It’s non-negotiable. HDR photography is all about blending multiple pictures of the exact same scene, and even the slightest camera movement between shots will lead to a blurry, unusable mess. A good tripod is your insurance policy, guaranteeing your camera stays locked in place so the software can align your bracketed shots perfectly.
Your Camera and Lens Combo
Any modern DSLR or mirrorless camera that can shoot in RAW and offers manual control will get the job done. The real game-changer is your lens. For interior shots, a wide-angle lens is your best friend. It’s what allows you to capture the true scale of a room, making it feel open and inviting to potential buyers scrolling through listings.
A lens in the 16-35mm range on a full-frame camera is pretty much the industry standard, and for good reason. It’s wide enough to handle tight spaces like bathrooms or narrow hallways without creating that weird, distorted fish-eye effect that makes walls look like they’re bending. If you’re just starting out, this is the one lens to invest in; it’ll handle almost anything you throw at it.
One of the biggest mistakes I see new photographers make is going too wide. Sure, a 10mm lens crams more into the frame, but the heavy distortion just looks unprofessional and can even misrepresent the room’s actual size. Stick to a moderate wide-angle for a much more natural and appealing look.
Nailing Your Camera Settings for Bracketing
Once you’ve got your camera set up on the tripod, getting your settings right is the next crucial step. You want to have a reliable starting point so you’re not wasting time fiddling with dials on-site. A smooth workflow is an efficient one. For a much deeper look at camera setups, our guide is packed with more real estate photography tips to help you out.
Here are the go-to settings I use for virtually every HDR shoot:
- Shooting Mode: Always Aperture Priority (A or Av). This lets you lock in the aperture you want, and the camera will automatically adjust the shutter speed for each shot in your bracketed series. It’s a huge time-saver.
- Aperture: Start with f/8 or f/11. This f-stop range is the sweet spot for getting a deep depth of field, which means everything from the chair in the foreground to the window in the back will be perfectly sharp.
- ISO: Keep it as low as it can go, which is usually ISO 100. A low ISO is key to minimizing digital noise and getting clean, professional-looking images. Since you’re on a tripod, you don’t need a high ISO to deal with slow shutter speeds.
- Exposure Bracketing (AEB): This feature will become your best friend. Set your camera’s Auto Exposure Bracketing to take 3 or 5 shots. For most normally lit rooms, a 3-shot bracket at 2, 0, and +2 EV (exposure value) is perfect.
Your On-Site Shooting Workflow
https://www.youtube.com/embed/vKHJdstcGVk
Having a smooth on-site process is what really separates the pros from the amateurs in HDR photography for real estate. It’s not just about knowing the right camera settings; it’s about being efficient and consistent from the moment you step inside. A solid, repeatable workflow means you get all the shots you need without wasting time, leading to incredible results for your clients, every single time.
The first thing I do in any room is prep the space. Before my tripod even comes out of the bag, I turn on every single light—lamps, overhead fixtures, even the under-cabinet lighting. This instantly creates a warmer, more inviting atmosphere and helps soften some of the harsh shadows. Next, I open all the blinds and curtains to let in that beautiful natural light and show off any great views.
Finally, I do a quick sweep for clutter. This isn’t a full home staging, but hiding distracting things like TV remotes, a stack of mail, or personal photos on the fridge makes a world of difference. The goal is to present a clean, bright, and welcoming space that potential buyers can picture themselves in.
Mastering Your Composition and Angles
Once the room is prepped, it’s time to find your shot. Composition is everything in this business. You’re trying to make rooms feel as spacious and open as possible, which is exactly what buyers want to see.
A classic, tried-and-true technique is to shoot from the corners of a room, aiming back toward the center or the entryway. This angle just naturally makes the space feel bigger. I always keep my camera at chest height—roughly five feet off the floor. If you shoot too low or too high, you start to get distorted vertical lines, making the walls look like they’re slanting inward or outward.
Pro Tip: Use your camera’s built-in level or a simple hot-shoe bubble level to get your lines perfectly straight. Crooked walls are a dead giveaway of amateur work and are incredibly distracting to buyers.
This attention to detail is why professional photography is so valuable. The U.S. real estate photography market, valued at $268.3 million in 2024, is built on delivering this exact level of quality. It’s no surprise that properties with professional photos sell 32% faster. In fact, 63% of homebuyers have made offers on homes without ever visiting in person, which shows just how powerful compelling images are. You can find more fascinating real estate photography statistics about industry trends and their impact on home sales.
Your Essential Room-by-Room Checklist
To make sure you never miss a shot, it really helps to have a mental checklist you run through in every single space. A systematic approach is your best defense against having to make a frustrating return trip.
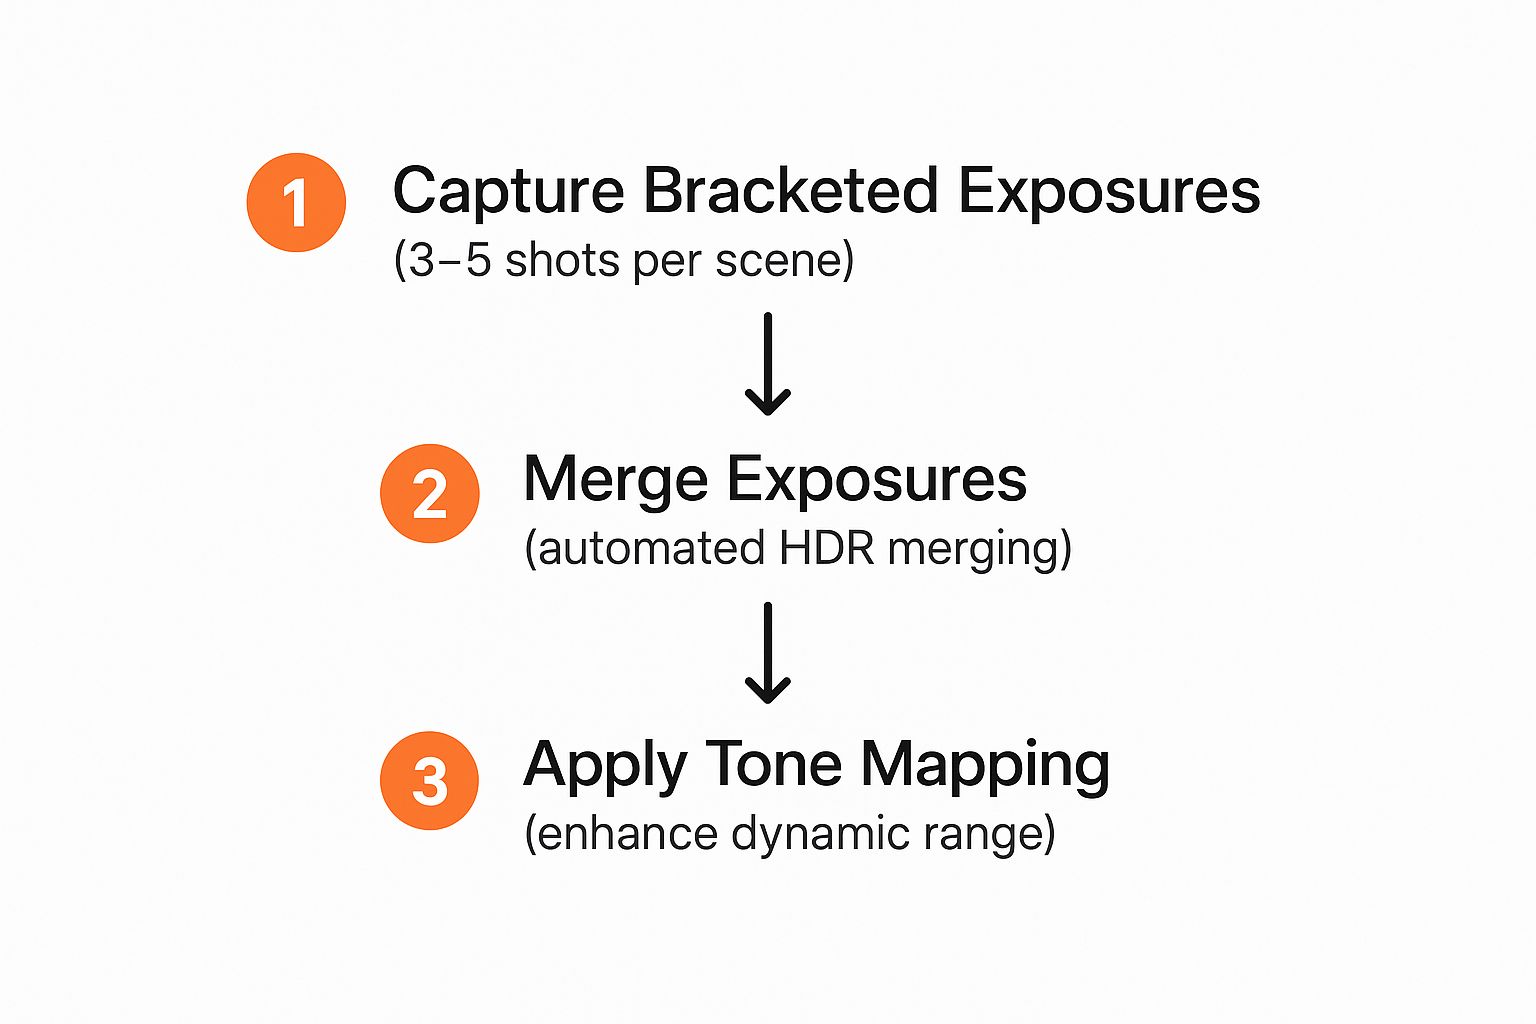
This infographic breaks down the core technical steps involved in capturing and creating a final HDR image.
Image
This workflow, from capturing the different exposures to the final tone mapping, is the true foundation of high-quality real estate imagery.
For every room, I make sure to hit these key points:
- Set Tripod & Level Camera: I find the best corner, set up my tripod, and make sure my verticals are perfectly straight.
- Frame the Shot: I take a moment to compose the shot, making sure to highlight the room’s best features and create that sense of space.
- Check Focus & Settings: I confirm my aperture is where I want it (usually f/8-f/11) and that my focus is tack-sharp on the main subject.
- Fire Bracketed Shots: Using my camera’s auto-exposure bracketing (AEB), I fire off my sequence of 3 or 5 exposures.
- Review Images: Before moving on, I do a quick check of the darkest and brightest images on my camera’s screen. This quick glance confirms I’ve captured the entire dynamic range of the scene.
By running through this simple but effective process, you can move through a property efficiently and leave with total confidence that you have everything you need to create stunning images in post-processing.
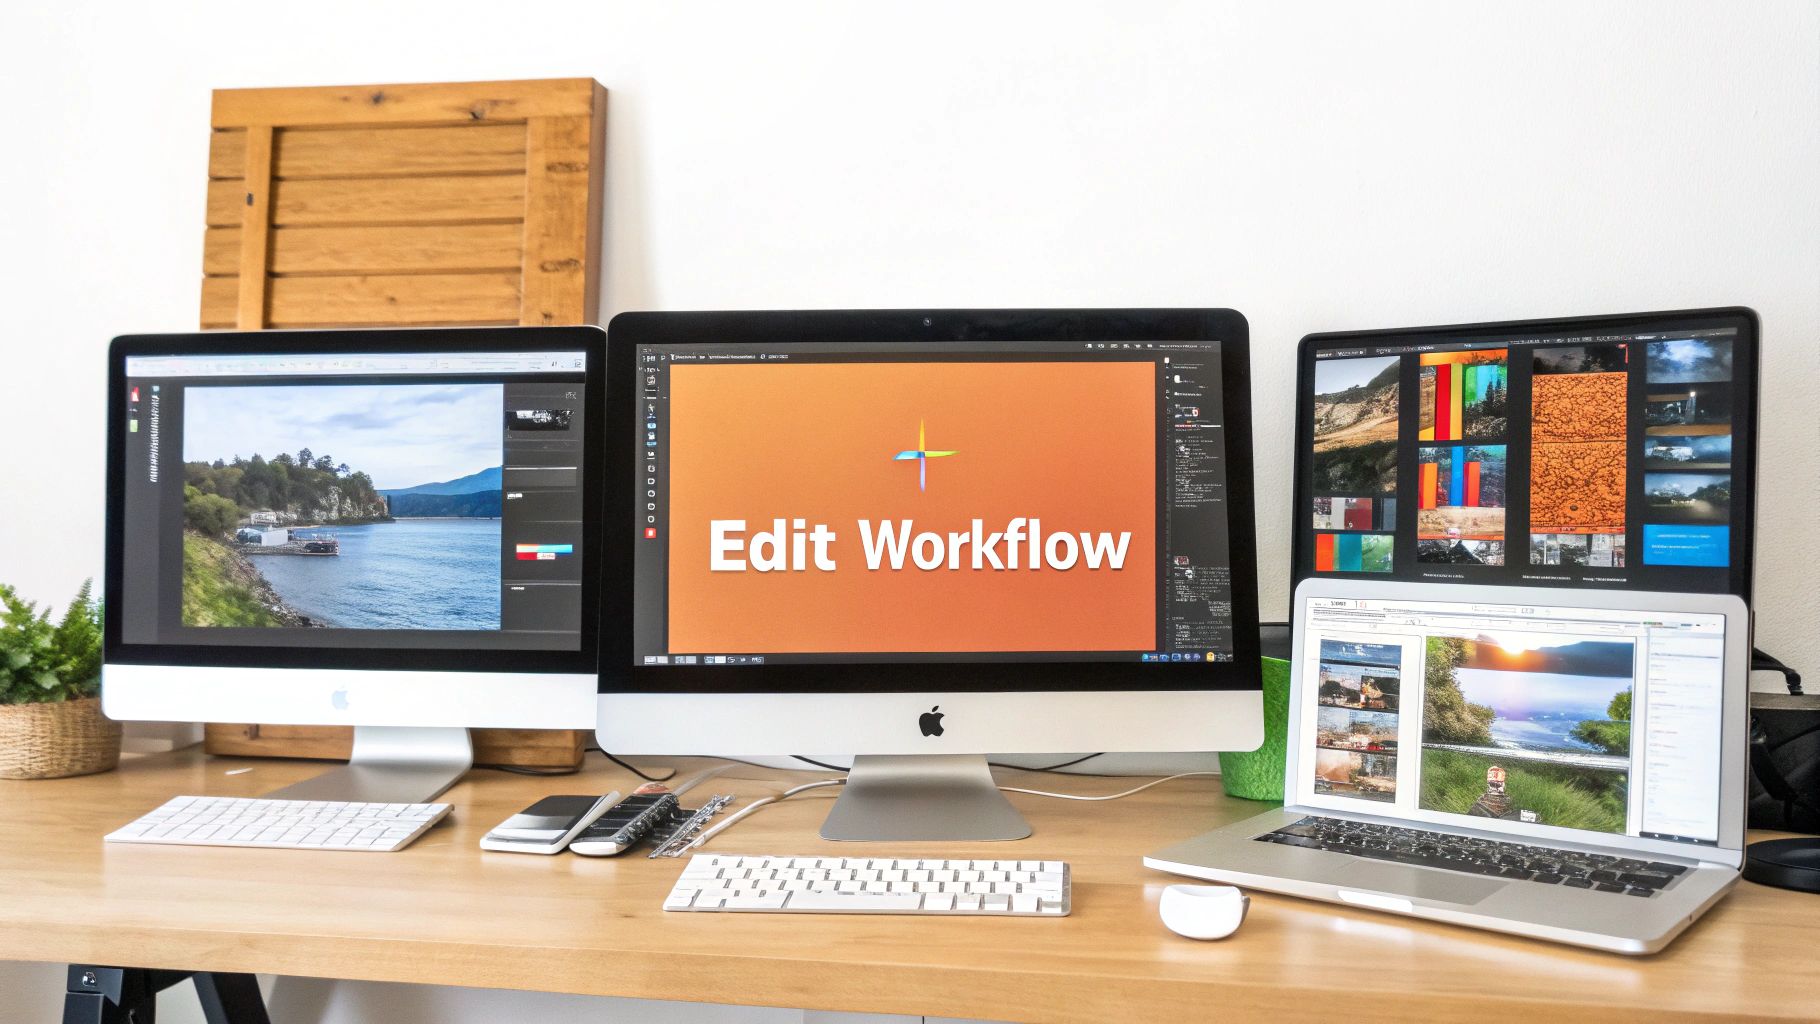
Bringing Your HDR Photos to Life in Post-Processing
Image
The work you do on-site is only half the story. The real magic of HDR photography for real estate happens back at your computer, where you transform those bracketed exposures into a single, polished image that will captivate buyers. This is where your raw materials become a finished product.
Your main job in post-processing is to blend that series of photos into one final HDR image. You’ve got two main paths here: you can use an all-in-one program like Adobe Lightroom, or you can turn to a specialized tool like Photomatix Pro. Both are great, but they cater to slightly different workflows.
Choosing Your Editing Software
For most photographers, especially in the fast-paced world of real estate, Adobe Lightroom is the perfect hub. Its built-in “Photo Merge to HDR” function is surprisingly powerful and keeps your entire workflow under one roof. You merge the shots and then immediately dive into your final edits using the adjustment sliders you already know and love. It’s clean and efficient.
On the other hand, Photomatix Pro is a dedicated HDR powerhouse. It offers much deeper control over the merging process itself, with different rendering engines and advanced features like “ghost removal.” This can be a lifesaver in tricky situations, like when tree branches were blowing in the wind outside a window during your shoot. If you find yourself specializing in complex HDR work, it’s definitely worth a look.
For pure speed and efficiency—which are absolutely critical in real estate—I’d recommend starting with Lightroom. The process is streamlined and produces fantastic, natural-looking results with minimal fuss.
The Initial Photo Merge Process
No matter which software you land on, the first step is always the same: merging your bracketed shots.
In Lightroom, it’s simple. Just select your sequence of images (usually 3 or 5 RAW files), right-click, and navigate to Photo Merge > HDR.
A small dialog box will pop up with a few important options:
- Auto-Align: Always leave this checked. It’s brilliant at correcting any tiny camera movements that happened, even on a rock-solid tripod.
- Auto-Settings: This gives Lightroom its best guess at toning the image. It’s a solid starting point that saves you a few clicks.
- Deghost Amount: If anything moved between your shots—like a ceiling fan, a person, or those pesky tree branches—you can set this to Low, Medium, or High. For most static interiors, “None” is perfectly fine.
Once you hit “Merge,” the software works its magic and creates a brand-new DNG file. This is your 32-bit HDR image, packed with all the light information from every single bracketed photo. Now, the real artistry begins.
Polishing Your Final Image for a Natural Look
Your goal here is not to create some over-the-top, surreal image. Good HDR photography for real estate is all about realism, but better—think bright, clean, and inviting. The biggest mistake I see beginners make is pushing the editing sliders way too far.
Start with the basics. First, nail your white balance to make sure the colors are true to life. White walls should look white, not tinged with yellow or blue.
Next, use the exposure, highlights, and shadows sliders to balance the light across the entire frame. Gently lift the shadows to reveal details in darker corners, and carefully pull down the highlights to bring back that beautiful view outside the windows.
Finally, don’t forget to fix your verticals. Wide-angle lenses are essential for real estate, but they can make straight lines look like they’re bending or leaning. A quick trip to your software’s “Lens Corrections” panel will automatically straighten things out, giving your photo a professional, architectural feel. This one simple check is often what separates a good photo from a great one.
Common HDR Mistakes and How to Fix Them
Image
Getting into HDR photography is one thing, but mastering it is another. It’s really the little things that separate amateur shots from truly professional HDR real estate photography. Once you learn to spot the common pitfalls, you’ll see a massive improvement in your work almost immediately.
A classic technical hiccup you’ll run into is “ghosting.” This is what happens when something moves in the frame while you’re shooting your bracketed shots. Think of a ceiling fan you forgot to turn off or tree branches swaying in the wind outside a window. When you merge the photos, that movement creates a blurry, transparent “ghost,” which is a dead giveaway that something went wrong.
Thankfully, there’s a fix. Most HDR programs have a “deghosting” tool. The trick is to look through your bracketed images before you merge them. Find the one shot where the moving object is sharpest, and then tell the software to use that specific frame for the problem area. It’s a simple step that can save you a world of frustration later.
Overcoming the Biggest Beginner Mistake
If there’s one mistake I see new photographers make over and over, it’s pushing the processing way too far. It’s so tempting to crank up the saturation and clarity sliders, but that’s what gives HDR a bad name. You end up with a garish, cartoonish image that just feels fake.
A great real estate HDR photo shouldn’t look like an HDR photo at all. It should just look like a perfectly lit, natural, and inviting room that a buyer can easily picture themselves in.
When you overdo it, you get those ugly halos around furniture, weirdly vibrant colors, and a gritty texture that screams unprofessional. My rule of thumb? Always pull back. If you think an edit looks perfect, dial it back by another 10%. A good reality check is to compare your final image against your original middle exposure to make sure it still feels authentic.
Remember, the quality of your photos has a real-world impact. In fact, 52% of realtors who hire pros believe it helps sell homes for the asking price or more. High-quality images can also keep potential buyers looking at a listing 118% longer simply because they help sell a lifestyle, not just a house.
Handling Reflections and Tricky Lighting
Reflections are another hurdle you’ll constantly face. Mirrors, shiny kitchen appliances, and even windows can easily catch you or your tripod in the shot, instantly breaking the illusion.
Here’s how I usually tackle this on-site:
- Adjust Your Angle: Often, just moving a foot to the left or right is enough to make a reflection disappear.
- Use a Remote: A wireless shutter remote lets you step completely out of the room, so you’re not in the reflection to begin with.
- Embrace Post-Production: For those really stubborn reflections, you’ll have to get your hands dirty in Photoshop with some careful cloning and masking.
Finally, remember that great photography goes hand-in-hand with great presentation. To learn more about getting a property camera-ready, our guide on what is house staging is a great place to start. Steering clear of these common mistakes will make your photos look cleaner, more professional, and ultimately, far more effective at selling the home.
Answering Your Real Estate HDR Questions
When you’re just getting started with HDR photography for real estate, a few common questions always seem to pop up. Let’s clear the air so you can get out there and start shooting with confidence.
How Many Shots Should I Take?
For most rooms, a bracket of 3 to 5 exposures is the magic number. I usually start with a standard 3-shot bracket, setting my exposures at -2, 0, and +2 EV. This handles the lighting in about 90% of interior spaces just fine.
But what about that tricky room with a huge picture window looking out onto a bright, sunny day? That’s when you’ll want to bump it up to a 5-shot bracket. Capturing those extra exposures gives you more information to play with in post-production. It’s the key to pulling out all the detail from the dark corners inside and the bright clouds outside, all without creating that grainy, digital noise.
Can I Just Use My Phone?
Smartphone cameras have gotten incredibly good, but for professional listing photos, they still can’t compete with a dedicated camera. It really comes down to two things: RAW file capture and interchangeable lenses.
- RAW files are a game-changer. They capture a massive amount of image data, giving you way more control over adjusting colors and exposure later on.
- A wide-angle lens on a DSLR or mirrorless camera is built to capture the true scale of a room without the funky, distorted look you sometimes get from a phone.
So, while your phone is perfect for a quick behind-the-scenes shot for Instagram, stick with your dedicated camera for the photos that will actually sell the house.
The biggest mistake I see photographers make is over-editing their HDR images until they look fake. Your goal isn’t to create a surreal, glowing fantasy world. It’s to make the home look like it does to the human eye on its best day—bright, clear, and welcoming.
Keep an eye on your colors and aim for soft, clean lines. If the photo starts looking more like a scene from a video game, you’ve gone too far. When you make realism your north star, you’ll create photos that buyers connect with, and that’s what gets properties sold.
Ready to create stunning property visuals with a single click? Pedra uses AI to instantly handle virtual staging, photo enhancements, and even video creation, saving you time and helping you close deals faster. See how over 20,000 real estate professionals are transforming their listings with Pedra.

Related Posts
Top 7 AI Room Decoration Tools for 2025
Discover the best AI room decoration software for 2025. Our review compares top tools to help you de...
9 Curb Appeal Ideas on a Budget That Actually Work (2025)
Transform your home's exterior with our top curb appeal ideas on a budget. Get easy, high-impact tip...
10 Essential Curb Appeal Improvements for 2025
Discover 10 essential curb appeal improvements to boost property value. This guide for real estate p...