How to Create a Virtual Tour for Real Estate
Learn how to create a virtual tour that sells properties. Our guide offers practical advice for capturing, building, and marketing immersive real estate tours.
At its core, creating a virtual tour is about taking a series of 360-degree photos of a property and weaving them together with software. The goal is to build an immersive experience that a potential buyer can explore on their own time, from anywhere. With a platform like Pedra, this is no longer a technical nightmare. You just upload your images, and the software helps you build a self-guided tour that feels just like being there.
Why Virtual Tours Are a Game Changer in Real Estate
Before we get into the nuts and bolts of building your first tour, let's talk about why this is such a critical tool for any agent today. It's not just a fancy gadget—it's a fundamental part of a smart real estate strategy. The benefits aren't just about showing off a property online; they change the entire dynamic of how you connect with clients and protect your most valuable asset: your time.
This isn't just about keeping up with technology. It's about giving yourself a serious competitive edge. You're handing clients a powerful, immersive way to truly experience a property on their own terms, shifting them from passive viewers to active explorers.
More Than Just a Timesaver
Of course, the most obvious win is cutting down on physical showings for looky-loos. But the real magic happens when you realize virtual tours are one of the best lead-qualifying tools you have. Think about it: a prospect who has already "walked" through every room of a home online is far more serious and invested than someone who just scrolled through a few photos.
To dig deeper into how this impacts your workflow, check out our guide on virtual tours for realtors.
This filtering process means the in-person showings you do schedule are with highly interested, decision-ready buyers. This shift is a common theme when you look into how real estate agents use platforms for virtual property showings, confirming their essential role in the modern market.
This efficiency also blows the doors wide open to a global audience. Buyers from out-of-state or even other countries can now tour properties with the same confidence as a local, all from thousands of miles away.
The difference in performance is not subtle. When you compare a listing with only standard photos to one that includes a high-quality virtual tour, the numbers speak for themselves.
Listing Performance With and Without a Virtual Tour
| Metric | Traditional Photos Only | With Virtual Tour |
|---|---|---|
| Online Engagement | 2-3 minutes average time on page | 8-10 minutes average time on page |
| Lead Quality | Higher volume of initial inquiries | 49% more qualified leads |
| Days on Market | Standard market average | Up to 31% faster sale |
| Final Sale Price | Standard offers | Sells for 1-9% higher on average |
As you can see, a virtual tour isn't just a feature; it's an investment that directly impacts your bottom line and your client's success. It drives deeper engagement, attracts better-qualified buyers, and ultimately helps close deals faster and for more money.
The Psychology of an Immersive Experience
A great virtual tour does more than just show off a space—it creates an emotional connection. When a potential buyer can guide themselves through a home at their own speed, they start to form a bond. They can peek into the pantry, measure a wall with their eyes for their sofa, and really imagine their life unfolding there.
This interactive freedom builds the confidence people need to make one of the biggest purchases of their lives. It removes the social pressure of a scheduled appointment and gives them the space to genuinely fall in love with the property.
This change in what buyers want is reshaping the industry. The demand for virtual tours has exploded, and it's largely because cloud-based software has made these tools easy and affordable for everyone. It's proof that offering an immersive experience isn't just a forward-thinking move anymore—it's what today's buyers expect.
Staging a Property for the 360-Degree Camera
A great virtual tour doesn't start when you press the shutter button. It begins with the prep work—staging the home with a 360-degree view in mind. This is what truly separates a polished, professional tour from an amateur one. It’s more than just tidying up; it's about making a space look incredible from every conceivable angle.
When a potential buyer can look up, down, and all around, every single detail is on display. You have to think of it like prepping for the most meticulous open house visitor imaginable. The goal is to create a clean, inviting space that feels aspirational through the lens. This is where you lay the groundwork for a tour that truly sells.
Get the Lighting Right and Tame Reflections
Lighting is everything in photography, and its importance is magnified for 360-degree tours. The wrong light can make a gorgeous room feel dim and tight. The right light makes it feel spacious, bright, and welcoming.
Your best friend here is natural light. Throw open all the curtains and blinds to let the sun pour in. I've found the best time to shoot is on a bright, overcast day; this gives you soft, even light without the harsh shadows or blown-out windows you get from direct sun. A quick tip: turn off all the artificial lights inside. Mixing the cool temperature of daylight with the warm glow of indoor bulbs often creates weird, unappealing color splotches in the final images.
Reflections are the other big hurdle with 360 cameras. You, your tripod, your gear—it can all show up in mirrors, glass tables, and shiny appliances.
- Mirrors: Try to angle your shots to avoid capturing yourself directly. If you can't avoid a mirror, position the camera so it reflects something simple, like a blank wall, instead of the middle of the room.
- Windows: Make sure all windows are sparkling clean to get rid of smudges that will definitely show up. Shooting with your back to the window can reduce glare, but always check your test shots.
- Shiny Surfaces: Stainless steel refrigerators and polished floors love to reflect everything. While some high-end lenses can use polarizing filters to cut glare, for most 360 cameras, your best bet is creative camera placement.
Declutter with a 360-Degree Perspective
Tidying up for a virtual tour is a whole different ballgame. With standard photos, you can just shove clutter out of the frame. With a 360 view, there's nowhere to hide.
My rule of thumb is simple: if an item doesn’t help sell the home, it needs to go. That means personal photos, magnets on the fridge, toiletries on the bathroom counter, and stacks of mail on the desk. You’re selling the buyer their future life in this home, not showcasing the current owner's.
Pay close attention to all horizontal surfaces like countertops, tables, and shelves. Keeping them clear makes a room feel bigger and cleaner. A single, well-chosen decorative piece like a vase of fresh flowers or a bowl of green apples? Perfect. A countertop covered in appliances and mail? Not so much. For a complete room-by-room guide, check out our deep dive into home staging for virtual tours.
Finally, think about the viewer's journey. Before you even set up your tripod, walk through the property and map out a logical path. Where would someone naturally go after walking in the front door? Your camera placements should mimic this flow, creating an intuitive and seamless experience. A little bit of planning here goes a long way in making the tour feel effortless to navigate.
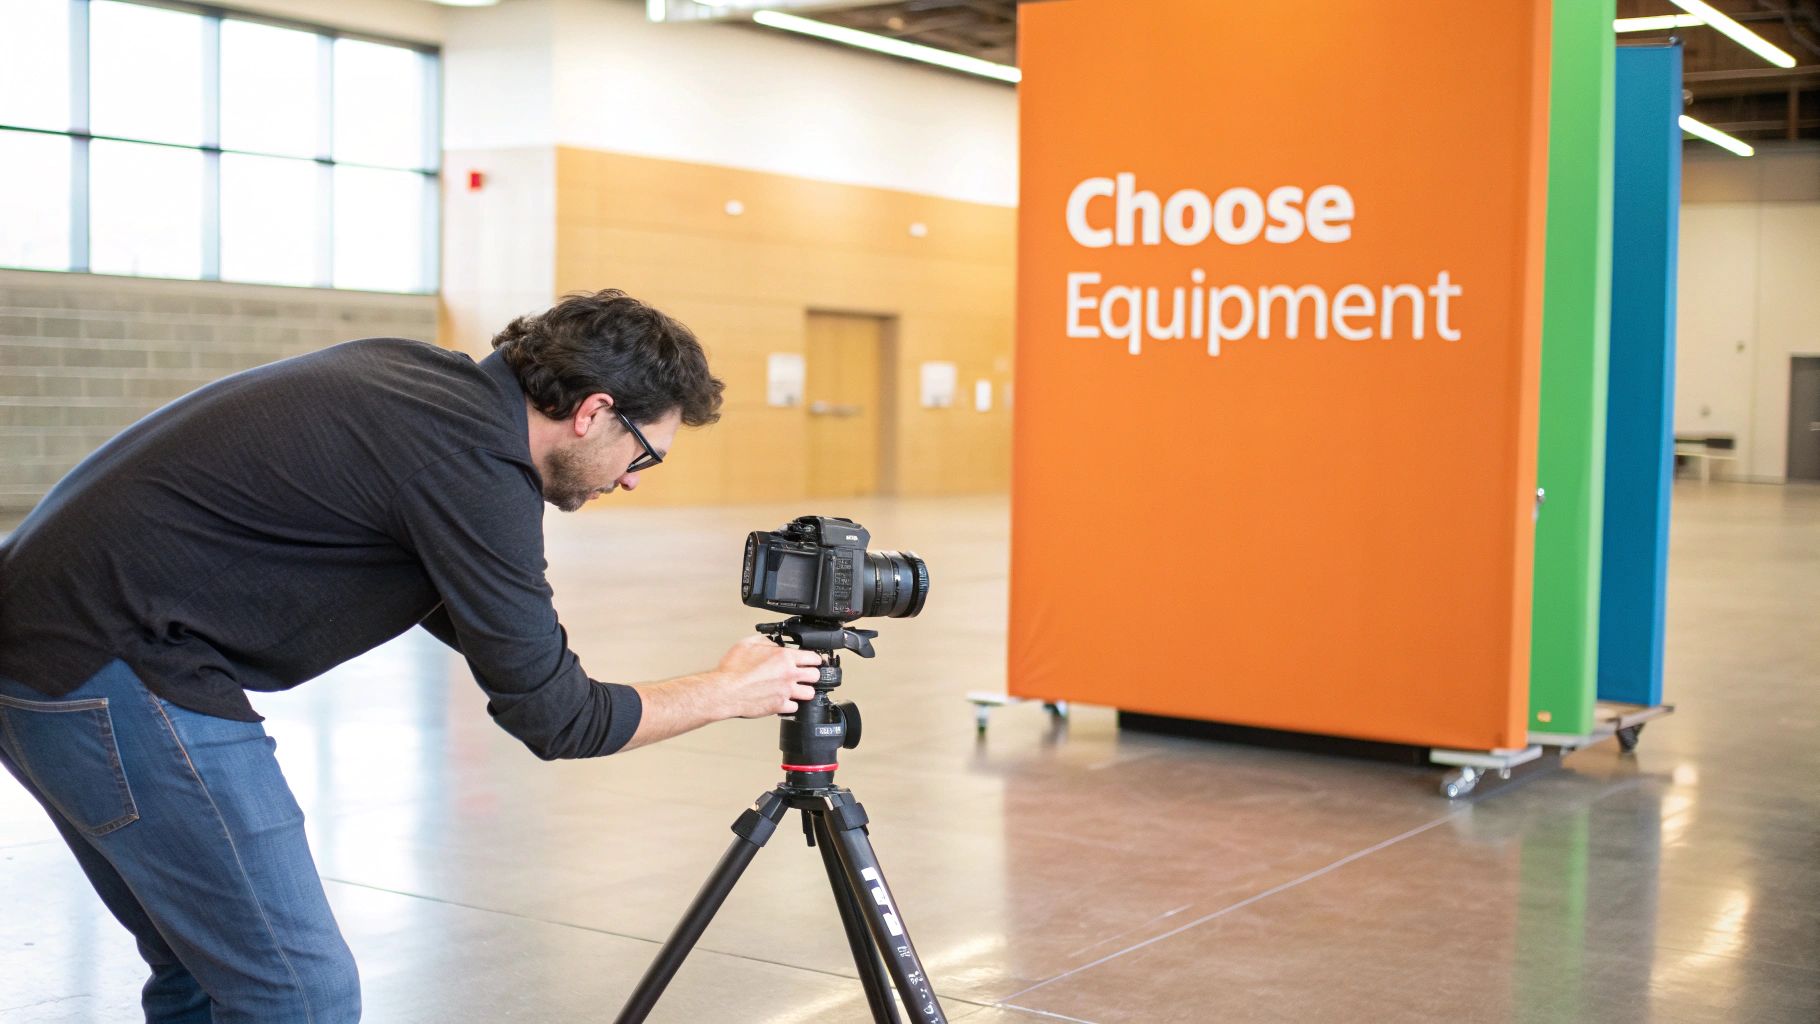
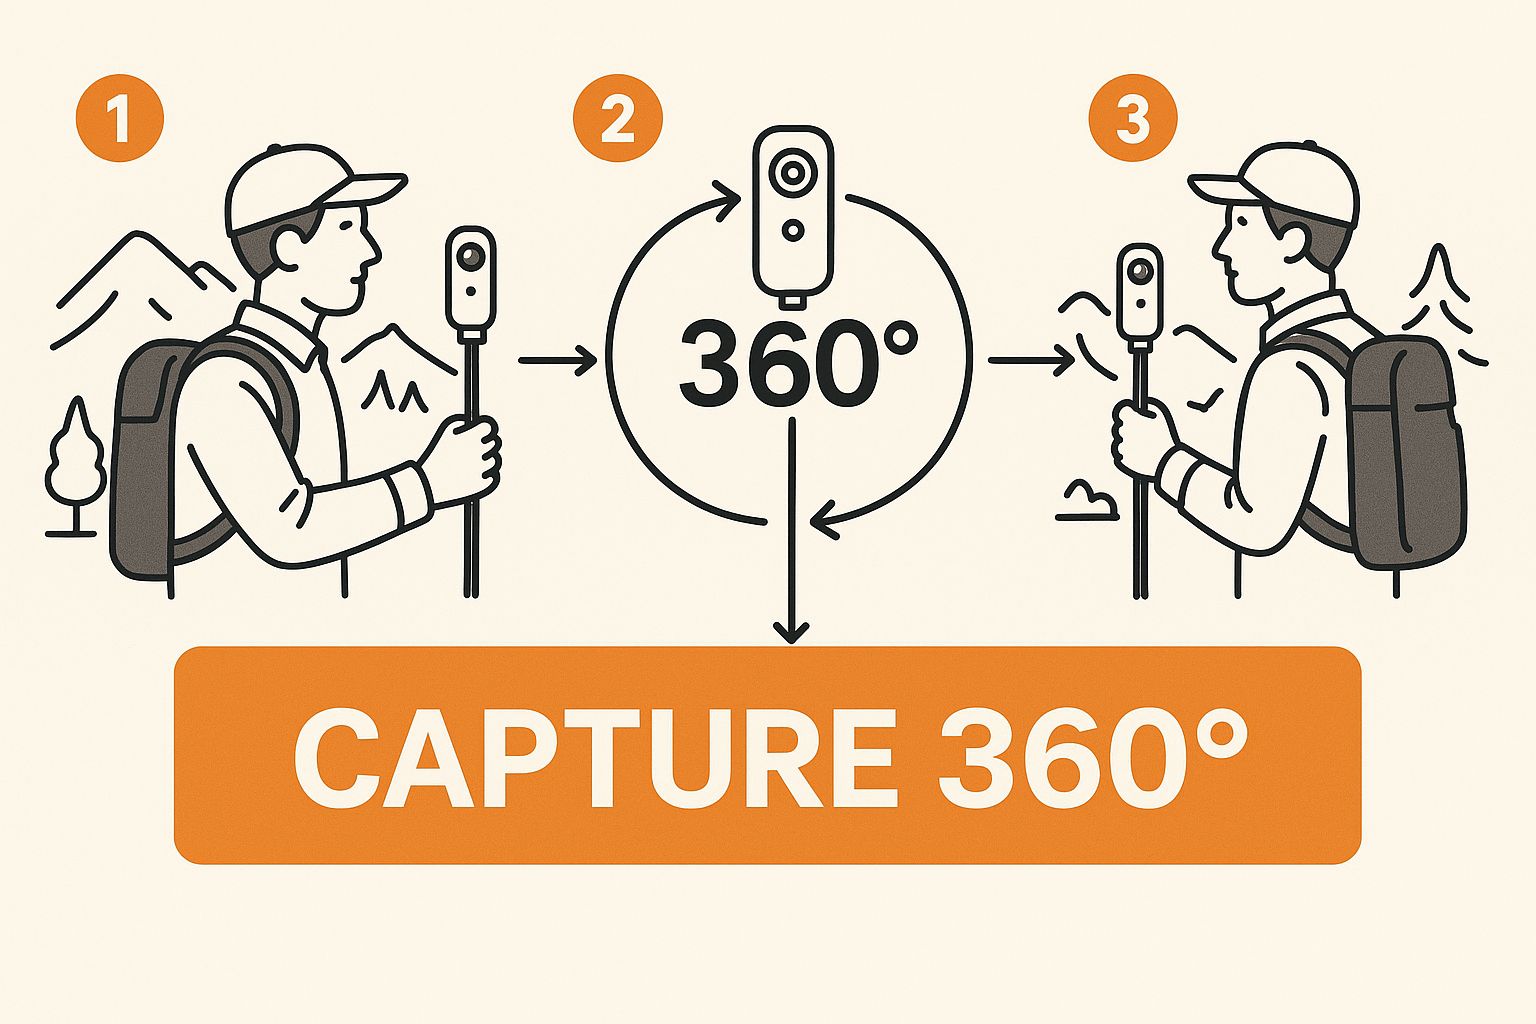
Capturing High-Quality 360-Degree Images
Alright, the property is staged and looking its best. Now comes the part where all that prep work really starts to pay off: shooting the actual 360-degree images for your tour.
Think of each photo you take as a "scan point." This is a spot where a potential buyer can virtually stand and explore a room. Your goal isn't just to take pretty pictures, but to capture these scan points in a way that creates a logical, easy-to-follow path through the home. Get this right, and the editing process in Pedra becomes a breeze, and your final tour will look incredibly professional.
Master Your Camera Placement
I can't stress this enough: where you place your tripod is everything. It directly impacts how a viewer experiences the size and flow of a space.
One of the most common mistakes I see is agents placing the camera too close to a wall. It seems like a good idea to "show more of the room," but it actually distorts the perspective and makes the space feel cramped and unnatural.
Instead, find the natural walkway. For a living room, that might be right between the sofa and the coffee table. In a bedroom, try placing it at the foot of the bed. You want to mimic where a person would naturally stand.
Here are a few placement tips I've learned over the years:
- Small Bathrooms: These are tricky. My go-to move is to place the tripod just inside the doorway. This gives the best sense of the room's full size without getting the door awkwardly in the shot.
- Kitchens: I always aim for the center of the work triangle—that sweet spot between the sink, stove, and refrigerator. It’s the perfect vantage point to showcase the layout and appliances.
- Open-Concept Areas: Don't try to capture it all in one shot. You'll need multiple scan points. Place one in the middle of the living area and another in the dining space to clearly define each zone.
Achieve Perfect Exposure and Lighting
Modern 360 cameras are fantastic, but they aren't magic. You still need to manage the lighting to avoid those dreaded blown-out windows or super dark corners.
Consistency is key here. Always set your camera to the same height for every single shot—I find that around 5 feet (or 1.5 meters) is perfect, as it mimics the average person's eye level. This simple step makes moving from room to room feel seamless, not jarring. And please, use a tripod with a built-in bubble level. Nothing screams "amateur" like a crooked horizon.
Once you’ve captured your images, you’ll upload them into an interface that looks something like this.
As you can see, the platform is clean and straightforward. Your well-composed, high-quality images become the building blocks for the entire interactive experience.
The shift from simple 360 photos to these fully interactive tours is a direct result of better imaging technology and smarter software. It’s exactly what today’s buyers are looking for. If you're interested in the data behind this trend, you can find more insights on the virtual tour market and see just how much demand has grown.
Overlapping Shots for Smooth Transitions
Finally, as you're shooting, think about how each scan point connects to the next. For a tour to flow naturally, your scan points must have a clear line of sight to each other.
When a viewer is "standing" in the living room, they should be able to see the doorway leading to the kitchen, where your next scan point will be. This visual connection is what allows the software to stitch the tour together seamlessly.
If you capture a shot in a hallway, for example, make sure you can see both the previous spot in the entryway and the next spot in the bedroom from that hallway position.
This bit of planning prevents people from feeling like they’ve hit a dead end. It’s what transforms a collection of static images into a true, walkable experience—which is precisely why you’re creating a virtual tour in the first place.
Alright, you've got your 360° photos in hand and you're ready for the fun part. Let's jump into the Pedra platform and stitch those beautiful images into a virtual tour that actually sells. This is where you go from photographer to director, crafting an experience that lets buyers walk through a property from anywhere in the world.
Don't worry, Pedra is built to be straightforward. You'll upload your 360° images, and from there, it’s all about connecting the dots and telling the home's story.
Think of it this way: you capture the shots, then you build the journey. It's a simple workflow that turns individual pictures into a powerful marketing asset.
Each step logically follows the one before, transforming your raw photos into a polished tool that buyers will love to explore.
Linking Rooms with Intuitive Hotspots
What makes a virtual tour feel real? The navigation. It has to be seamless. In Pedra, we do this with hotspots. These are just little clickable icons you place in the scene to connect one room to the next.
Imagine a potential buyer is looking at the living room. You’ll simply drop a hotspot on the doorway to the kitchen. When they click it, boom—they're standing in the kitchen. It’s that simple. The goal is to make it feel just like walking through the house in person.
A quick pro tip: Always place your hotspots where there's a clear line of sight. If someone can see into the next room, that's where the hotspot should go. It makes the transition feel natural and keeps people from getting lost or confused.
Enriching the Tour with Interactive Elements
A great tour is more than just a walkthrough; it's an information hub. This is where Pedra really shines. You can embed all sorts of media and details right into the tour itself.
I've found that by adding these extra layers of information, you’re answering a buyer’s questions before they even have to ask. It shows you've thought of everything and builds a ton of trust right from the start.
You're not just showing the space; you're highlighting what makes it special. This turns a passive viewing into an active discovery, which is far more engaging for a serious buyer.
This kind of immersive experience is becoming a huge deal. It's part of a bigger trend in virtual tourism, which has seen explosive growth as people get more comfortable with digital exploration. You can discover more about the growth of virtual tourism to see just how big this shift is. It’s not just for real estate anymore—it's changing how people learn and interact online.
To make your tour truly stand out, you'll want to use Pedra's interactive features to their full potential. Here’s a quick rundown of what you can add and where it works best.
Using Pedra's Interactive Hotspot Features
| Feature | Description | Best Use Case |
|---|---|---|
| Info Hotspot | A clickable icon that reveals a pop-up with text, images, or even video. | Perfect for calling out specific details like the brand of the kitchen appliances, the type of countertop material, or the age of the HVAC system. |
| Media Hotspot | Embeds a video or a gallery of high-resolution photos directly into the tour. | Showcasing a newly renovated bathroom with a video walkthrough, or displaying close-up shots of custom tile work. |
| Link Hotspot | An icon that links out to an external webpage. | Great for linking to the school district's website, neighborhood guides, or a spec sheet for smart home devices. |
| Audio Hotspot | Plays a short audio clip when clicked. | Use this to add a personal touch. Record a quick voice note explaining the history of the home or the benefits of the custom-built fireplace. |
Think of these tools as your secret weapons for creating a rich, informative experience that goes far beyond what a simple photo gallery can do.
Final Touches for a Professional Finish
You're almost there. With your tour built and enriched, it's time for the final polish. These are the small details that reinforce your brand and make the whole experience feel premium.
Pedra gives you plenty of control to make the tour feel like it’s yours. Here are a few things I always do before sending a tour live:
- Add Your Branding: Don't forget this! Upload your logo and set the tour's color palette to match your company's branding. It’s a simple step that screams professionalism.
- Include a Floor Plan: I highly recommend uploading a 2D floor plan. You can then link each 360° scene to its corresponding spot on the plan, giving viewers a bird's-eye view that helps them understand the layout.
- Set the Mood with Audio: This is optional, but adding some soft, ambient background music can make the property feel more inviting and create a welcoming atmosphere as people click through.
These final touches really tie everything together, leaving you with a powerful and impressive marketing tool for any listing.
Getting Your Virtual Tour in Front of Buyers
You’ve put in the work and created a fantastic virtual tour. That’s a huge win, but the job isn't quite done. Your tour is a powerful, 24/7 open house, but only if people know it exists. Think of your finished tour as the starting pistol for your marketing sprint.
The first, most crucial place for your tour is on its home turf: your website. With Pedra, embedding the tour directly onto the property's listing page is a breeze. This single move instantly makes your static listing interactive, keeping potential buyers on your site longer. Don't forget to add it to your MLS listing, too—most now have dedicated fields for virtual tours.
Use Social Media to Create Buzz
Your tour is gold for social media, but you can't just post a link and hope for the best. You're competing for attention in a fast-scrolling world.
My favorite trick is creating short, punchy video teasers. Just use a screen recorder to capture a quick, exciting clip of you "walking" through the tour's best features. Picture this: a smooth transition from the front door into a gorgeous, sun-drenched living room. Edit that down to a 15-30 second video, layer on some trending audio, and you've got perfect content for:
- Instagram Reels & Stories: Great for grabbing eyeballs and generating immediate curiosity.
- TikTok: Lets you tap into a massive audience that loves quick, engaging video content.
- Facebook: Perfect for sharing with your local sphere of influence and professional groups.
The idea is to give them just enough of a taste to make them click the link in your bio and see the whole thing. This turns passive scrollers into genuinely interested leads.
A virtual tour isn't just a cool feature; it’s a lead-generation engine. When you use this tech, you're not just marketing a home. You're showing clients you're a modern agent who brings the best tools to the table to get their property sold.
Re-Engage Your Audience with Email
Your email list is another goldmine. This tour is the perfect excuse to reach out to new leads and reconnect with past clients.
Send out an email blast dedicated to the new listing. Make the call-to-action big, bold, and clear: "Take the Virtual Tour Now." For buyers who are getting serious, this is a game-changer, letting them walk through the home again and again from their couch. To get the most out of every click, applying proven conversion rate optimization strategies can make a real difference in turning viewers into appointments.
Ultimately, getting eyeballs on your tour means putting it everywhere your potential buyers are looking. To dive deeper into building out a full promotional strategy, check out our guide on marketing real estate virtual tours. When you treat your tour as the star of your marketing show, you'll see a real impact on your engagement and, most importantly, your sales.
Your Top Virtual Tour Questions, Answered

Even after walking through the steps, you probably still have a few questions buzzing around. It's totally normal. Let's tackle some of the most common things I hear from agents when they're just starting out with virtual tours.
First up is always the gear. "Do I really need to drop thousands on a professional camera setup?" The short answer is no. While high-end equipment is always nice, you can absolutely create fantastic, professional-looking tours with a consumer-grade 360° camera. Look at models from Insta360 or the Ricoh Theta; they're affordable and powerful enough for the job.
The next big hurdle for most agents is time. We’re all busy, right? The idea of learning a new skill can feel overwhelming. But here’s the good news: this is faster than you think. Once you get the hang of it, you can shoot a standard home in under an hour. And the editing? With a platform like Pedra designed for real estate, you can stitch together the entire tour, link rooms, and add hotspots in just 15-20 minutes.
Tackling Tricky Properties
Okay, but what about those other listings? The ones with the weird, choppy floor plan or that one bedroom that feels like a cave. This is where your skill as an agent, combined with the right tools, really shines.
-
Awkward Layouts: If a property has a confusing flow, your job is to create a clear path for the viewer. Think like a tour guide. Add extra scan points in hallways, around tight corners, or at the top of stairs. Use more hotspots than you think you need to make navigation completely seamless. Your goal is to make the layout feel intuitive, not confusing.
-
Dark or Poorly Lit Rooms: This is a classic real estate photography problem. Modern 360° cameras are lifesavers here thanks to their built-in HDR (High Dynamic Range) feature. This tech automatically balances the light, so you won’t have glaring, blown-out windows next to dark, shadowy corners. Everything comes out looking crisp and clear.
A great virtual tour doesn't just show a space; it solves problems for the buyer. It can take a quirky floor plan and make it feel logical and inviting. When you master this, you have an incredibly effective tool to market any property you list.
Ready to see for yourself how easy this can be? With Pedra, creating professional virtual tours, AI-powered home staging, and beautiful renders is just a few clicks away. Give it a try and watch your listings come to life. Start creating with Pedra now.

Related Posts
3D Photography for Real Estate Guide
Explore our guide to 3D photography for real estate. Learn how immersive virtual tours can attract q...
Effective Copywriting for Real Estate to Sell Homes Fast
Discover expert copywriting for real estate that boosts property sales. Learn tips to craft compelli...
Top Floor Plan Creator Software of 2025 | Design with Ease
Explore the best floor plan creator software of 2025. Find intuitive tools and powerful features to ...