Master Real Estate Photography Lighting in 2025
Learn top real estate photography lighting techniques to make your property listings stand out. Improve your skills and boost sales today!
High-quality photos are crucial for selling properties. This listicle reveals seven real estate photography lighting techniques to elevate your listings and attract more buyers. Learn how to use natural light, flash bouncing, multiple off-camera flashes, HDR blending, the Flambient technique, twilight photography, and the window pull technique to create stunning images. Mastering real estate photography lighting is essential for showcasing properties at their best and closing deals faster.
- Natural Light Photography
Natural light photography is a cornerstone of effective real estate photography lighting. This technique harnesses the power of the sun to illuminate a property, creating images that feel warm, inviting, and authentic. It relies on understanding how sunlight interacts with a space throughout the day and strategically positioning shots to maximize its impact. This method is especially crucial for showcasing the natural light flow within a property, a key selling point for potential buyers.
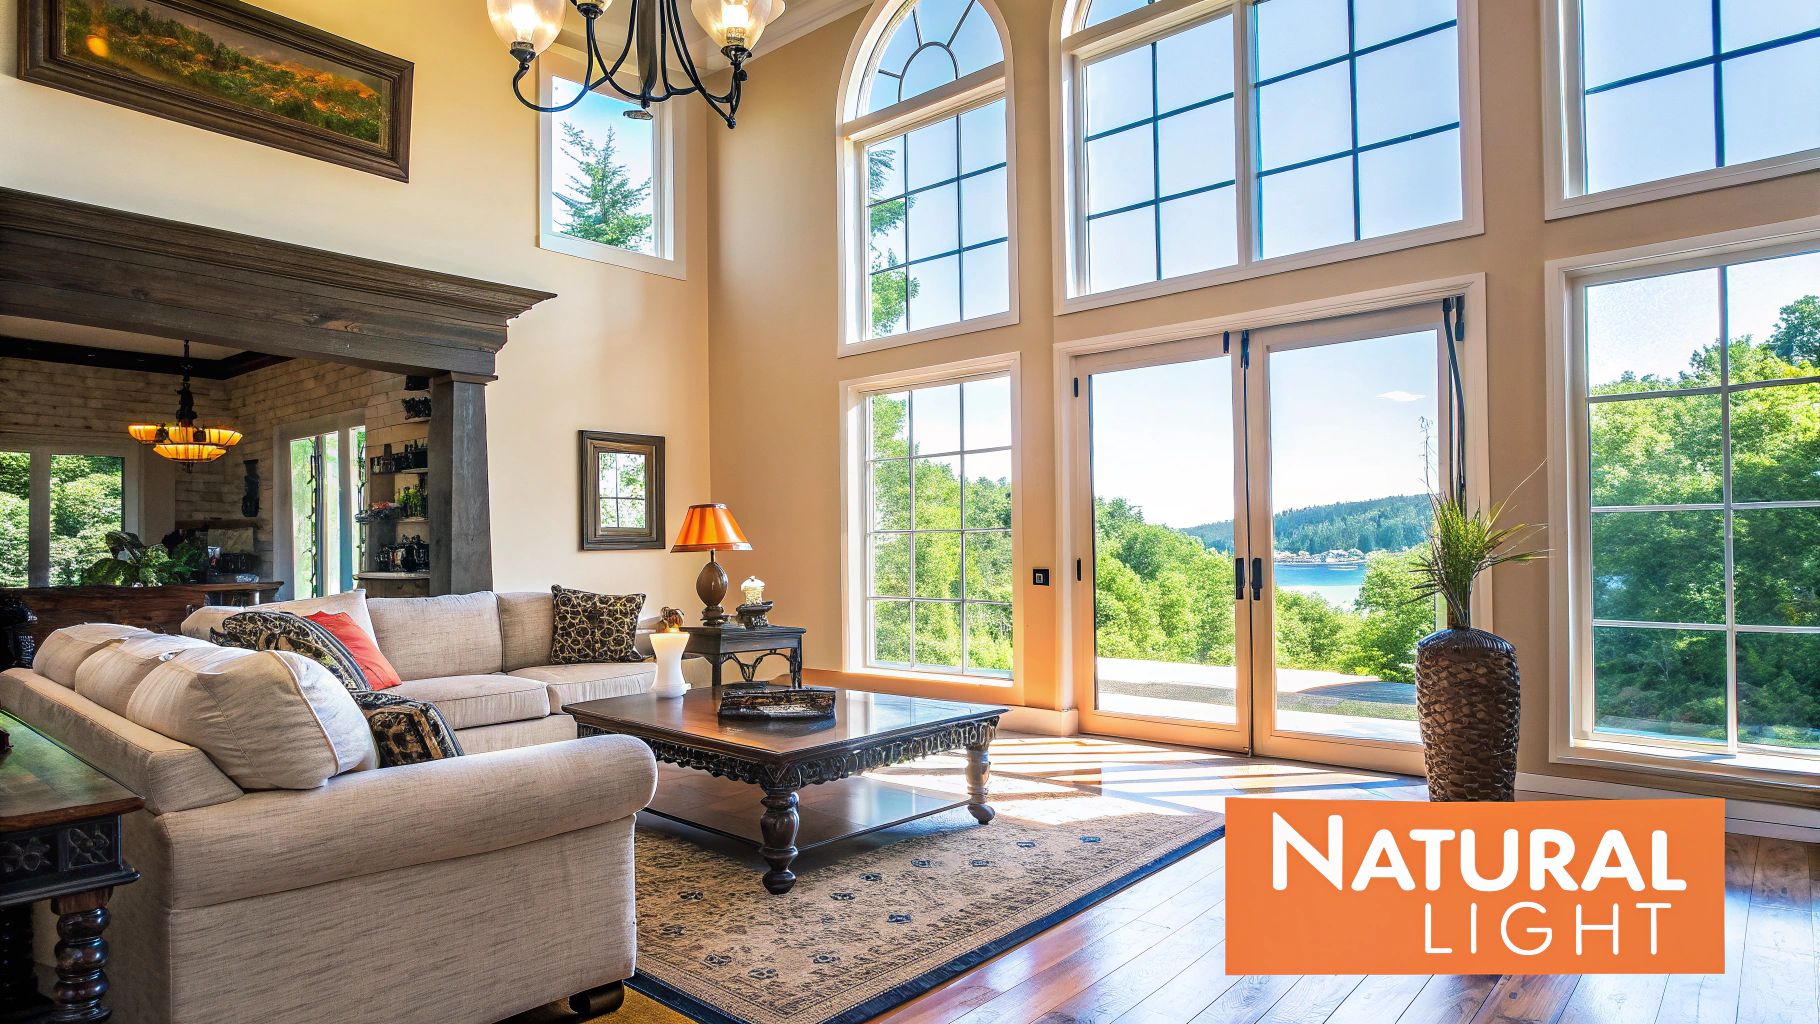
Successfully implementing natural light photography often involves shooting during the "golden hours," which are the first hour or two after sunrise and the last hour or two before sunset. These times provide a soft, warm light that enhances architectural features and creates a welcoming atmosphere. Directional light during these hours creates depth and dimension, making rooms appear more spacious and visually interesting. Think bright, airy images of coastal properties bathed in the morning sun or golden hour shots that highlight the intricate details of a building's facade. Sunlit interiors showcasing natural light streaming through windows are another excellent example of this technique's effectiveness.
For real estate agents, home staging companies, and real estate marketing firms, mastering natural light photography is essential for presenting properties in their best light. It's a cost-effective method, requiring minimal equipment beyond your camera. This approach delivers a more genuine representation of how a space actually looks to the naked eye, a significant advantage for attracting potential buyers. Learn more about Natural Light Photography .
Pros:
- Cost-effective: No specialized lighting equipment is needed.
- Creates warm, inviting images: Natural light enhances the ambiance of a space.
- Showcases the natural lighting of the property: A key selling point for buyers.
- More representative of how the space actually looks: Provides an authentic view.
- Can create dramatic shadows and highlights: Adds depth and visual interest.
Cons:
- Highly dependent on weather conditions: Overcast skies or rain can limit shooting opportunities.
- Limited shooting hours: Golden hour windows restrict scheduling flexibility.
- Difficult to control light intensity and direction: Requires adapting to the sun's position.
- Can create harsh shadows in direct sunlight: Needs careful management of light and shadow.
- May require scheduling flexibility: Working around optimal lighting times can be challenging.
Tips for Effective Natural Light Photography:
- Schedule shoots for golden hours: Aim for 1-2 hours after sunrise or before sunset.
- Use reflectors: Bounce light into shadowy areas to create a more balanced exposure.
- Clean windows thoroughly: Maximize light transmission and clarity.
- Turn off artificial lights: Prevent color temperature conflicts and maintain a consistent look.
- Use HDR techniques: Balance bright windows with darker interiors for a well-exposed image.
Natural light photography deserves its place on this list because it offers a powerful, accessible, and cost-effective way to elevate real estate photography. By understanding its principles and employing the right techniques, you can capture stunning images that showcase properties in their most appealing light and attract potential buyers.
- Flash Bouncing Technique
Flash bouncing is a crucial technique in real estate photography lighting that leverages indirect light to create a softer, more natural look. Instead of pointing your speedlight directly at the subject, you aim it at a ceiling or wall, effectively transforming that surface into a large, diffused light source. This method minimizes harsh shadows, reduces glare and reflections, and helps maintain the natural ambiance of the space. It's a relatively simple yet powerful way to elevate your real estate photos.
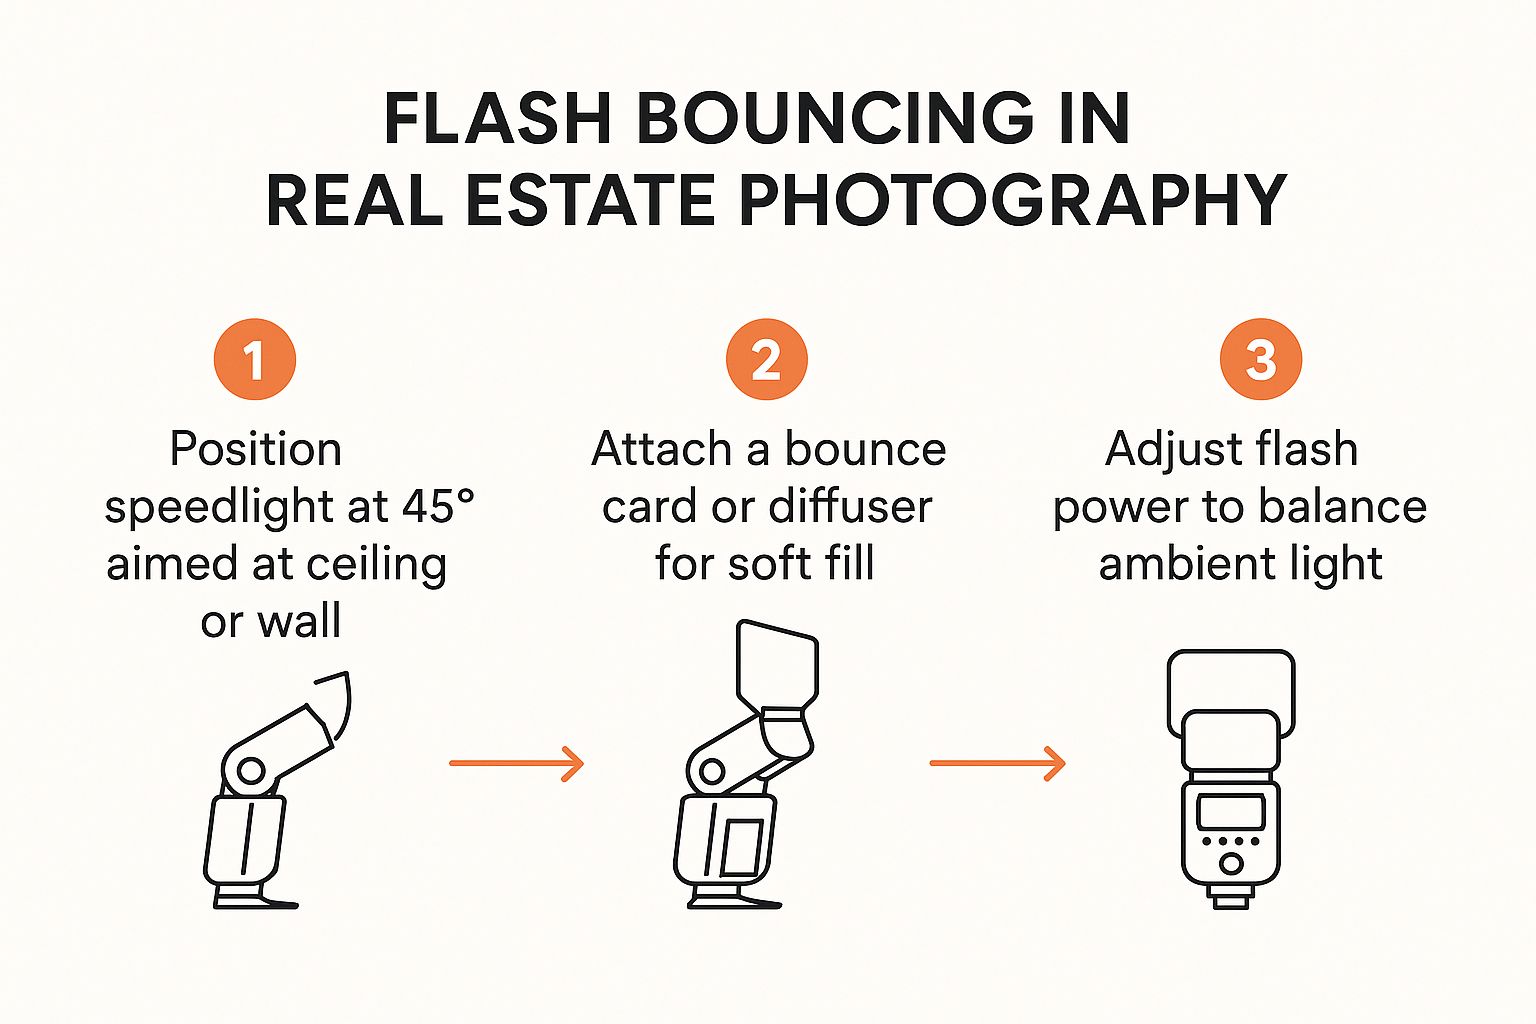
The infographic illustrates the process of achieving balanced lighting using the flash bounce technique. It starts with identifying a suitable bounce surface like a white ceiling or wall. Then, it demonstrates aiming the flash at a 45-degree angle to create diffused light. The process concludes with evaluating the resulting light and adjusting the flash power or adding a diffuser for optimal illumination. Understanding this flow is critical to consistently achieving well-lit, professional real estate photos.
For real estate agents, home stagers, and real estate marketers, mastering flash bouncing can significantly enhance property photos. Imagine capturing evenly lit living rooms bathed in balanced ambient light, kitchen photos with minimal reflections on stainless steel appliances, or interior shots that showcase the true beauty of a space with natural-looking illumination. These are just a few examples of how this technique can transform your real estate photography.
This technique deserves its place on this list because it offers a practical and effective approach to real estate photography lighting. Its benefits include soft, diffused light; reduction of harsh shadows and glare; and maintenance of a natural look, all essential for presenting properties in their best light. While more advanced lighting setups offer greater control, flash bouncing provides an excellent balance of simplicity and impressive results.
When and Why to Use Flash Bouncing:
Flash bouncing is particularly valuable in situations where direct flash would create undesirable effects, such as harsh shadows, hotspots, or unnatural-looking light. It's ideal for interior shots where you want to maintain a warm, inviting ambiance.
Tips for Effective Flash Bouncing:
- Aim for the Angle: Position your flash at a 45° angle towards the ceiling for optimal light diffusion.
- Bounce Card Boost: Use a white bounce card attached to your flash for additional fill light and to direct the light more precisely.
- Power Play: Adjust your flash power to balance with the existing ambient light, creating a natural and balanced exposure.
- Diffuse the Situation: Consider a diffuser cap for your flash to further soften the light.
- Color Conscious: Avoid bouncing off colored surfaces, as this can create unwanted color casts in your photos.
Pros and Cons:
Pros: - More flattering and natural-looking than direct flash
- Easy to learn and implement
- Requires minimal equipment
- Preserves the natural ambiance of the space
- Reduces glare and reflections
Cons: - Requires suitable bounce surfaces (white ceilings/walls are ideal)
- Less effective in rooms with high or colored ceilings
- May require higher flash power than direct flash
- Can create color casts with non-white bounce surfaces
- Offers less precise control compared to more complex lighting setups
Popularized by experts like Scott Hargis, the PFRE (Photography For Real Estate) community, and Simon Maxwell, flash bouncing has become a staple technique in real estate photography, helping professionals create stunning images that sell. By understanding the principles and applying these practical tips, you can significantly improve your real estate photography lighting and showcase properties in their best light.
- Multiple Off-Camera Flash System
For real estate photography lighting that truly elevates your images to the next level, consider the multiple off-camera flash system. This advanced technique involves strategically placing several flash units around a property, carefully concealing them from the camera's direct line of sight. Each flash acts as a controlled light source, illuminating specific areas and allowing for precise manipulation of light throughout large or challenging spaces. This method is a game-changer for achieving balanced, professional results by eliminating harsh shadows and ensuring consistent illumination across the entire frame.
This approach is a significant step up from basic flash photography and is ideal for achieving magazine-quality results. It allows you to shape the light, highlighting architectural features and creating a sense of depth and space that single light sources simply can't replicate. By controlling the power and direction of each individual flash, photographers can balance interior and exterior exposures, a particularly useful feature for showcasing views through windows without overexposing either the interior or the exterior scene.
How it Works:
The core of a multiple flash system lies in wireless triggering. A transmitter attached to the camera communicates with receivers attached to each flash unit, allowing them to fire simultaneously when you take a picture. Zoned lighting is another key component, allowing you to group flashes and control their power independently. This means you can have one group of flashes illuminating the living room at a specific power, while another group illuminates the kitchen at a different power, all controlled from your camera position.
Features and Benefits:
- Multiple light sources placed strategically: Offers pinpoint control over light direction and intensity.
- Wireless triggering system: Enables convenient control of all flashes from the camera.
- Zoned lighting approach: Allows independent power adjustment for different groups of flashes.
- Hidden light placement: Prevents flashes from appearing in the final image, maintaining a clean and professional look.
- Independent power control for each flash: Ensures perfectly balanced exposure throughout the scene.
Pros:
- Complete control over lighting in any environment: Conquer challenging lighting scenarios with ease.
- Consistent illumination throughout space: Achieve even lighting, eliminating dark corners and harsh shadows.
- Ability to light multiple rooms or large areas: Perfect for capturing expansive spaces in a single shot.
- Can balance interior and exterior exposure: Showcase stunning views without compromising interior lighting.
- Creates professional, magazine-quality images: Elevate your real estate photography to a higher standard.
Cons:
- Requires significant investment in equipment: The initial cost of multiple flashes, triggers, and stands can be substantial.
- More complex setup and longer shooting time: Positioning and adjusting multiple flashes takes more time and planning compared to simpler setups.
- Steeper learning curve: Mastering this technique requires practice and understanding of lighting principles.
- More post-processing may be required: While the goal is perfect lighting in-camera, some fine-tuning in post-production might still be necessary.
- Equipment transportation and setup logistics: Managing multiple pieces of equipment can be cumbersome, especially for on-location shoots.
Examples of Successful Implementation:
- High-end luxury property photography, where showcasing the details and ambiance is crucial.
- Magazine-quality interior spreads, demanding perfectly balanced and consistent lighting.
- Complex multi-room shots with perfect lighting balance, capturing the flow and connection between spaces.
Tips for Using Multiple Off-Camera Flashes:
- Hide flashes behind furniture or doorways: This diffuses the light and creates a more natural look.
- Use light stands or clamps to position flashes: Ensure stability and precise positioning.
- Set flashes to different power levels based on zone needs: Balance light across different areas of the scene.
- Create lighting diagrams before complex shoots: Planning ahead saves time and ensures a smooth workflow.
- **Use color-coded flash groups for easier management:**Quickly identify and adjust specific groups of flashes.Popularized By: Experts like Scott Hargis (author of 'Lighting Interiors'), Mike Kelley, Barry MacKenzie, and Rich Baum have championed and popularized this technique within the real estate photography community. Their work showcases the incredible potential of multiple flash photography for creating stunning and impactful images.
This video provides a practical demonstration of setting up and using multiple off-camera flashes for real estate photography.
While the multiple off-camera flash system demands more investment and expertise, the results speak for themselves. This technique justifies its place on this list by offering unparalleled control over real estate photography lighting, empowering you to create truly professional and captivating images that impress clients and sell properties. This method is particularly valuable for real estate agents, home staging companies, and real estate marketing firms looking to present properties in the best possible light, highlighting their key features and creating an inviting atmosphere.
- HDR (High Dynamic Range) Blending
HDR (High Dynamic Range) blending is a powerful technique in real estate photography lighting that allows you to capture the full range of light in a scene, from the brightest highlights to the darkest shadows. This is particularly important in interior real estate photography, where bright windows and dimly lit rooms often exist in the same shot. The process involves taking multiple photos of the same composition at different exposures – typically underexposed, correctly exposed, and overexposed – and then merging them together in post-processing software. This technique overcomes the limitations of a camera's sensor, which often struggles to capture the entire spectrum of light in high-contrast scenes.
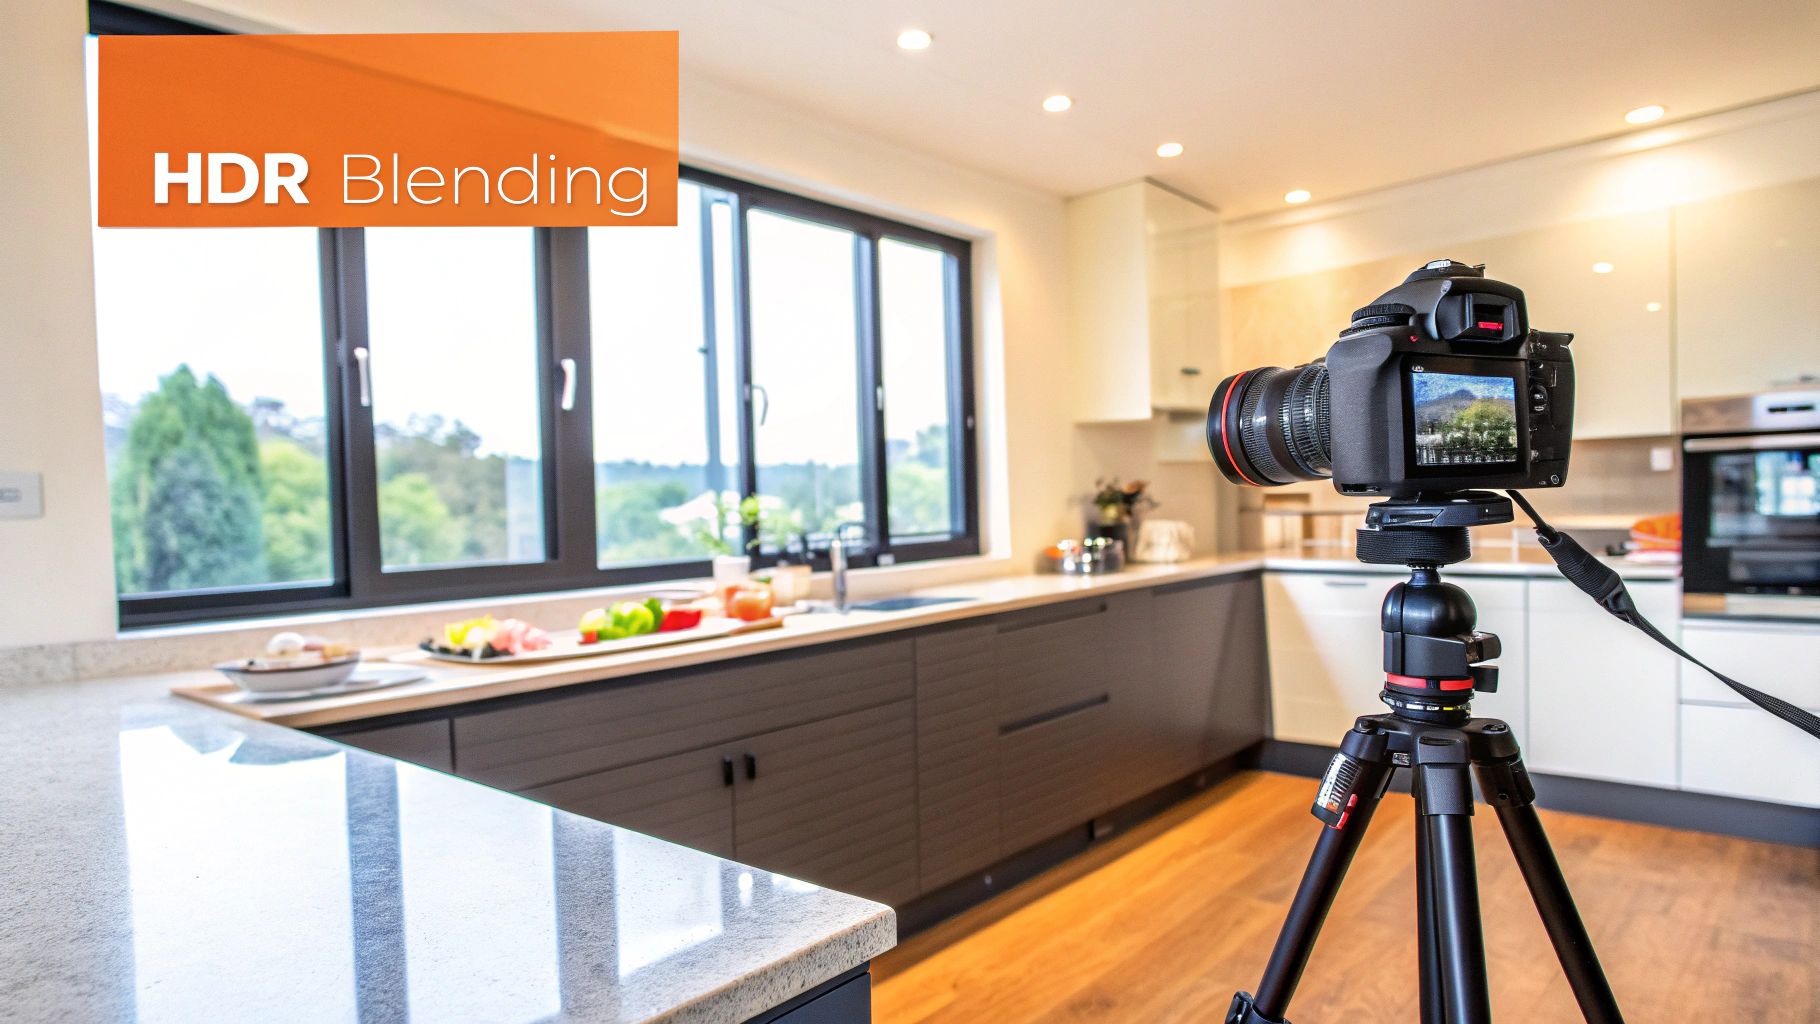
This method is essential for real estate photography because it preserves details in both bright windows and darker interior spaces. Imagine a living room with large windows overlooking a sunny garden. Without HDR, you might capture the garden view perfectly, but the interior would appear too dark. Conversely, exposing for the interior might result in blown-out windows, losing the attractive outdoor view. HDR blending solves this problem by combining the best aspects of each exposure, resulting in a balanced and appealing image. This reduces the need for complex and time-consuming lighting setups, making it an efficient technique for high-volume real estate photography. Features like multiple exposure bracketing and software-based blending make this a highly accessible technique.
HDR blending offers real estate agents, realtors, and real estate companies a significant advantage by showcasing properties in the best possible light. The ability to capture details in both highlights and shadows creates more inviting and realistic images, crucial for attracting potential buyers. It's especially effective for twilight exterior shots, where balancing the interior lights with the darkening sky can be challenging. Think of a beautifully lit home at dusk – HDR can capture that magical ambiance perfectly.
While HDR offers many benefits, it's crucial to avoid over-processing, which can lead to an unnatural, almost cartoonish look. The key is to aim for a natural and balanced result. Learn more about HDR (High Dynamic Range) Blending for detailed insights into post-processing techniques.
Pros:
- Captures detail in bright windows and dark interiors simultaneously.
- Can be accomplished with minimal equipment.
- Works well for twilight exterior shots.
- Flexible processing options (subtle to dramatic).
- Efficient for high-volume shooting.
Cons:
- Can look artificial if over-processed.
- Requires post-processing expertise.
- Multiple exposures can increase the chance of alignment issues (using a tripod is crucial).
- Not ideal for properties with moving elements (e.g., curtains blowing in the wind).
- Some clients might prefer flash-based approaches for more control.
Tips for Successful HDR Blending:
- Use a sturdy tripod to ensure perfect alignment between exposures.
- Bracket 3-7 exposures, typically 2 stops apart.
- Use a remote trigger to prevent camera movement during exposure.
- Explore different HDR software options like Photomatix, Aurora HDR, and Lightroom to find what works best for you.
- Aim for natural-looking results by avoiding over-processing.
HDR blending deserves its place in this list due to its effectiveness in handling challenging lighting situations commonly encountered in real estate photography. It allows photographers to create stunning, balanced images that showcase properties in their best light, ultimately helping real estate professionals attract more clients and close more deals. This technique, popularized by photographers like Brian Berkowitz, Nathan Cool, and Trey Ratcliff (who contributed to the broader popularization of HDR), has become a staple in the real estate photography toolkit.
- Flambient Technique: The Best of Both Worlds in Real Estate Photography Lighting
The Flambient technique is a powerful approach to real estate photography lighting that seamlessly blends the best aspects of flash and ambient light. This hybrid method allows you to capture the controlled, even illumination of flash while preserving the natural feel and beauty of existing ambient light, especially crucial for showcasing window views and exterior scenery. This technique is a staple for many real estate photographers, offering a balanced and appealing look that elevates property listings.
How it Works:
Flambient involves taking two separate exposures:
- Flash Exposure: A flash, often bounced off the ceiling or a wall, illuminates the interior, providing even lighting and eliminating shadows. This exposure prioritizes correctly exposing the interior space.
- Ambient Exposure: A second exposure is taken without flash, exposing for the ambient light. This is crucial for capturing details outside windows and ensuring the view isn't blown out or underexposed. This exposure prioritizes the view through the windows.
These two exposures are then blended together in post-processing software like Photoshop, using techniques like layer masking and luminosity masks to combine the best parts of each image.
Examples of Successful Implementation:
- Living Rooms: Imagine a brightly lit living room with a stunning view of the ocean. Flambient allows you to showcase both the room's interior details, evenly lit by the flash, and the vibrant colors of the ocean view, correctly exposed through the ambient shot.
- Kitchens: Flambient prevents kitchens from looking overly artificial, which can happen with pure flash photography. By blending in ambient light, the kitchen maintains a natural feel while still benefiting from the flash's even illumination.
- Twilight Exteriors: Flambient can be used for exteriors too. The flash exposure illuminates the home's interior through the windows, while the ambient exposure captures the beautiful twilight sky.
Tips for Mastering Flambient:
- Single Flash, Bounced Light: For the flash exposure, a single flash unit bounced off the ceiling or a wall is often sufficient. This creates soft, diffused light that evenly fills the room.
- Expose for the Highlights (Ambient): Ensure your ambient exposure is properly adjusted for the brightest parts of the image, typically the windows or the view outside. This prevents overexposure and preserves details.
- Precise Blending with Layer Masks: Layer masks in Photoshop are essential for accurately blending the two exposures. This allows you to selectively reveal and conceal parts of each image, seamlessly combining them.
- Luminosity Masks (Advanced): For even more control and refinement, explore luminosity masks. These masks allow for blending based on the brightness values of the image, creating a more natural and sophisticated result.
- Consistent White Balance: Maintain a consistent white balance between the flash and ambient exposures to avoid color discrepancies in the final image.
Pros and Cons of Flambient:
Pros: - More natural and inviting appearance compared to pure flash.
- Less equipment required compared to complex multi-flash setups.
- Superior control over lighting compared to relying solely on ambient light.
- Excellent preservation of window views and exterior details.
- Works effectively in various lighting conditions.
Cons: - Requires post-processing skills and knowledge of software like Photoshop.
- More time-consuming than single-exposure techniques.
- There is a learning curve to mastering the blending process.
- Still requires investment in flash equipment.
- Careful alignment of multiple exposures is crucial.
Why Flambient Deserves Its Place on the List:
Flambient offers a significant advantage in real estate photography lighting by providing a realistic yet polished look that appeals to potential buyers. It bridges the gap between the artificiality of pure flash and the limitations of solely ambient light. While it requires some post-processing expertise, the results—beautifully lit interiors with stunning window views—justify the effort. This technique, popularized by figures like Rich Baum, Nathan Cool (author of "Flambient Real Estate Photography"), and the Photography For Real Estate (PFRE) community, has become a go-to method for achieving professional-quality real estate images. By mastering this technique, real estate agents, home staging companies, and real estate marketers can significantly enhance their property listings and attract more potential buyers.
- Twilight/Blue Hour Photography
Twilight/Blue Hour photography is a powerful technique in real estate photography lighting that leverages the brief period after sunset, when the sky takes on a rich, deep blue hue. This magical window, typically lasting just 15-30 minutes, offers a unique opportunity to capture stunning images that significantly enhance a property's appeal. By balancing the fading natural light with the warm glow of interior and exterior artificial lighting, you can create a captivating contrast that highlights architectural features, landscape design, and the overall ambiance of the property. This technique is especially effective for luxury properties, often serving as the hero shot in marketing materials, brochures, and online listings.
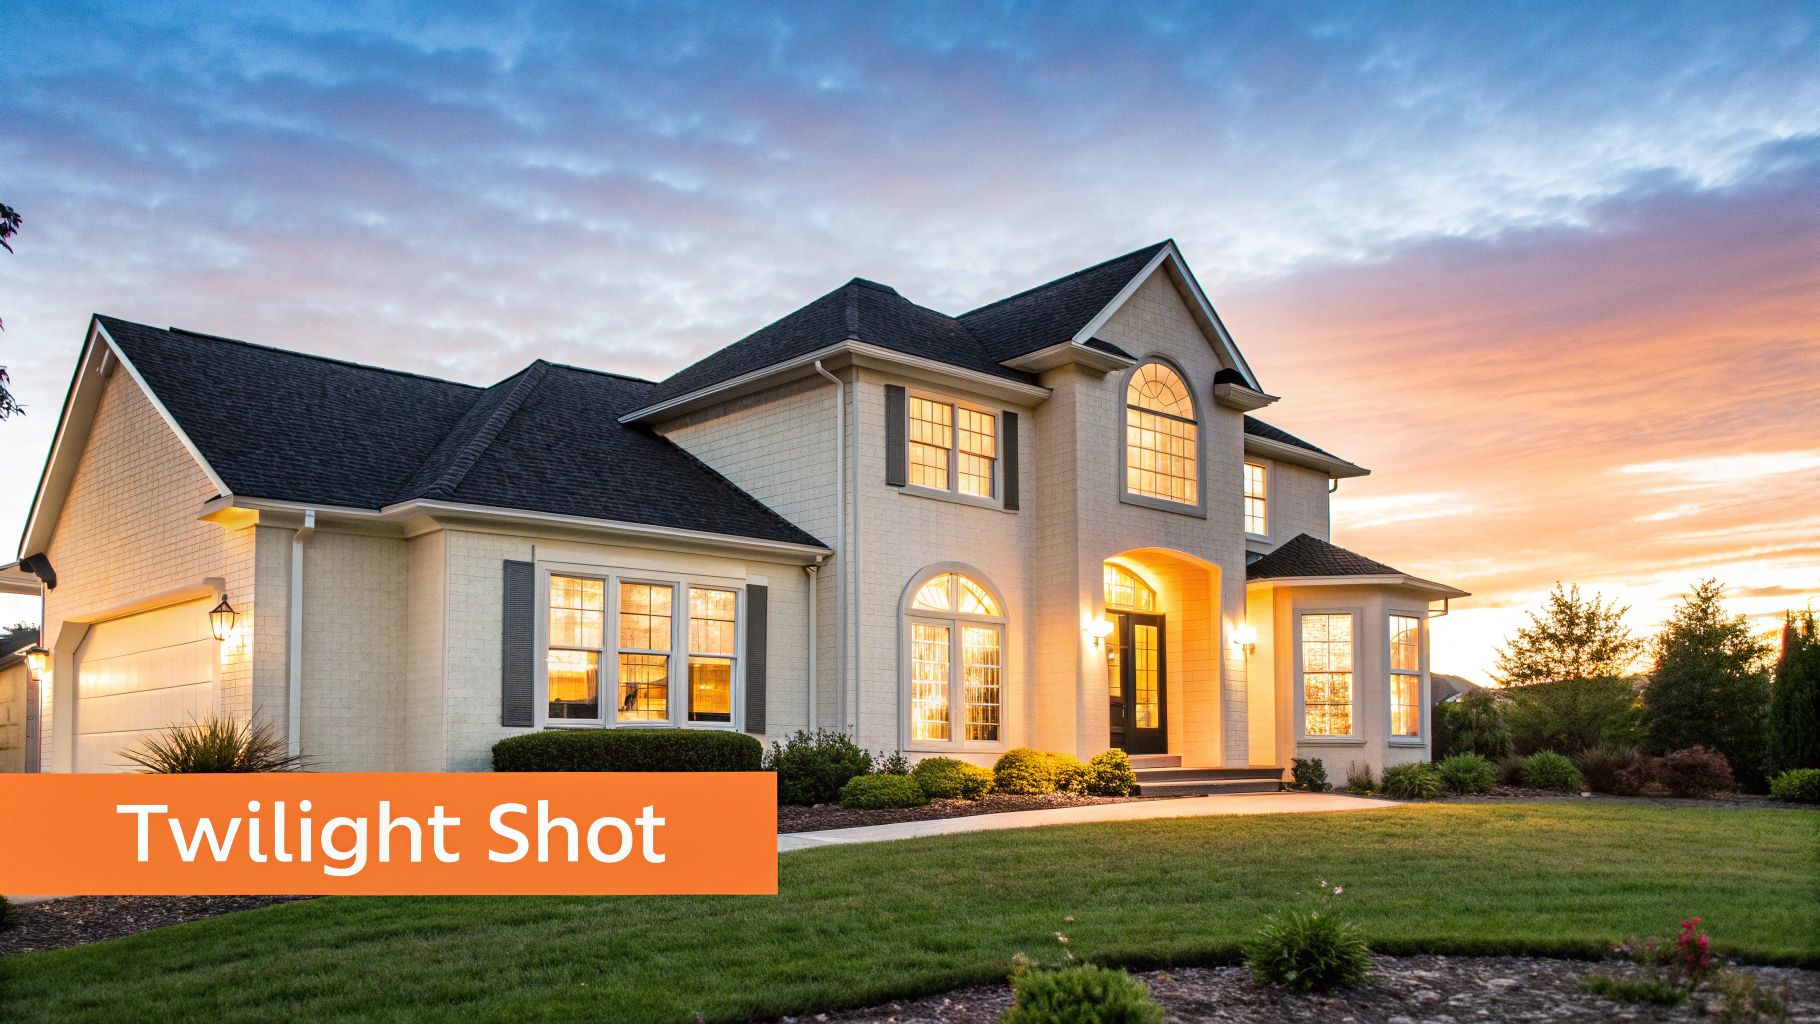
This approach is particularly valuable for showcasing properties with thoughtful lighting design, such as modern architectural homes with dramatic uplighting or estate properties with carefully planned landscape lighting. Imagine a luxury beachfront property with an illuminated pool reflecting the deep blue sky – this is the kind of high-impact imagery twilight photography excels at. For real estate agents, realtors, and real estate companies looking to elevate their marketing, mastering real estate photography lighting, especially blue hour techniques, is crucial. It allows you to create images that evoke emotion and luxury, ultimately making properties more desirable to potential buyers.
Why use Twilight/Blue Hour Photography?
The benefits are numerous. Twilight photography creates images with a dramatic, emotional impact that grabs attention and leaves a lasting impression. This translates to a stronger marketing appeal for the property and often commands premium rates from photographers specializing in this technique. Highlighting architectural and landscape lighting adds another layer of sophistication, making properties appear more luxurious and desirable. Think illuminated pools shimmering under the twilight sky, or the warm glow emanating from strategically placed exterior lights, creating a welcoming and inviting atmosphere.
Pros:
- Creates high-impact, emotional images
- Commands premium rates from photographers
- Significantly enhances property marketing appeal
- Highlights thoughtful architectural lighting
- Makes properties appear more luxurious
Cons:
- Very time-restricted shooting window
- Weather-dependent
- Requires advanced planning and timing
- May require portable lighting for dark areas
- Limited to 1-3 properties per evening
Tips for Successful Twilight Photography:
- Arrive Early: Scouting the location beforehand allows you to plan compositions and identify the best angles to capture the property during the short blue hour window.
- Light it Up: Ensure all interior and exterior lights are turned on before you begin shooting. This creates the warm/cool contrast that defines twilight photography.
- Bracket Exposures: Bracketing your exposures allows for HDR blending in post-processing, ensuring you capture all the detail in both the bright sky and the darker areas of the property.
- Portable Lighting: Bring portable lights to illuminate any dark areas that need a boost, ensuring a balanced exposure throughout the image.
- Timing is Key: Schedule your shoot for 20-30 minutes after sunset for the optimal blue sky. This window can vary depending on location and time of year.
- Clean Reflections: If the property features a pool or other reflective surfaces, ensure they are clean for the best results.
Pioneered by photographers like Mike Kelley, Wayne Capili, and Scott Hargis, twilight photography has become a staple in high-end real estate marketing. Learn more about Twilight/Blue Hour Photography and how it relates to choosing the right equipment. By understanding and implementing these tips, you can leverage the power of twilight photography to elevate your real estate photography lighting and capture truly stunning images that sell.
- Window Pull Technique
One of the trickiest aspects of real estate photography lighting is balancing the bright light from windows with the comparatively darker interior of a room. Often, a single exposure will either properly expose the interior, leaving the windows completely blown out (white and featureless), or expose for the window view, leaving the interior too dark. This is where the window pull technique comes in, offering a solution to this common challenge and earning its place as a key technique in professional real estate photography.
This method utilizes multiple exposures, combined in post-processing, to achieve a perfectly balanced image showcasing both the interior and the exterior view. Essentially, you take one photo exposed for the interior and another exposed for the window view, then blend them seamlessly in editing software like Photoshop. This "pulls" the detail back into the windows, revealing the scenery outside while maintaining a properly lit interior.
How it Works:
- Set Up Your Tripod: A stable tripod is essential for the window pull technique because you need precise alignment between your exposures. Any shift in the camera's position will make blending the images much harder.
- Manual Exposure Mode: Shoot in manual mode to maintain consistent settings across your exposures. This ensures a seamless blend and prevents variations in white balance or depth of field.
- Capture the Interior: Take a photo exposed for the interior of the room, potentially using flash or ambient light. The window view will likely be overexposed in this shot, but that's okay.
- Capture the Exterior View: Without moving the camera, adjust your exposure settings to properly expose the view through the window. The interior will appear underexposed in this frame.
- Post-Processing Blend: Import both images into an editing program like Photoshop. Using layer masks and blending modes (typically luminosity masks), combine the properly exposed window from one image with the properly exposed interior from the other.
Examples of Successful Implementation:
- Urban Condos: Imagine a stunning city skyline view through floor-to-ceiling windows. The window pull technique allows you to capture both the luxurious interior of the condo and the vibrant cityscape without compromise.
- Oceanfront Properties: Capture the breathtaking ocean vista while also showcasing the interior details of a beachfront property. This technique is perfect for highlighting the key selling feature: the view.
- Mountain Homes: Preserve the beauty of a mountain landscape visible through large windows while also showcasing the cozy interior of a mountain home.
Tips for Success:
- Keep your aperture constant between shots to maintain a consistent depth of field.
- Use luminosity masks in Photoshop for the most natural-looking blends.
- Consider shooting during early morning or late evening when the difference between interior and exterior light levels is less extreme, simplifying the blending process.
Pros:
- Showcases both interior details and exterior views.
- Creates more appealing and valuable marketing images.
- Preserves the crucial selling feature of appealing views.
- Provides a more realistic representation of how humans experience a space.
- Works for a variety of views: city, water, landscape, etc.
Cons:
- Requires a tripod and precise camera positioning.
- Can be time-consuming in post-processing.
- Requires software proficiency with layering and masking.
- Can look artificial if poorly executed.
Why This Technique Deserves Its Place:
The window pull technique is a powerful tool for real estate photographers because it addresses a fundamental challenge in real estate photography lighting: balancing interior and exterior exposures. By mastering this technique, real estate agents and marketing companies can showcase properties in the most attractive and realistic light possible, maximizing their appeal to potential buyers. This technique, popularized by experts like Barry MacKenzie, Tony Colangelo, and the PFRE (Photography For Real Estate) community, has become a staple for achieving professional-quality results.
7 Real Estate Lighting Techniques Compared
| Technique | 🔄 Implementation Complexity | ⚡ Resource Requirements | 📊 Expected Outcomes | 💡 Ideal Use Cases | ⭐ Key Advantages |
|---|---|---|---|---|---|
| Natural Light Photography | Low – dependent on timing/weather | Minimal – camera, tripod, reflectors | Warm, authentic, naturally lit spaces | Daytime shoots, properties with good sunlight | Cost-effective, natural look, dimensionality |
| Flash Bouncing Technique | Low to moderate | Minimal – speedlight, bounce cards/diffusers | Soft, even illumination, reduced harsh shadows | Interior rooms with suitable bounce surfaces | Flattering, natural-like lighting, simple setup |
| Multiple Off-Camera Flash System | High – complex multi-unit setup | High – multiple flashes, triggers, stands | Balanced, shadow-free, professional quality | Large/complex interiors, luxury real estate | Precise lighting control, consistent illumination |
| HDR (High Dynamic Range) Blending | Moderate – requires multiple exposures + post-processing | Moderate – tripod, HDR software | Balanced exposure, details in shadows & highlights | Interiors with bright windows, twilight shots | Captures full dynamic range, flexible editing |
| Flambient Technique | Moderate – hybrid capture + blending | Moderate – flash(s), tripod, editing software | Natural look with balanced interior & exterior lighting | Mixed light conditions, window view preservation | Combines best of flash & ambient, less equipment than multi-flash |
| Twilight/Blue Hour Photography | Moderate to high – narrow time window, precise timing | Moderate – tripod, low-light camera, optional lighting | Dramatic, emotional images with sky contrast | Luxury exteriors, evening marketing shots | High-impact, luxurious appeal, unique atmosphere |
| Window Pull Technique | Moderate – multiple exposures + blending | Moderate – tripod, editing software | Properly exposed interiors with detailed window views | Properties with valuable views (city, water, landscape) | Detailed windows + interiors, realistic presentation |
Picture Perfect: Taking Your Real Estate Photography to the Next
Level
Mastering real estate photography lighting is crucial for showcasing properties in their best light, quite literally. From harnessing the power of natural light and the flash bouncing technique to exploring advanced methods like HDR blending, flambient, and twilight photography, the techniques covered in this article provide a strong foundation for capturing stunning images that grab attention. Remember, the window pull technique can also dramatically improve interior shots by balancing the exposure between the bright outdoors and the darker indoors. Effective real estate photography lighting isn't just about technical skill; it's about creating an emotional connection with potential buyers, highlighting a property's best features, and ultimately, driving sales.
To further enhance your real estate photography skills and take your images to the next level, consider investing in professional real estate photography training . Specialized courses, like the
- Formation Photo Immobilière : Gagnez en Professionnalisme
- from Gepetto, can provide in-depth knowledge of advanced lighting techniques, post-processing, and other essential aspects of real estate photography. This will not only refine your technical abilities but also help you develop a keen eye for composition and storytelling through imagery.
By consistently practicing these techniques and exploring new approaches to real estate photography lighting, you'll develop a unique style that sets your work apart. The ability to effectively use light will transform your images, making properties look more inviting and spacious. This directly translates to increased buyer interest and faster sales. Ready to elevate your real estate photography and streamline your workflow? Explore the power of Pedra , an AI-powered tool designed to enhance your images and help you present properties in the most compelling way possible, taking your lighting expertise to the next level.

Related Posts
Top 7 AI Room Decoration Tools for 2025
Discover the best AI room decoration software for 2025. Our review compares top tools to help you de...
9 Curb Appeal Ideas on a Budget That Actually Work (2025)
Transform your home's exterior with our top curb appeal ideas on a budget. Get easy, high-impact tip...
10 Essential Curb Appeal Improvements for 2025
Discover 10 essential curb appeal improvements to boost property value. This guide for real estate p...