Videography for Real Estate: Your Essential Guide
Learn videography for real estate with our expert guide. Discover pro techniques to capture stunning property videos that sell faster. Start now!
In real estate, great photography is the price of entry. But professional video? That's how you win the game. It's no longer some fancy add-on for luxury listings; it's a powerful tool that helps you connect with serious buyers and get properties sold, faster.
A great video does something photos just can't—it creates an emotional connection. It lets a potential buyer walk through a home, get a feel for the layout, and experience its unique character before they even book a showing.
Why Professional Video Is a Game-Changer
Let's be real. A shaky smartphone walkthrough or a glorified photo slideshow just doesn't cut it anymore. Today's buyers are used to high-quality content everywhere else in their lives, and they expect nothing less when they're shopping for a home. Professional videography for real estate is all about meeting—and exceeding—that expectation.
Video bridges the gap between a flat, 2D floor plan and the real-life experience of being in a space. A well-produced video takes the viewer on a journey. It shows how the entryway flows into the living room, how the morning sun pours into the kitchen, and what it feels like to stand on the back patio. You're not just listing features; you're selling a lifestyle.
From Static Images to Genuine Desire
High-quality photos are table stakes, but they only give you isolated moments in time. Video, on the other hand, tells a complete story.
It builds a sense of discovery as the camera glides from the front door, through the heart of the home, and out to the backyard oasis. This carefully crafted narrative is what sparks a genuine emotional response.
The real job of a real estate video isn't just to show off a property. It's to make a buyer feel like they've already found their way home. It turns a simple listing into a place where they can start picturing their future.
This isn't just a gut feeling; the numbers back it up. Listings that feature video can pull in up to 157% more organic traffic from search engines. On top of that, a whopping 73% of homeowners say they'd rather list with an agent who uses video. The crazy part? Only about 10% of agents are actually doing it, which leaves a huge opening for you to stand out. You can dive deeper into these real estate video insights to see the full impact.
Before we move on, let's summarize the key advantages. This table breaks down exactly how video can elevate your business.
Core Benefits of Real Estate Videography
| Benefit Area | Specific Impact | Supporting Statistic |
|---|---|---|
| Increased Engagement | Videos capture attention and keep potential buyers on your listing longer. | Listings with video can get up to 157% more search traffic. |
| Client Acquisition | Demonstrates a commitment to modern marketing, attracting more sellers. | 73% of homeowners prefer to list with agents who use video. |
| Lead Quality | Viewers get a true feel for the home, leading to more qualified inquiries. | Video pre-qualifies buyers, reducing time wasted on casual browsers. |
| Brand Perception | Positions you as a premium, tech-savvy agent in a crowded market. | Only ~10% of agents are using video, creating a clear opportunity. |
Ultimately, investing in video isn't just about one listing; it's about building a stronger brand and a more efficient business.
The Clear Business Case for Video
Bringing professional video into your marketing mix isn't an expense—it's a strategic investment that pays off in real, measurable ways.
Think about it:
- You'll attract more sellers. Homeowners want to know you're using the best tools available to market their most valuable asset. A polished video portfolio speaks volumes.
- You'll get better leads. An immersive video tour helps weed out the tire-kickers. The people who call you after watching are already invested and serious.
- You'll dominate online. Search engines and social media platforms love video. Their algorithms will push your listings in front of far more people.
At the end of the day, professional videography sends a clear signal that you operate at a higher level. It builds instant trust with both buyers and sellers, and that trust is what gets deals done.
Building Your Real Estate Videography Kit
Jumping into videography for real estate can feel overwhelming. You see all this expensive gear and hear a ton of technical jargon, and it's easy to think you need a Hollywood budget to get started. But I'm here to tell you that's not the case. The real secret is investing smartly in the right tools that give you the most bang for your buck.
Think of your gear as the foundation. Your skill and eye are what truly matter, but the right equipment makes getting that polished, professional look so much easier. Let's walk through what you actually need to build a solid real estate videography kit, from starting on a shoestring to stepping up your game.
Choosing Your Camera
The camera is the heart of your setup, but "the best" one is simply the one that fits your needs and your budget. You've got great options at every price point.
- Smartphones: Seriously, don't sleep on the phone in your pocket. The latest iPhones or Google Pixels shoot incredible 4K video. With a few key accessories, a smartphone is more than capable of producing beautiful listing videos, especially if you're just dipping your toes in the water.
- Mirrorless Cameras: When you're ready to make a leap in quality, a mirrorless camera is the next logical step. You'll get a huge boost in creative control and image quality. I've seen fantastic work from popular models like the Sony A7 series , Canon's EOS R line, or even Fuji cameras. Their ability to perform in low light and use different lenses gives you that cinematic look.
The goal is always to look professional. Authenticity is great, but when you're marketing a property, the production quality is a direct reflection of your brand. A shaky, poorly lit video can honestly do more harm than good.
While you're building your video skills, don't let your photography get rusty. For a deep dive into that side of things, check out our complete guide to real estate photography .
Essential Lenses for Real Estate
If you go the mirrorless route, your lens choice might be even more important than the camera body itself. The lens is what shapes the perspective and feel of every shot.
A wide-angle lens, typically in the 16-35mm range, is absolutely non-negotiable for interiors. It's what lets you capture an entire room without making it feel distorted or cramped. This is the magic wand for making smaller bedrooms or bathrooms feel spacious and inviting.
I also recommend adding a standard "nifty fifty" ( 50mm) lens to your bag for detail shots. It's perfect for focusing on those high-end finishes, unique architectural details, or little lifestyle touches that help tell the home's story.
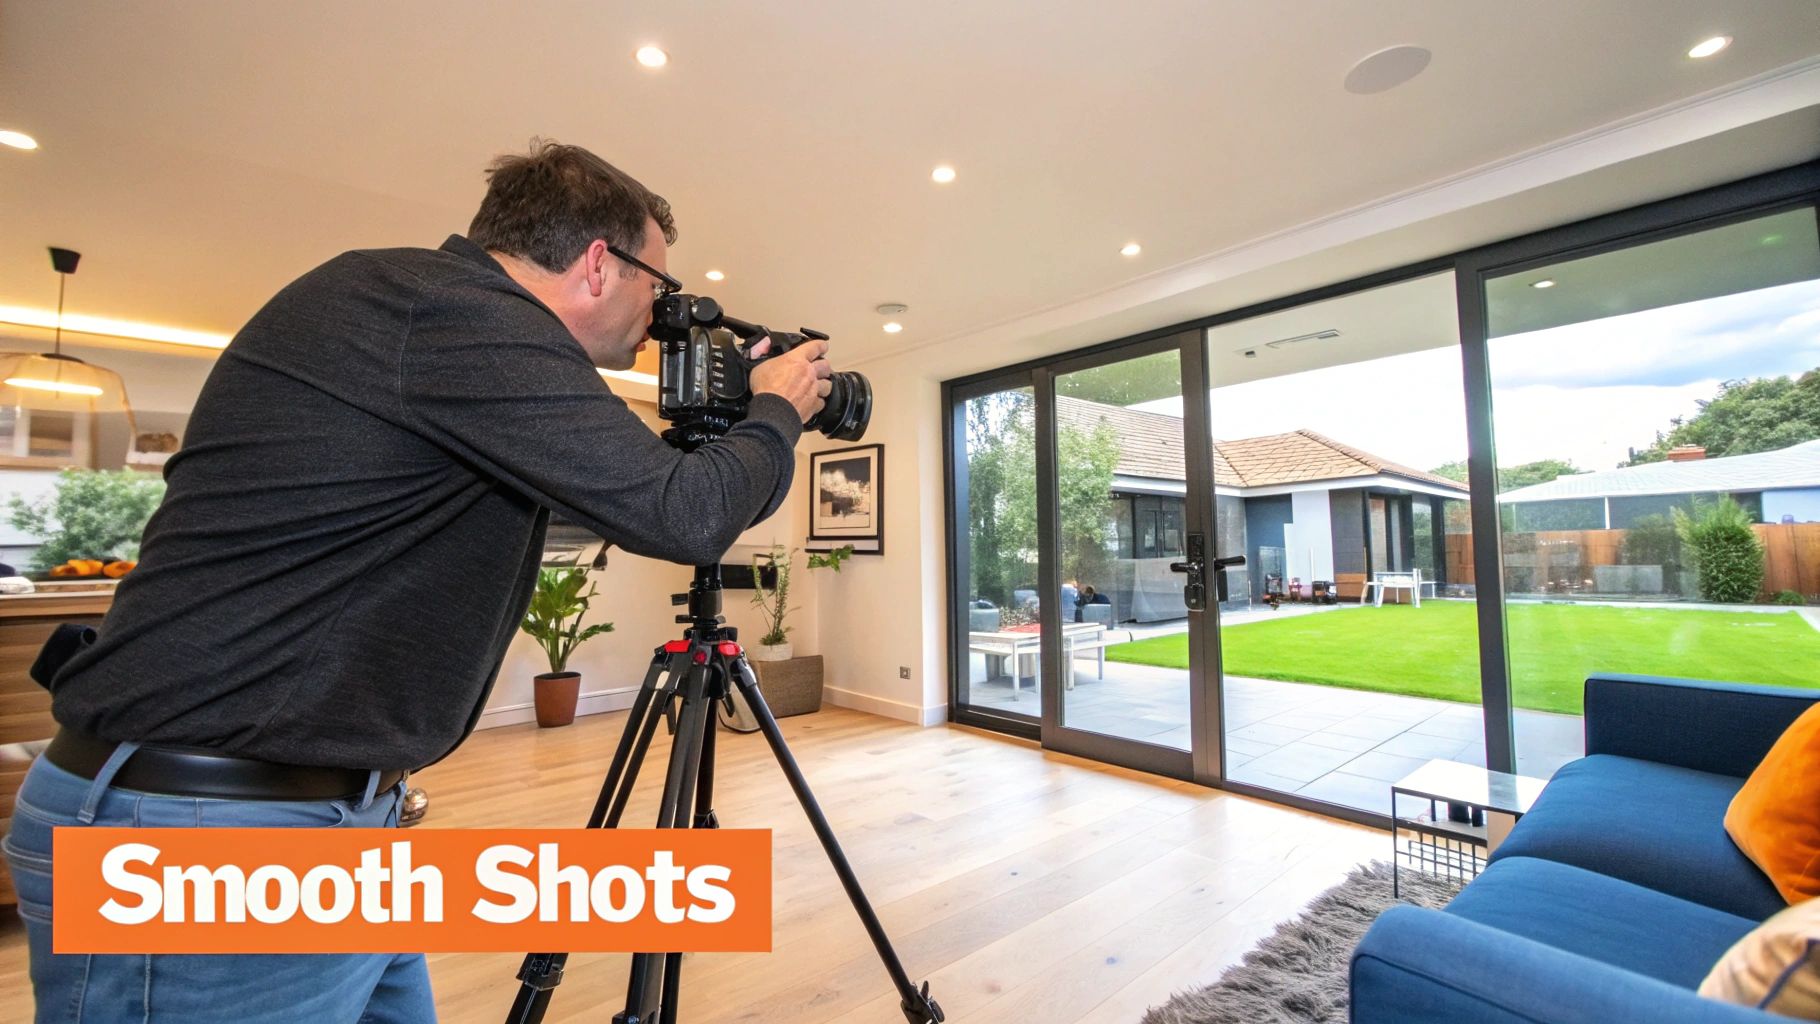
Achieving Smooth and Stable Shots
Nothing screams "amateur" louder than shaky footage. Smooth, deliberate camera movements are what create that high-end, cinematic experience buyers love.
Here's how you get that buttery-smooth look:
- Gimbal: This is the single most important accessory you can buy for video. A gimbal is a handheld stabilizer that uses motors to smooth out your movements as you walk. Whether it's on a smartphone or a bigger camera, a gimbal from a company like DJI or Zhiyun will instantly make your footage look ten times more professional.
- Tripod: While a gimbal is for your moving shots, a good old-fashioned tripod is essential for static ones. Use it to lock down a shot of a room, get a slow and perfectly controlled pan, or film yourself doing an introduction.
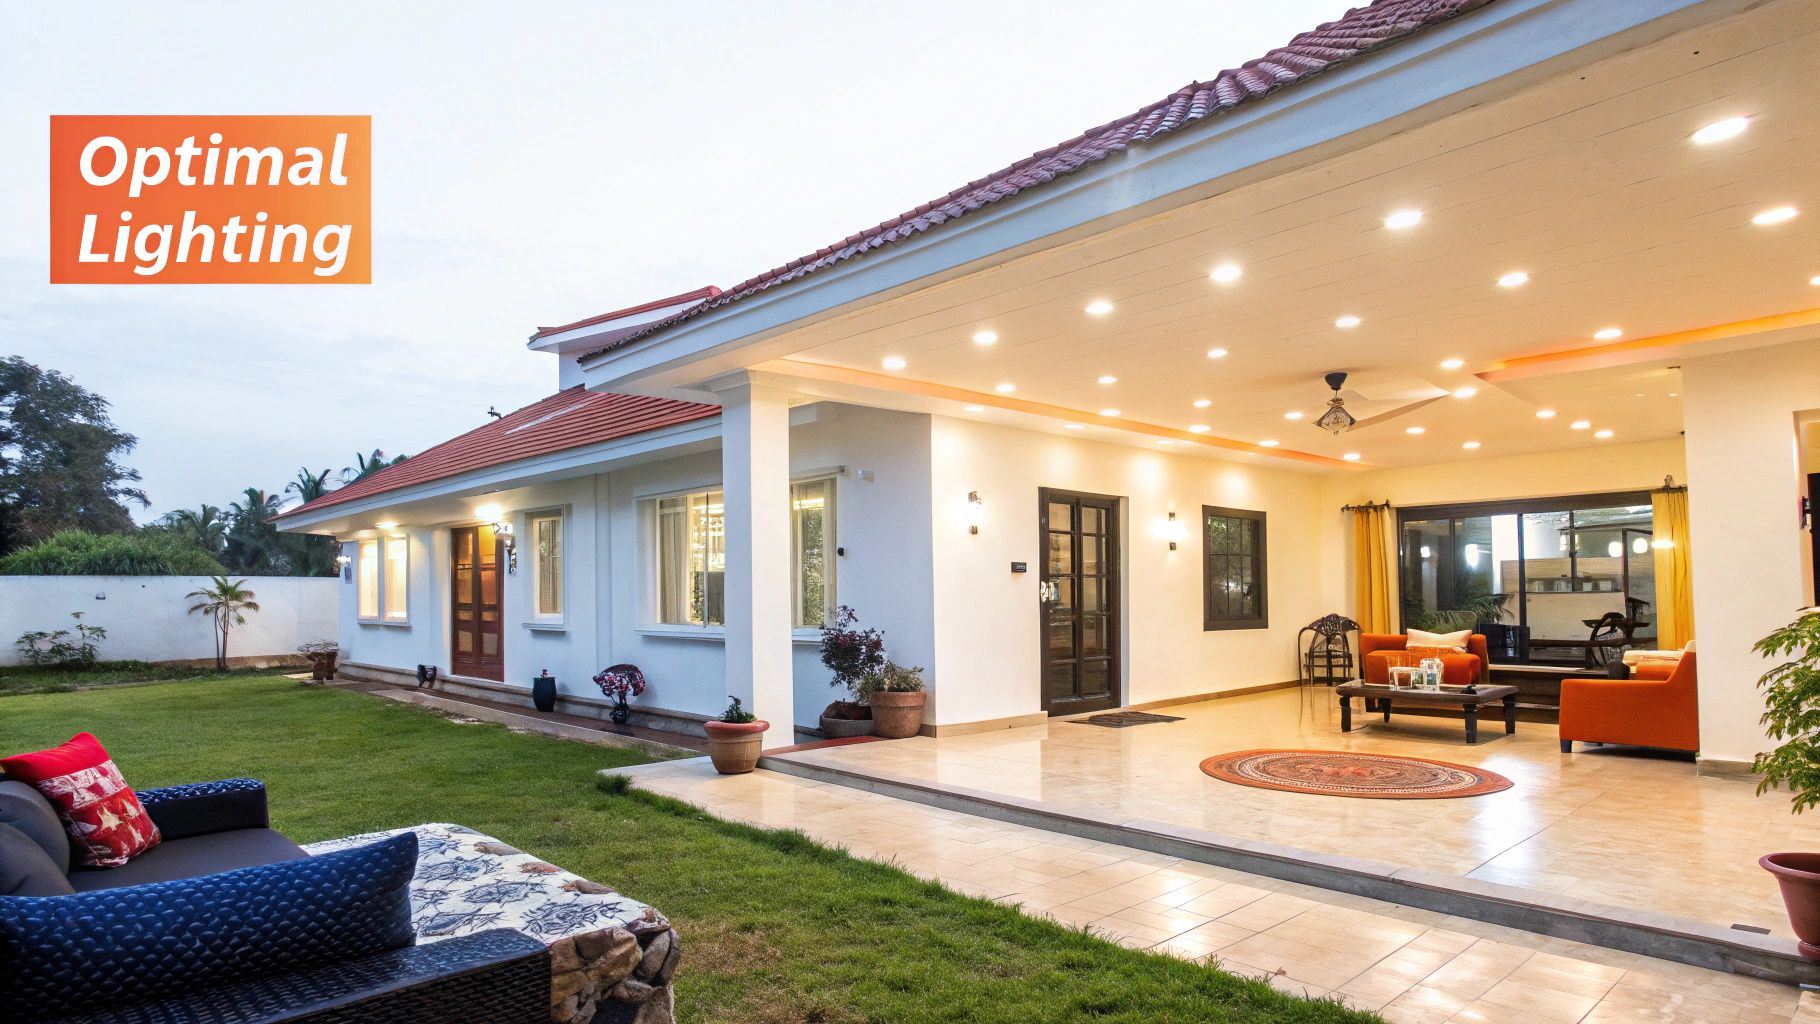
Lighting and Audio Gear
Great lighting makes a property feel bright, airy, and clean. You should always try to use natural light, but let's be real—you're going to run into dark corners and gloomy rooms. A couple of small, portable LED light panels can be a lifesaver for filling in shadows and making sure every space is shown in its best light.
And please, don't forget about audio! If you're going to have an agent on camera or record a voiceover, clean sound is non-negotiable. A simple on-camera shotgun mic or a wireless lavalier mic will capture crisp, clear audio, making your message professional and easy to understand.
How to Plan and Shoot a Stunning Property Video
A great property video is made long before you ever hit the record button. While gear matters, your success on-site really comes down to thoughtful planning and having a clear vision for the story you want to tell. This is how you go from simply documenting rooms to crafting an experience that helps a buyer feel an immediate connection.
Truly successful videography for real estate isn't about just showing up and pointing a camera around. You're trying to create a narrative that guides the viewer through the home's best features and, more importantly, highlights the lifestyle it offers. That requires a solid plan of attack, and it all starts with the property itself.
Preparing the Home for Its Close-Up
Before any camera gear comes out of the bag, the home needs to be prepped like a movie set—because for the day, that's exactly what it is. Your main goal here is to create a clean, bright, and inviting canvas that lets the property's best attributes shine.
First things first, you'll want to work with the homeowners to strategically declutter every single room. This doesn't mean making the space sterile. It means tucking away personal photos, refrigerator magnets, and any excess furniture that makes a room feel smaller and distracts the viewer. You want potential buyers to picture their lives there, not the current owner's.
Next up is lighting. Open every blind and pull back every curtain to flood the space with natural light. Then, turn on every single light in the house—yes, even the lamps and under-cabinet lighting. A bright space always looks bigger and more appealing on camera.
A common mistake I see is overlooking the small details. A perfectly made bed, a bowl of fresh fruit on the kitchen counter, or neatly folded towels in the bathroom can add a subtle touch of polish that elevates the entire video.
For a deeper look into how these elements contribute to a polished final product, exploring the broader strategy behind video for real estate can provide some valuable context.
Crafting a Compelling Shot List
Just walking through a property and filming as you go is a recipe for disjointed, confusing footage. What you need is a shot list that maps out the video's flow from beginning to end. Think of it as your blueprint for a successful shoot.
Your shot list should be much more than just "film the living room." Think about the story. I always like to start with a strong establishing shot of the exterior, then move logically through the home in a way that mirrors how a person would naturally explore it.
- Exterior: You've got to capture the curb appeal. Get the front door and any unique architectural details.
- Entryway: Film a smooth entrance that feels like it's welcoming the viewer inside.
- Main Living Areas: Really focus on the flow between the living room, dining room, and kitchen.
- Key Features: Get dedicated shots of the standouts, like a cozy fireplace, a beautifully renovated kitchen island, or a stunning view.
- Bedrooms and Bathrooms: Emphasize the sense of space and light in these crucial rooms.
- Outdoor Living: Don't forget the backyard, patio, or balcony! This is where you sell the lifestyle.
Also, plan your transitions. How will you move from the kitchen to the backyard patio? A smooth, continuous shot that follows that path is far more powerful than an abrupt cut.
Mastering Cinematic Camera Movements
The way you move the camera is what separates a professional video from amateur-hour footage. Your movements should always feel slow, smooth, and deliberate. A gimbal is your best friend for this, but even with the best gear, your technique is what truly matters.
Whatever you do, avoid jerky motions or rapid pans that can be disorienting for the viewer. Instead, try to master these key movements:
- The Push-In: Slowly and smoothly move the camera forward, either into a space or toward a specific feature. This is a classic way to draw the viewer's attention and create a sense of immersion.
- The Pull-Out: Start in tight on a detail—like a high-end faucet—and slowly pull the camera back to reveal the entire room. This move is fantastic for establishing context.
- The Gentle Pan: Slowly pivot the camera from left to right (or vice-versa) to showcase the breadth of a space. The key word here is slow. Keep it steady to avoid that nauseating home-video look.
- The Reveal: I love this one. Use a wall or a doorway to hide what's coming next, then move the camera sideways to reveal the new room. It adds a little element of discovery and makes the tour feel more dynamic.
For some practical inspiration, check out this interactive coworking space video tour example . Even though it's a commercial space, the principles of movement and revealing features are directly applicable to residential real estate. Remember, the goal is to make the viewer feel like they are gracefully gliding through their future home.
Turning Raw Footage into a Polished Video
Getting that beautiful, smooth footage on-site is a great feeling, but the job is only half done. The real magic in videography for real estate happens on the editing timeline. This is where your collection of raw clips transforms into a compelling story that actually sells the property.
Think of the editing process like the final staging of a home. You've already done the hard work of capturing the space; now it's time to declutter your footage, arrange the best shots, and guide the viewer's eye to what really matters. A thoughtful edit is what makes a video feel professional and persuasive.
The Post-Production Workflow
Walking away from a shoot with a full memory card can feel overwhelming. The best way to tackle it is with a solid, repeatable workflow, and it all starts with organization. Before you even open your editing software, create a simple folder system for your project: one for raw video, one for audio, another for graphics, and a final one for your finished exports. This little bit of prep work will save you from major headaches down the road.
With your files sorted, it's time to review everything you shot. Watch it all, and start pulling out your "A-roll"—the absolute best, smoothest, most perfectly lit shots. These are the clips that will form the foundation of your video. Get these hero shots onto your timeline first.
The best real estate videos look effortless, but they are born from ruthless curation. Your job as an editor is to cut anything that doesn't serve the story. If a shot isn't actively highlighting a key selling point or moving the narrative forward, it has to go.
This disciplined approach is more important than ever. The market is visually driven, and professional video is no longer a luxury—it's an expectation. In fact, 22% of listings now include virtual tours to stand out, and for good reason: 92% of U.S. buyers use video in their home search. You can dig deeper into these real estate photography statistics to see just how much visual content moves the needle.
Color Correction and Grading
Color dictates the entire mood of a video. Straight out of the camera, your footage probably looks a little flat or washed out. The first step is color correction, which is purely technical. You're just trying to make the video look true-to-life by adjusting things like exposure, white balance, and contrast. The goal is to get your whites looking pure white and your colors looking accurate.
After the footage is corrected, you can move on to the more artistic part: color grading. This is where you create a specific feeling. For most homes, you'll want a bright, airy, and inviting look.
- Boost the shadows slightly so viewers can see details in darker corners, but keep it looking natural.
- Increase the saturation just a touch to make the green grass and blue skies pop.
- Add a hint of warmth to interior shots to give the home a cozy, welcoming feel.
The key here is subtlety. You want the property to look like its best self on a perfect day, not like something out of a heavily filtered Instagram post.
Finding the Right Soundtrack
Music is the emotional heartbeat of your video. The right track can make a home feel grand and luxurious, calm and serene, or fun and modern. The wrong one, on the other hand, can be a huge distraction.
When picking your music, think about the home's personality and the likely buyer. A sleek downtown loft needs a completely different soundtrack than a sprawling suburban family home. I always turn to royalty-free music sites like Epidemic Sound or Artlist to find high-quality, licensed tracks. Stick with instrumental music—you don't want lyrics competing with a voiceover or distracting the viewer.
Let the music's rhythm guide your edits. Cutting your shots to the beat of the song is a simple trick that instantly makes the final video feel more polished and professional. A shift in the music can also be a perfect way to transition between different parts of the property, like moving from the interior to the backyard.
Adding Simple Text and a Call to Action
Finally, use clean, simple text overlays to share key details the visuals can't. This is your chance to highlight important features without getting in the way of the tour.
What to Include in Your Text Overlays:-The address: Display it cleanly at the beginning or end.
- Key features: Think square footage, bed/bath count, or a standout like "Newly Renovated Kitchen."
- Your contact info: Always end the video with your name, brokerage, and website.
Above all, your video needs a clear call to action (CTA). Don't leave people hanging. A simple closing graphic that says "Schedule Your Private Tour Today" along with your contact information is all you need to turn an interested viewer into a genuine lead.
Techniques That Make Your Videos Unforgettable
Once you've nailed the smooth, well-lit walkthrough, you're ready to add the layers that really make a property stand out. This is where you move from creating a simple tour to crafting an experience.
These are the techniques that separate standard listings from the premium ones that command top dollar. It's how you justify a bigger marketing budget and show high-end clients you deliver exceptional results. We're moving beyond just showing a space; we're building a persuasive visual story.
Go Aerial with Drone Videography
Nothing tells the whole story of a property like a drone. A ground-level tour shows the rooms, but an aerial view shows the life. It reveals the size of the yard, the stunning views, the walk to the park, and the feel of the neighborhood. For any property where the land is a major selling point, this perspective is non-negotiable.
But great drone footage in your videography for real estate is more than just flying high and pointing down. Think cinematically.
- The Reveal: Start low, maybe behind a line of trees, and slowly rise up to reveal the entire home. It's a classic, dramatic opening that never fails to impress.
- The Orbit: Fly a slow, steady circle around the property. This showcases all its angles, the landscaping, and the best architectural features in one seamless shot.
- The Fly-Through: For luxury homes with soaring entryways or open-air lanais, a carefully choreographed fly-through shot is absolutely breathtaking.
A word of advice: don't overdo it. A few perfectly placed aerial clips at the beginning and end of your video are far more powerful than a video made entirely of drone shots.
For Developers and Builders
In property development, renderings connect the blueprint to the bank. Developers often need to secure major investments or pre-sell units long before breaking ground. A compelling set of exterior and interior renderings of houses can make a project look irresistible to investors and early buyers. They don't just show a building; they sell the lifestyle and quality of the finished development, forging an emotional connection that plans alone can't create.
This is especially important in the current market. As noted in the global real estate outlook from jll.com , many regions are experiencing housing supply shortages. With fewer new properties available, developers need every advantage to attract buyers quickly. Stunning visuals that clearly communicate the end product are a powerful tool to stand out.
For Real Estate Agents and Contractors
Real estate agents use renderings to market properties that aren't built yet or are in the middle of a major renovation. These visuals allow them to list and show homes that don't physically exist, which broadens their inventory and helps close sales faster. For contractors, detailed renderings are a key coordination tool.
When every professional—from plumbers and electricians to painters—can see a clear picture of the final goal, there's less room for error and miscommunication on the job site. This shared understanding helps keep complex projects on schedule and on budget.
The table below details how different professionals use renderings of houses to achieve their specific objectives.
House Rendering Applications by Industry
- How different industries and professionals utilize house renderings, including typical use cases and benefits
| Industry | Primary Use | Key Benefits | Typical Investment | ROI Indicators |
|---|---|---|---|---|
| Real Estate | Marketing & Pre-sales | Sells properties faster, attracts more buyers, lists off-plan homes. | Low to Medium | Faster sale time, higher sale price, more leads. |
| Development | Securing Funding & Sales | Visualizes project potential, attracts investors, sells units early. | Medium to High | Successful funding rounds, high pre-sale rates. |
| Architecture | Client Communication | Clarifies design intent, speeds up approvals, explores options. | Low to Medium | Fewer revisions, higher client satisfaction. |
| Construction | Project Coordination | Reduces on-site errors, aligns subcontractors, clarifies plans. | Low | Fewer change orders, on-time project completion. |
As the table shows, the investment in renderings is often small compared to the potential returns. Faster sales, secured funding, and fewer construction mistakes all translate to significant financial gains, proving that a good picture is truly worth a thousand words—and sometimes, much more.
Your First House Rendering Project Step by Step
Starting your first project to create renderings of houses can feel like trying to solve a puzzle without the picture on the box. But with a clear plan, the process is much simpler than it seems. The trick is to break it down into manageable steps, beginning with gathering your key documents and getting clear on your goals.
Step 1: Gather Your Foundational Documents
Before any digital magic can happen, you need the architectural plans that serve as the project's DNA. Think of this as gathering your ingredients before you start cooking. The most important document is the blueprintorfloor plan, which provides the essential dimensions, layout, and structural information that will become the digital skeleton of your home.
It's a good idea to understand what you're looking at. For those new to these drawings, taking a moment to learn how to read blueprints can help you communicate your vision more effectively.
Besides blueprints, try to collect these items:
- Elevation Drawings: These show what the house looks like from each side, outlining window placement and roof designs.
- Material and Finish Schedules: This is a simple list of the materials you plan to use, like siding, roofing, flooring, and paint colors.
- Inspiration Photos: Collect images that show the style, mood, and lighting you're aiming for.
Keeping all these materials in one place creates a clear project brief, whether you're using a DIY tool or hiring a professional.
Step 2: Define the Scope and Key Views
With your documents organized, it's time to decide what you actually need to see. This step sets the project's scope, which has a direct impact on the cost and timeline. You probably don't need to render every single corner of the property. Instead, focus on the views that matter most for making decisions or marketing the house.
Ask yourself these questions:
- Which rooms are most important? The kitchen, main living room, and primary bedroom are usually top priorities.
- What is the goal of the exterior shot? Is it to show off the home's curb appeal or to highlight the backyard patio?
- How much detail do I really need? A simple rendering to check a layout needs far less detail than a photorealistic image for a sales brochure.
A common pitfall is asking for too many views or an extreme level of detail, which drives up the cost without adding much value. A good starting point is 2-3 essential interior viewsand1-2 key exterior angles.
Step 3: The Rendering and Revision Process
Once you've shared your vision, the rendering work begins. An artist or an AI tool will start by creating a "gray model" or "clay render." This is a basic, untextured 3D model of your space. Its purpose is to confirm that the camera angles and overall geometry are correct. This is the best time to request big changes, like moving a wall or swapping out a major piece of furniture.
After you approve the angles, the next stage involves adding materials, lighting, and textures. You'll receive a first draft to review. Look it over carefully and provide your feedback in a single, organized list. Instead of sending several emails with small tweaks, consolidate your notes. For example: "Change the kitchen countertop from marble to quartz," or "Make the living room wall color one shade lighter."
This organized feedback loop prevents endless back-and-forth, saving you time and ensuring the final renderings of houses match your vision. The workflow is very similar to how professionals use software for tasks like virtual home staging to furnish an empty room digitally.
Choosing Your House Rendering Tools and Software
Trying to pick the right software for creating renderings of houses can feel overwhelming. It's like walking into a massive hardware store with countless tools, each promising the best results. The trick is to match the tool to your job, whether you're a professional architect or a homeowner with a fresh idea. Your options generally fall into two camps: traditional, high-end software and newer, more accessible AI-driven platforms.
Professional-Grade Rendering Engines
For architects and design professionals who need complete control over every pixel, traditional rendering software is the go-to choice. These are powerful programs, often used in combination, that produce incredibly lifelike images.
- Modeling Software (The Blueprint): This is where the digital 3D model of the house gets built. Think of tools like SketchUp , Revit , and 3ds Max as the digital job site where you frame every wall, place every window, and lay every brick with absolute precision.
- Rendering Engines (The Photographer): Once the model is built, plugins like V-Ray and Corona Renderer step in to "photograph" it. They add realistic light, shadows, and materials—like the grain of wood or the reflection on a window—to turn a basic 3D model into a stunning, photorealistic image.
This path offers unlimited creative freedom, but it has its demands. It requires a steep learning curve, expensive software licenses, and a powerful computer to handle the workload. It's also time-intensive, as a single high-quality render can take hours to set up and process. When you're ready to show off your work, think about how to present it; looking into the best portfolio website builders can help your projects shine.
User-Friendly and AI-Powered Alternatives
For those who need beautiful results without the technical deep dive, a new wave of tools is making a big difference. These platforms are built for speed and simplicity, putting high-quality renderings of houses within everyone's reach.
- Free and Open-Source Options: A program like Blender is an excellent free choice that merges powerful 3D modeling with a capable rendering engine. It's supported by a huge, active community and tons of online tutorials.
This screenshot of the Blender interface shows its extensive capabilities, but it also gives a sense of the time needed to learn it well.
- AI-Powered Platforms:Software like our ownPedra works differently. Instead of building a complex 3D model from scratch, you can simply upload a 2D floor plan or a photo of a room. The AI takes over, automatically generating a fully furnished and photorealistic rendering in just a few minutes. This is a game-changer for real estate agents, home stagers, and remodelers who need to show a property's potential quickly and affordably. Plus, since all the heavy lifting happens in the cloud, you don't need a high-end computer.
The decision boils down to a simple trade-off: control versus convenience. Professional tools give you ultimate artistic control but require a significant investment of time, skill, and money. AI platforms provide incredible speed and ease of use, delivering 90% of the quality for 1% of the effort. For most business needs in real estate and renovation, this makes them a very practical and effective choice.
Getting Maximum Value from Your House Renderings
Your house renderings are much more than just the final, polished images; they are versatile assets that can deliver value throughout your project's entire lifecycle. To get the most from your investment, you should think of them not as a single-use item but as a multi-purpose tool. Strategic use can streamline decisions, improve communication, and even boost your marketing long after the initial design is approved. The key is to repurpose and present these visuals in ways that speak to different audiences at different stages.
Repurposing Renderings for Different Audiences
A single, high-detail rendering contains a wealth of visual information that can be adapted for various needs. Think of it like a chef using one prime ingredient to create multiple distinct dishes. A photorealistic exterior rendering created for a sales brochure can be effectively repurposed.
- For Contractors: Crop specific sections of the rendering to create detailed call-outs. A close-up of the porch can clarify railing designs, while a focused shot of the window trim can guide painters precisely.
- For Marketing: Turn a static image into engaging social media content by adding subtle animations, like twinkling lights in the windows or clouds drifting by.
- For Approvals: Use the rendering in presentations for homeowners' associations or permitting bodies. A clear visual showing how the new design fits into the neighborhood is often more persuasive than blueprints alone.
This approach ensures you extract maximum utility from the initial time and cost investment, making the renderings of houses work harder for you.
From Static Images to Interactive Experiences
How you present your renderings is just as important as the quality of the images themselves. Instead of simply emailing a JPEG, consider creating a more immersive presentation. A simple slideshow that walks a client through the home—from an exterior view to the kitchen and then the primary bedroom—tells a story and helps them form an emotional connection with the space.
Professionals on large-scale projects use this strategy to great effect. By presenting renderings of houses in a logical sequence, they guide stakeholders through the project, making it easier to secure financing from banks who can clearly see the finished product's potential. This visual clarity also helps coordinate trades. For instance, a real-time walkthrough can show an electrician and a plumber exactly how their work will intersect in a tight space, preventing on-site conflicts before they happen.
The Next Frontier: Augmented and Virtual Reality
New technologies are making it easier to take renderings off the screen and place them into the real world. With Augmented Reality (AR), a client can use their smartphone to project a 3D model of a proposed renovation onto their existing room, giving them a true sense of scale and fit. This technology is becoming more accessible and is a powerful tool for finalizing design decisions with confidence. By adopting these forward-thinking uses, you transform a simple visual into a powerful, project-defining asset.
Agent on Camera vs. a Cinematic Feel
One of your biggest strategic choices is who—or what—guides the tour. There's no single right answer here; it all comes down to the property and your marketing goals.
An agent-led tour, where you're on screen, is fantastic for building a personal connection. It positions you as a friendly, knowledgeable expert and lets you point out specific details that might otherwise be missed. This approach builds trust and adds a human touch.
On the other hand, a cinematic walkthrough drops the narration and lets stunning visuals and music do all the talking. This style creates a more aspirational, almost dreamlike quality. It lets buyers get lost in the fantasy of living there, making it perfect for high-end luxury listings where the property is the undisputed star.
Think of it this way: an agent-led tour is a guided conversation, while a cinematic tour is a short film. Pick the one that tells the story your target buyer wants to see.
Integrating Data for Commercial Properties
Video is evolving quickly, especially in the commercial real estate world. Investors and business owners want more than just pretty pictures. They expect videos to blend cinematic visuals with hard data like traffic counts, zoning details, or nearby anchor tenants. This helps them make faster, more informed decisions.
To truly stand out, you need to master visual storytelling techniques . It's all about weaving a narrative that connects on an emotional level, whether you're using a personal touch for a family home or powerful data for a commercial investment.
Comparing Basic and Advanced Video Features
Let's break down how these advanced approaches elevate the standard property video. See how standard video techniques stack up against advanced approaches that command attention and win premium listings.
| Feature | Basic Approach (Good) | Advanced Approach (Better) |
|---|---|---|
| Perspective | A smooth, ground-level walkthrough of the interior. | Integrated aerial shots showing the property's context and scale. |
| Narration | Royalty-free music sets the mood for the tour. | A strategic choice between a personal agent-led tour or a high-end cinematic style. |
| Information | Simple text overlays for square footage and address. | Data-rich graphics for commercial listings (e.g., traffic counts, demographics). |
| Storytelling | A logical tour showing the layout of the rooms. | A narrative that highlights a specific lifestyle or investment opportunity. |
By thoughtfully applying these methods, you're not just creating a tour anymore. You're producing a sophisticated marketing asset that drives serious engagement and delivers real results for your clients.
Getting Your Property Videos Seen by Buyers
You've just wrapped up a beautiful video tour of a stunning property. The shots are smooth, the lighting is perfect, and the edit is crisp. But here's the hard truth: a great video is worthless if no one sees it. Getting that video in front of actual buyers is just as important as producing it in the first place.
This means you need a plan. You can't just upload it and cross your fingers. The goal is to strategically place your video everywhere your potential buyers are already looking—from the world's biggest video search engine to their social media feeds. A smart distribution plan is what turns your creative work into more leads and faster sales.
Optimizing for Key Video Platforms
Let's start with the giant in the room: YouTube. It's not just for cat videos; it's the second-largest search engine on the planet, and a place where people absolutely go to research homes. Simply uploading your video isn't enough. You have to treat it like a mini-website that needs to be found.
Once you have your final video file, the very next step is to make sure it can rank. Getting a handle on the basics of YouTube SEO for beginners will give you a huge advantage over agents who just upload and forget.
- Craft a Smart Title: Don't just put the address. Include a compelling feature. Something like, " ** 123 Maple Street | Stunning 4-Bed Home with Pool in Scottsdale, AZ ** " works much better.
- Write a Real Description: This is prime real estate. Tell a story about the home, list out the key features and amenities, and, most importantly, add your contact info and a direct link to the full property listing.
- Use Specific Tags: Think like a buyer. Use tags for the city, neighborhood, and even the property style ("modern farmhouse," "downtown condo"). Don't forget feature-based tags like "renovated kitchen" or "ocean view."
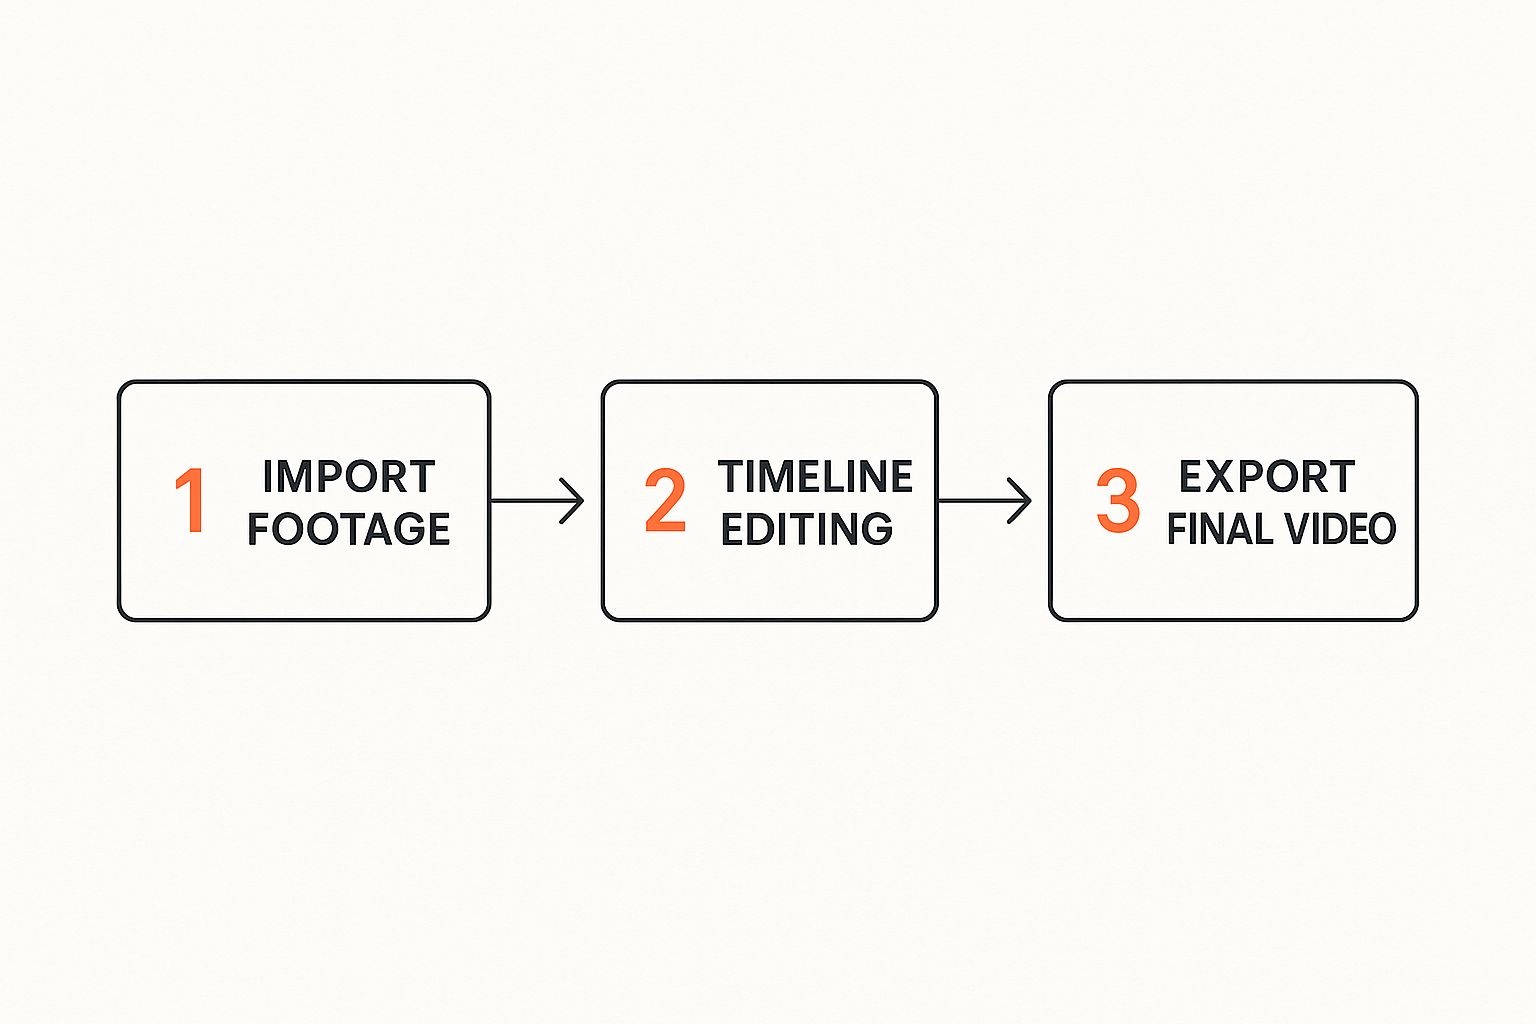
From bringing in the raw footage to exporting that polished final cut, every step is vital for creating a high-quality asset that's ready to attract buyers.
Leveraging Social Media and Your Own Channels
While YouTube is fantastic for search, social media is where you grab people's attention while they're casually scrolling. The key is to adapt your video for each platform.
For Instagram, chop up a 30-60 second vertical highlight reel for Reels. Show off the "wow" moments. On Facebook, you can post the full-length video and even put a small ad spend behind it to target specific demographics in your area. This can dramatically boost its reach for very little cost.
The most powerful and often overlooked channel? Your own network. Sending an email blast to your sphere of influence—past clients, current leads, and other agents—puts your video in front of a warm audience that already trusts you.
Finally, don't forget about the digital properties you own: your website and the MLS listing. Embedding the video directly into the listing is non-negotiable, as many portals give priority to listings that include video. A 2024 NAR survey found that while sellers expect agents to market homes on their websites, a surprising 46% of agents don't. That's a huge opportunity for you to stand out from the competition.
Placing the video on your personal or brokerage site doesn't just make the listing look better; it also helps your website's SEO by keeping visitors engaged longer. To pull all this together, you can dig deeper into building a complete real estate video marketing plan . By covering all your bases, you ensure those fantastic property videos do the heavy lifting to attract buyers and get that property sold.
Common Real Estate Videography Questions
When you're just getting started with property videos, you're bound to have some questions. Everyone does. Getting these sorted out from the beginning will give you the confidence to start filming content that actually gets results.
Let's walk through a few of the most common questions I hear from agents about videography for real estate. Remember, the goal isn't to create a perfect Hollywood production on your first try. It's all about taking action. An authentic video you shoot today is infinitely better than the flawless one you keep putting off until tomorrow.
How Long Should a Real Estate Video Be?
Finding the right video length is a balancing act. You need to show off the home, but you have to hold people's attention. From what I've seen, the sweet spot for a standard home is between 90 seconds and two minutes.
That's just enough time to glide through the main living areas, highlight a few standout features, and give a sense of the exterior without anyone getting bored. This length is also tailor-made for social media and the MLS, where you have only a few seconds to make an impression.
Of course, if you're listing a huge luxury estate with a guest house and acres of land, you can definitely go longer—maybe three or even four minutes. Just make sure every single second is adding value and keeping the pace up.
The biggest mistake you can make with video length is creating a long, rambling tour that loses the viewer's interest halfway through. Brevity and impact are your best friends.
Agent Voiceover or Just Music?
This is a great question, and the answer really depends on what you're trying to achieve with the video for that specific property. There's no single "right" way to do it; they just accomplish different things.
- Cinematic Music-Only Video: This style is all about creating a mood. It feels high-end and aspirational. By pairing beautiful shots with a great soundtrack, you let buyers imagine themselves living in the home. This works wonders for modern, architectural, or luxury listings.
- Agent Voiceover or On-Camera Intro: Putting yourself on camera is a fantastic way to build a personal connection and position yourself as the neighborhood expert. You can point out things the camera might miss, like the brand of the new kitchen appliances or the specific type of quartz countertops.
Honestly, a hybrid approach is often the most effective. You could start with a quick on-camera introduction, let a music-driven walkthrough handle the main tour, and then pop back in for a strong call-to-action at the end.
What Is the Biggest Mistake to Avoid?
Without a doubt, the most cringe-worthy mistake is shaky, unstable footage. It immediately looks amateur and, frankly, can make people feel a little dizzy. The single best investment you can make is a simple gimbal for your phone or camera. It will instantly make your videos look 10x more professional.
The other major pitfall is bad lighting. If you can avoid it, never film a property on a dark, dreary day. Your best bet is to shoot during bright daylight hours. Before you hit record, throw open every blind, pull back every curtain, and turn on every single light in the house. A bright, well-lit home always looks bigger, cleaner, and way more inviting on camera.
Ready to create stunning property videos without the complexity of traditional editing? Pedra uses AI to generate professional-quality real estate videos, virtual staging, and photo enhancements with just a single click. Elevate your listings and impress your clients by visiting the Pedra website to see how it works.

Related Posts
Top 7 AI Room Decoration Tools for 2025
Discover the best AI room decoration software for 2025. Our review compares top tools to help you de...
9 Curb Appeal Ideas on a Budget That Actually Work (2025)
Transform your home's exterior with our top curb appeal ideas on a budget. Get easy, high-impact tip...
10 Essential Curb Appeal Improvements for 2025
Discover 10 essential curb appeal improvements to boost property value. This guide for real estate p...